AR Annotations
Fiori: ArSceneRepository, navigation_ar_stickers_edit_mode
Intro
Augmented reality (AR) annotations let users view the virtual annotations of existing objects in a facility. They can be used to explore a warehouse, machinery, or a business object to provide users with more information about the world around them.
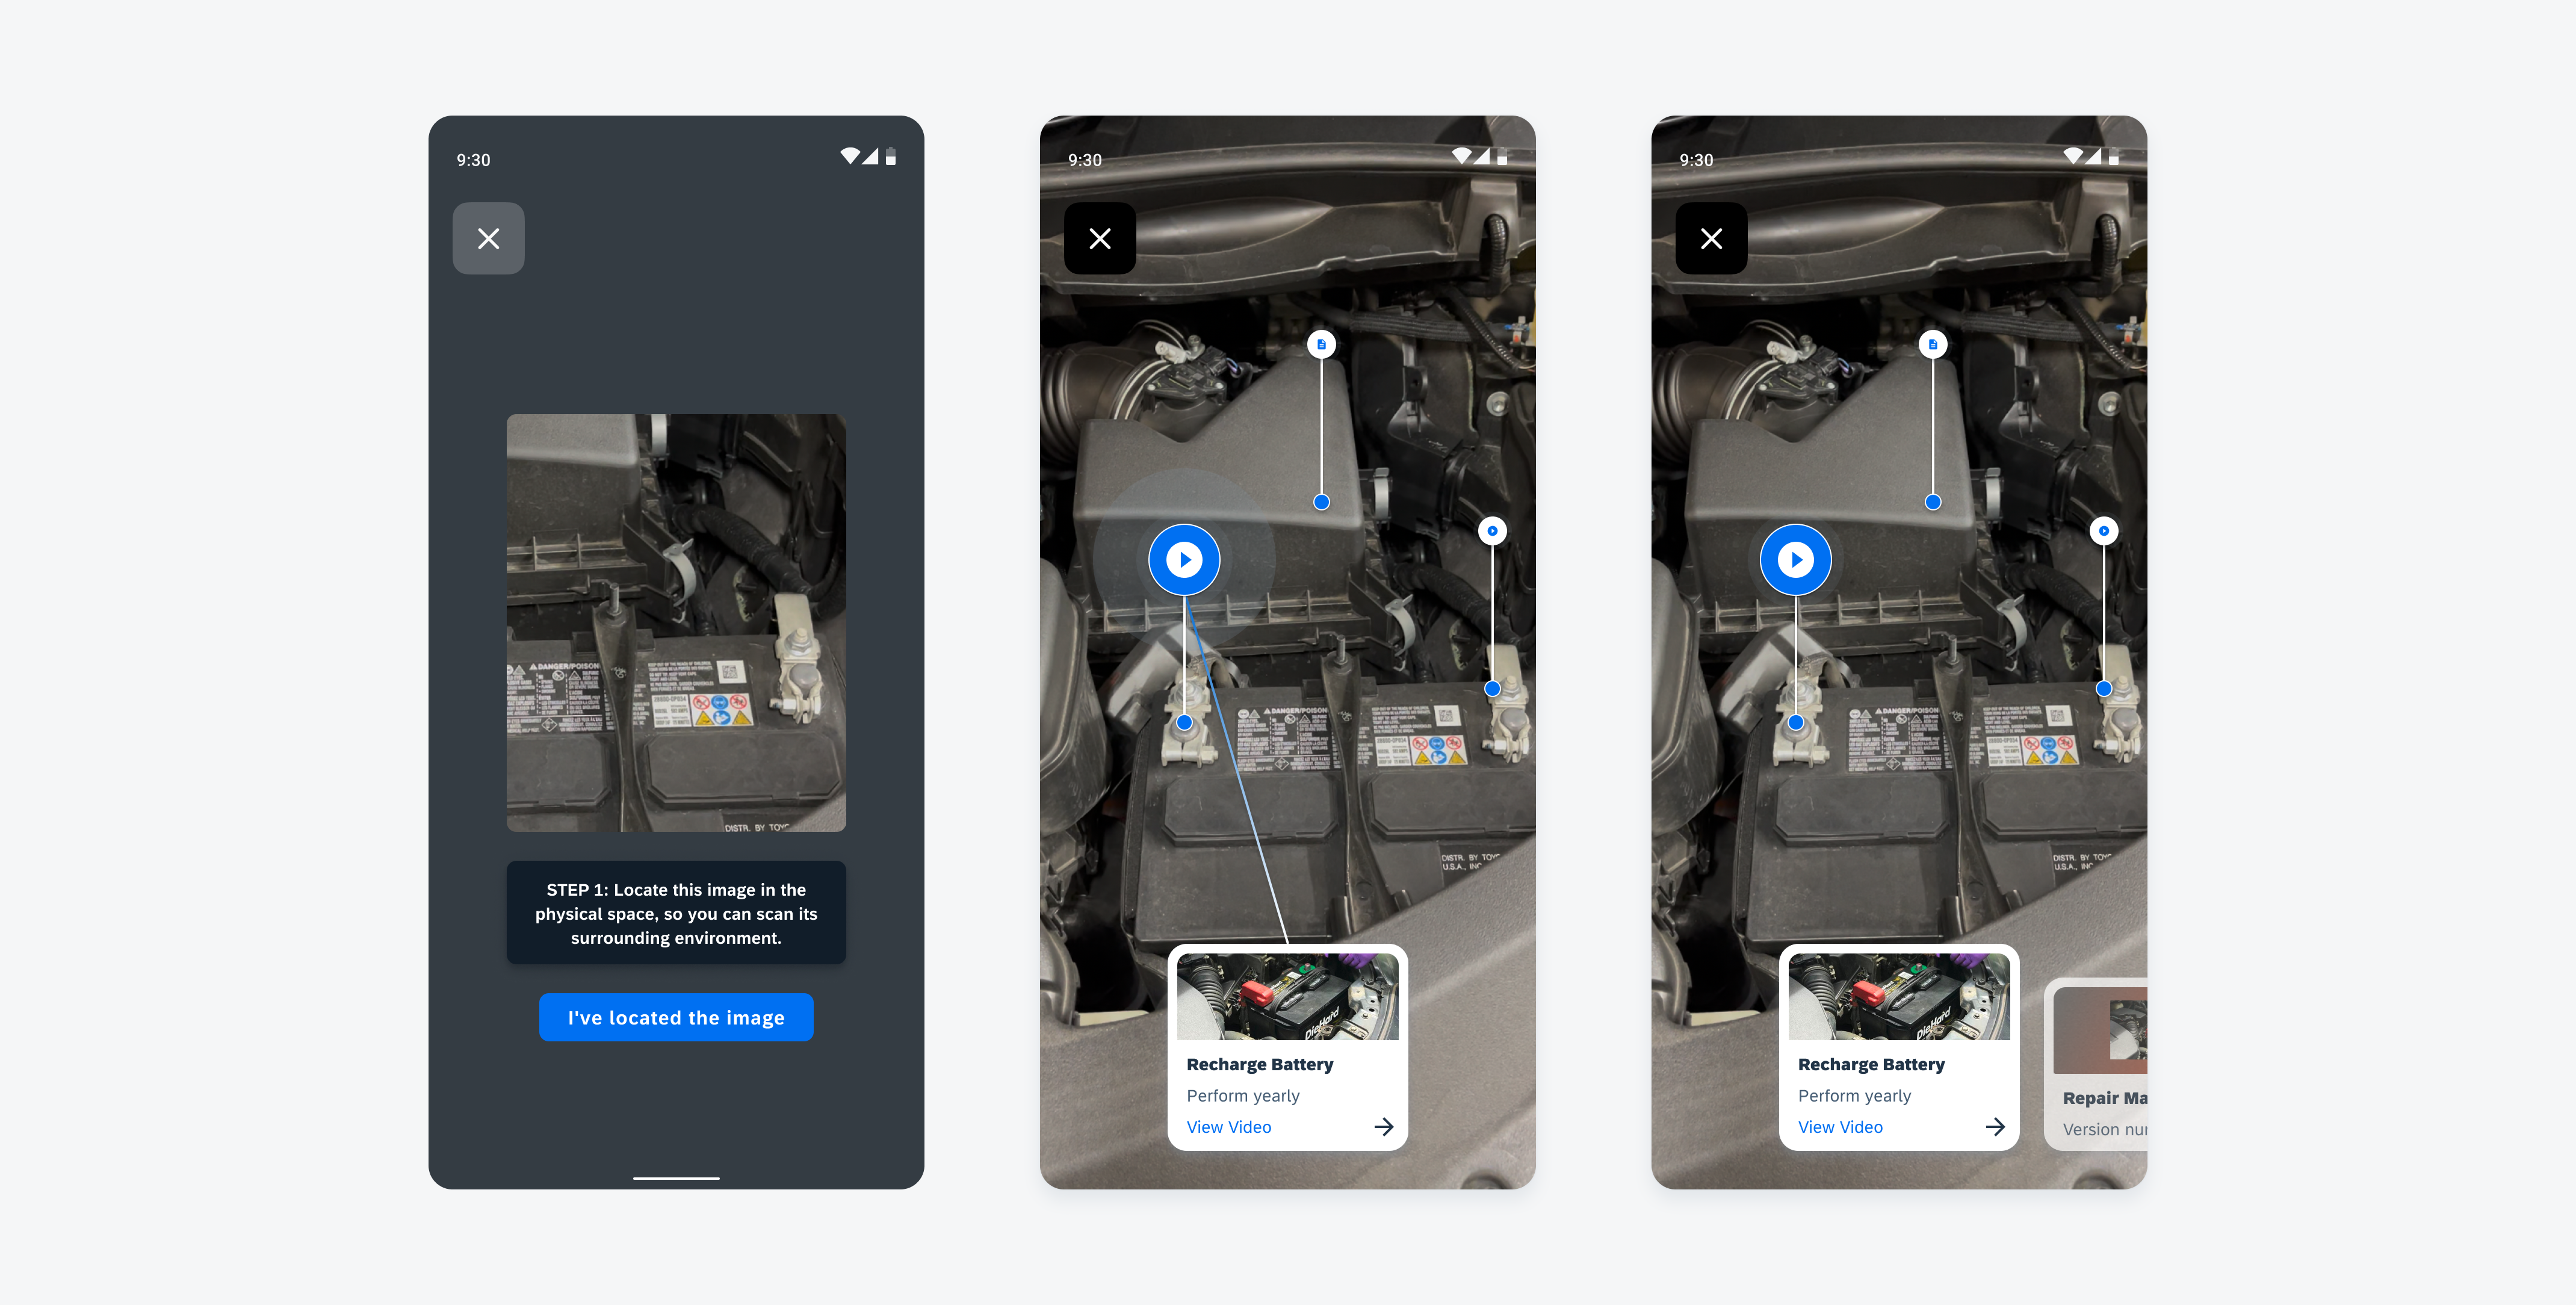
Examples of a scan screen (left), pulsing marker (middle) and selected marker (right)
Anatomy
AR Scanner
The AR scanner allows users to view annotations in the world view, using their phone to scan an image or an object in a facility. Refer to AR scanner for more details.
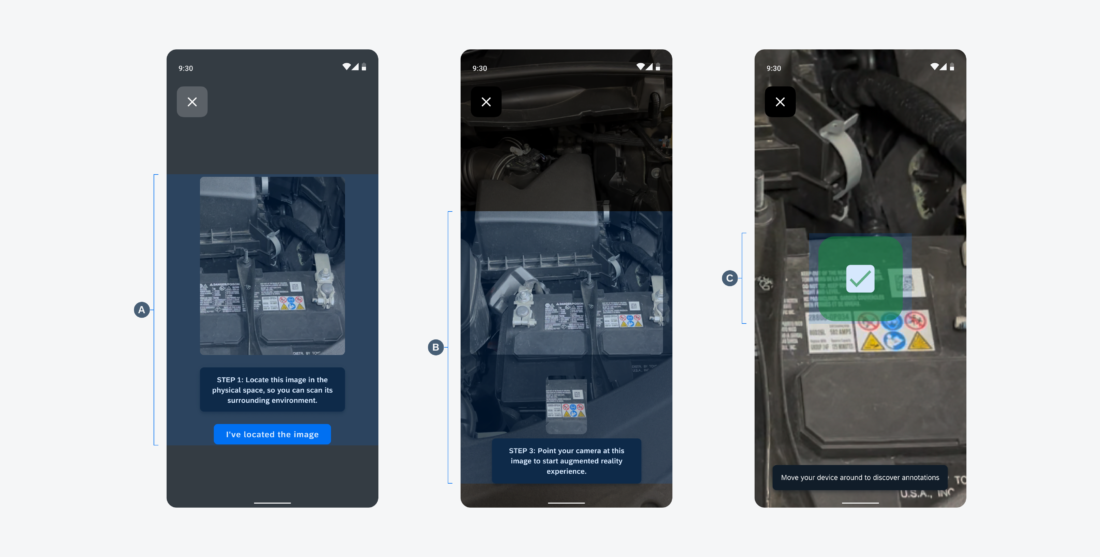
A. Coaching View
The user receives explicit instructions to scan the displayed image in the real world.
B. Scanning View
The user scans the object in the provided space.
C. Matched Scan View
The scanned verify check mark will appear once the image is scanned.
AR Marker
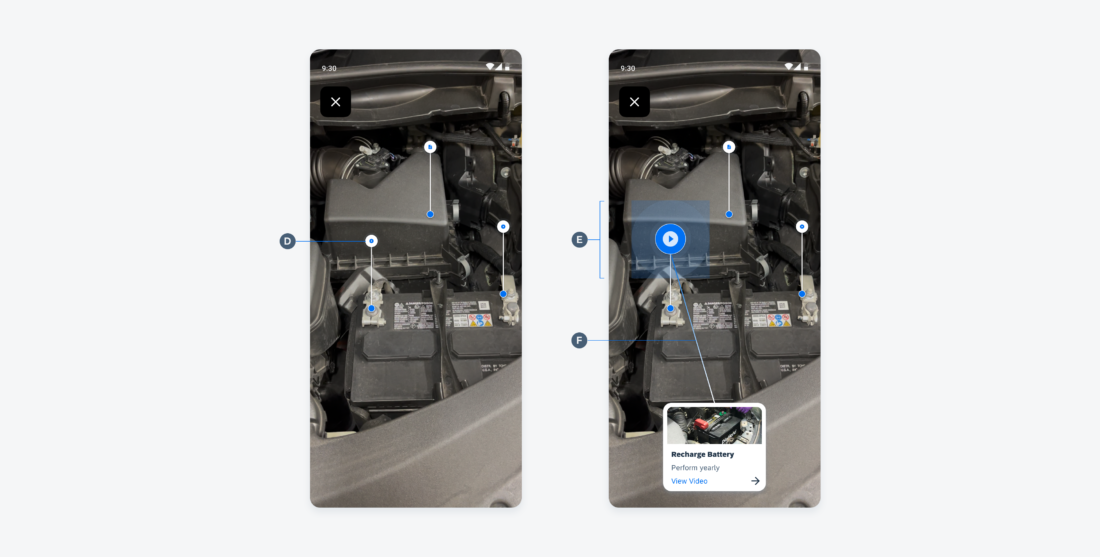
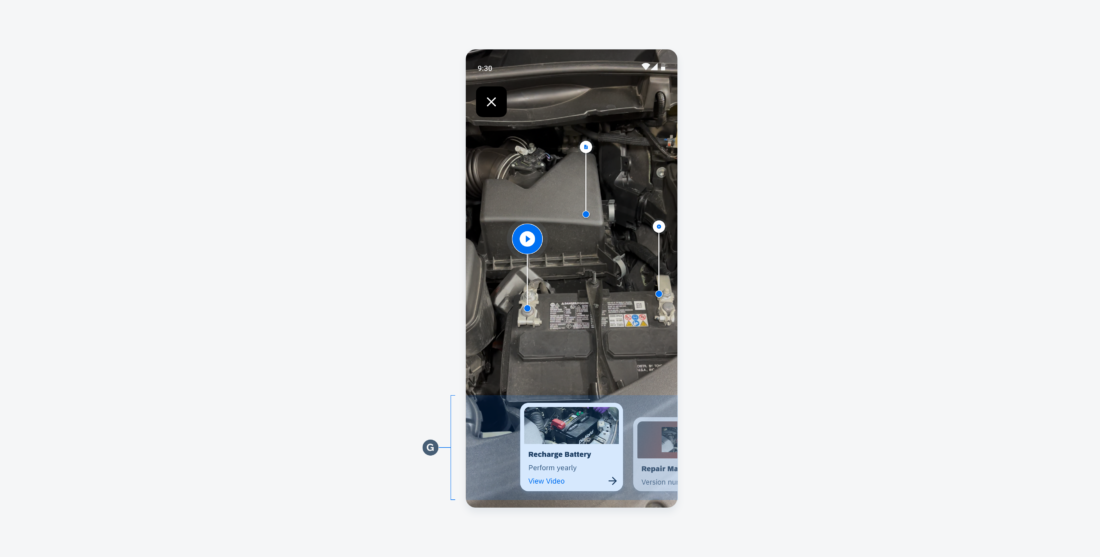
AR markers typically represent the annotated area of a business object. Each annotation marker consists of a default and a selected state. When a user taps a marker, a line guidance appears with a pulse animation of the marker. Refer to AR marker for more details.
D. Default Marker
E. Marker Pulse
Behavior and Interaction
The AR annotation flow consists of three interactions. To learn about more interaction in detail, refer to AR scanner, AR marker, and AR card.
Scanning
After a user receives instructions and successfully scans an image, AR markers will appear in default state on the screen in the world view.
Markers
When a user taps on a marker or swipes on a card, the marker will display a pulse animation with a line guidance joined to the card.
Card Detail
Once a user selects a marker, the related card will slide in from the left to the focused state, displaying relevant information about the object. A user can tap on the card’s action button to view more details.
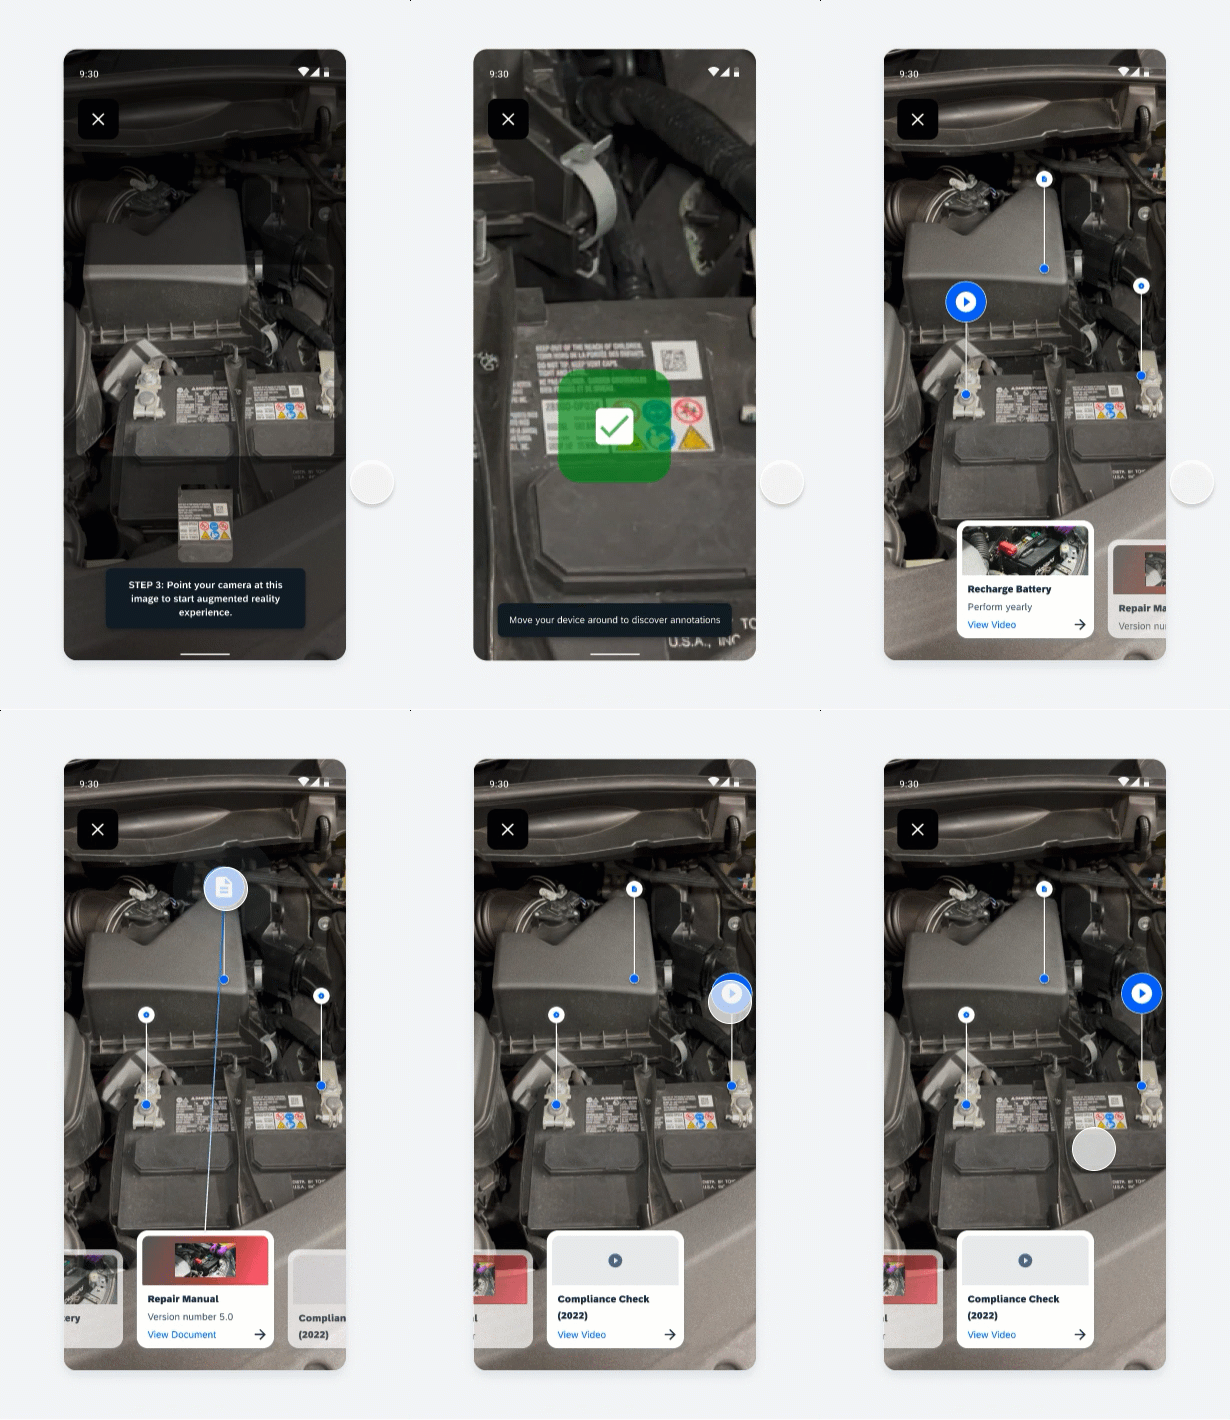
AR annotations flow with coaching, scanning and matched scan view
Resources
Development: ArSceneRepository, navigation_ar_stickers_edit_mode
SAP Fiori for iOS: AR Annotations

 Your feedback has been sent to the SAP Fiori design team.