
- Latest SAPUI Version 1.124
- SAPUI5 Version 1.122
- SAPUI5 Version 1.120
- SAPUI5 Version 1.118
- SAPUI5 Version 1.116
- SAPUI5 Version 1.114
- SAPUI5 Version 1.112
- SAPUI5 Version 1.110
- SAPUI5 Version 1.108
- SAPUI5 Version 1.106
- SAPUI5 Version 1.104
- SAPUI5 Version 1.102
- SAPUI5 Version 1.100
- SAPUI5 Version 1.98
- SAPUI5 Version 1.96
- SAPUI5 Version 1.94
- SAPUI5 Version 1.90
- SAPUI5 Version 1.88
- SAPUI5 Version 1.86
- SAPUI5 Version 1.84
- SAPUI5 Version 1.82
- SAPUI5 Version 1.80
- SAPUI5 Version 1.78
- SAPUI5 Version 1.76
- SAPUI5 Version 1.74
- SAPUI5 Version 1.72
- SAPUI5 Version 1.70
- SAPUI5 Version 1.68
- SAPUI5 Version 1.66
- SAPUI5 Version 1.64
- SAPUI5 Version 1.62
- SAPUI5 Version 1.60
- SAPUI5 Version 1.58
- SAPUI5 Version 1.56
- SAPUI5 Version 1.54
- SAPUI5 Version 1.52
- SAPUI5 Version 1.50
- SAPUI5 Version 1.48
- SAPUI5 Version 1.46
- SAPUI5 Version 1.44
- SAPUI5 Version 1.42
- SAPUI5 Version 1.40
- SAPUI5 Version 1.38
- SAPUI5 Version 1.36
- SAPUI5 Version 1.34
- SAPUI5 Version 1.32
- SAPUI5 Version 1.30
- SAPUI5 Version 1.28
- SAPUI5 Version 1.26
- Latest SAPUI Version 1.124
- SAPUI5 Version 1.122
- SAPUI5 Version 1.120
- SAPUI5 Version 1.118
- SAPUI5 Version 1.116
- SAPUI5 Version 1.114
- SAPUI5 Version 1.112
- SAPUI5 Version 1.110
- SAPUI5 Version 1.108
- SAPUI5 Version 1.106
- SAPUI5 Version 1.104
- SAPUI5 Version 1.102
- SAPUI5 Version 1.100
- SAPUI5 Version 1.98
- SAPUI5 Version 1.96
- SAPUI5 Version 1.94
- SAPUI5 Version 1.92
- SAPUI5 Version 1.90
- SAPUI5 Version 1.88
- SAPUI5 Version 1.86
- SAPUI5 Version 1.84
- SAPUI5 Version 1.82
- SAPUI5 Version 1.80
- SAPUI5 Version 1.78
- SAPUI5 Version 1.76
- SAPUI5 Version 1.74
- SAPUI5 Version 1.72
- SAPUI5 Version 1.70
- SAPUI5 Version 1.68
- SAPUI5 Version 1.66
- SAPUI5 Version 1.64
- SAPUI5 Version 1.62
- SAPUI5 Version 1.60
- SAPUI5 Version 1.58
- SAPUI5 Version 1.56
- SAPUI5 Version 1.54
- SAPUI5 Version 1.52
- SAPUI5 Version 1.50
- SAPUI5 Version 1.48
- SAPUI5 Version 1.46
- SAPUI5 Version 1.44
- SAPUI5 Version 1.42
- SAPUI5 Version 1.40
- SAPUI5 Version 1.38
- SAPUI5 Version 1.36
- SAPUI5 Version 1.34
- SAPUI5 Version 1.32
- SAPUI5 Version 1.30
- SAPUI5 Version 1.28
- SAPUI5 Version 1.26
Table Personalization Dialog
sap.m.TablePersoDialog
Intro
The table personalization dialog allows you to display and modify table settings. It is a UI pattern that defines the column order and visibility.
Usage
Use the table personalization dialog if:
- You have small tables.
- You have a manageable number of columns.
Do not use the table personalization dialog if:
- You have large tables.
- You have a lot of columns to manage.
For larger tables you can use the P13n dialog (sap.m.P13nDialog) instead.
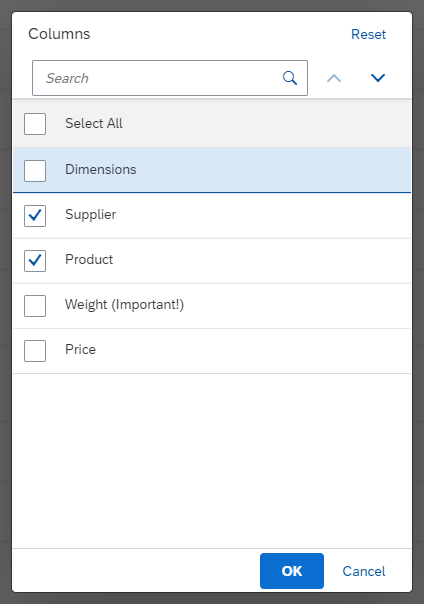
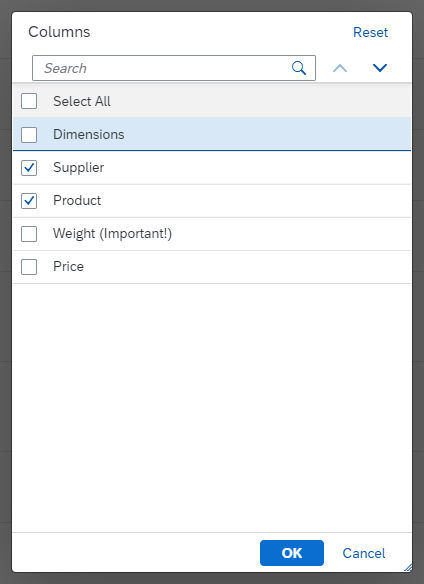
Responsiveness
On a desktop and tablet, the control appears as a dialog window.
On smartphone devices, always display the table personalization dialog in full screen mode.
Smartphone - Size S
Tablet - Size M
Desktop - Size L/XL
Layout
Position on the Screen
The dialog always opens in a modal window in the center of the screen.
For smartphones, stretch the dialog to fill the entire screen. For tablet and desktop devices, keep the modal window.
Layout of the Dialog
The table personalization dialog comprises the following five areas:
(1) Header
(2) Toolbar
(3) List Header
(4) Column list
(5) Footer toolbar
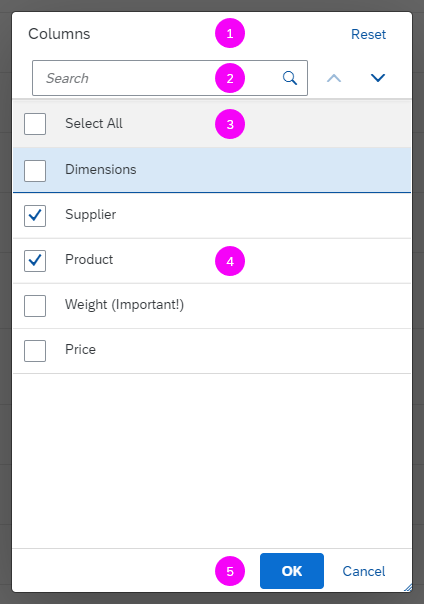
Table personalization dialog – Overview
Components
The table personalization dialog contains the following sections:
Dialog Header
The header displays the dialog title and the Reset button to revert to the initial state.

Dialog header
Toolbar
The toolbar displays the Move Column Up and Move Column Down buttons, and the Search field.

Toolbar
List Header
The list header displays the Select All checkbox for selecting all columns.

List header
Column list
The column list displays the available columns. The user can filter the selection using the search field in the toolbar.
Column list
Footer toolbar
The footer toolbar displays an OK and a Cancel button.

Footer toolbar
Behavior and Interaction
The table personalization dialog is resizable.
Open the Dialog
To open the table personalization dialog, the user clicks the (Settings) button on the right-hand side of the table toolbar.
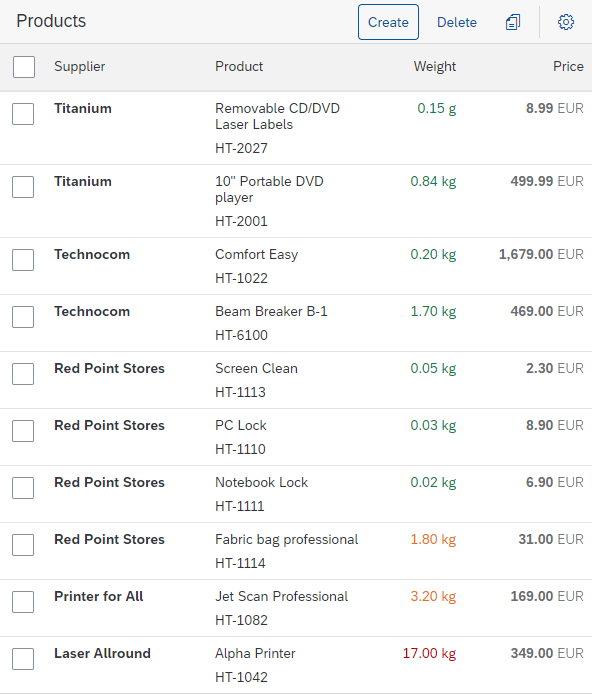
Table with settings button
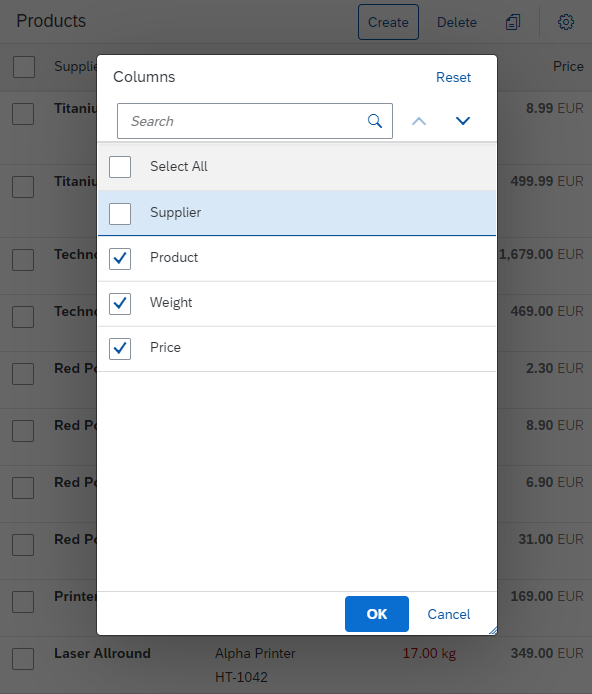
Table personalization dialog opened
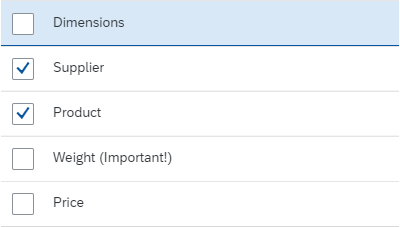
Show or Hide Columns
To show or hide columns, the user selects or deselects the checkbox for a column (list item).

The column is hidden in the table

The column is visible in the table
The user can also show or hide all columns with just one click. A checkbox on the left-hand side of the list header enables all list items to be selected or deselected.

Show all

Hide all
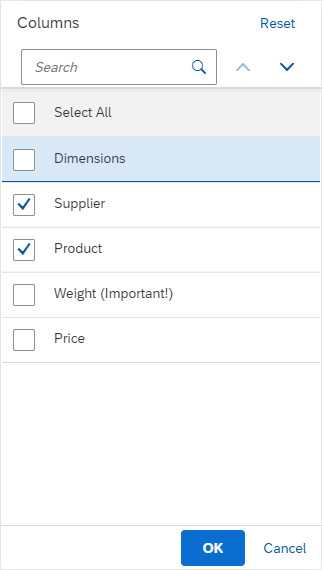
Move Columns
Users can change the order of the columns in the table using the (Move Column Up) and (Move Column Down) buttons in the toolbar.
To change the order, click an item (not on the check box, but on the rest of the line), and click the button: Items on top are farthest to the left in the table, items on bottom are farthest to the right.

Move buttons
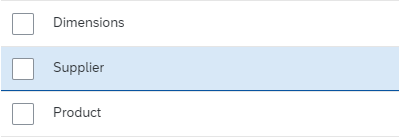
The column 'Supplier' will be moved. It is not checked, though, therefore the result of moving this column will not be visible in the table.
Search/Filter Columns
Users can search for or filter columns using the search field in the toolbar.

Search field
The search is a live search (also known as “search-as-you-type”), which is triggered by each character the user enters or deletes. For more information, see search.
To clear the filters, the user can delete all characters manually, or use the icon.
The list then shows all columns again.
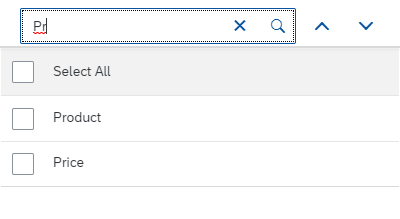
Search while you type
Reset Personalization
The Reset button in the dialog header resets all settings to the initial state.
If the table personalization dialog is used together with variant management, the button resets the changes to the initial state of the selected variant.

Reset button
Confirm/Cancel Changes
The changes are applied when the user closes the dialog with the OK button.
The Cancel button closes the dialog without applying the changes.

OK and Cancel buttons
Resources
Elements and Controls
- Toolbar (guidelines)
- Button (guidelines)
- Search (guidelines)
- List (guidelines)
- Footer Toolbar (guidelines)
Implementation
- Table Personalization Dialog (SAPUI5 samples)
- Table Personalization Dialog (SAPUI5 API reference)
- Table Personalization Controller (SAPUI5 API reference)
 Your feedback has been sent to the SAP Fiori design team.