
- Latest SAPUI Version 1.124
- SAPUI5 Version 1.122
- SAPUI5 Version 1.120
- SAPUI5 Version 1.118
- SAPUI5 Version 1.116
- SAPUI5 Version 1.114
- SAPUI5 Version 1.112
- SAPUI5 Version 1.110
- SAPUI5 Version 1.108
- SAPUI5 Version 1.106
- SAPUI5 Version 1.104
- SAPUI5 Version 1.102
- SAPUI5 Version 1.100
- SAPUI5 Version 1.98
- SAPUI5 Version 1.96
- SAPUI5 Version 1.94
- SAPUI5 Version 1.92
- SAPUI5 Version 1.90
- SAPUI5 Version 1.88
- SAPUI5 Version 1.86
- SAPUI5 Version 1.84
- SAPUI5 Version 1.82
- SAPUI5 Version 1.80
- SAPUI5 Version 1.78
- SAPUI5 Version 1.76
- SAPUI5 Version 1.74
- SAPUI5 Version 1.72
- SAPUI5 Version 1.70
- SAPUI5 Version 1.68
- SAPUI5 Version 1.66
- SAPUI5 Version 1.64
- SAPUI5 Version 1.62
- SAPUI5 Version 1.60
- SAPUI5 Version 1.58
- SAPUI5 Version 1.56
- SAPUI5 Version 1.54
- SAPUI5 Version 1.52
- SAPUI5 Version 1.50
- SAPUI5 Version 1.48
- SAPUI5 Version 1.44
- SAPUI5 Version 1.42
- SAPUI5 Version 1.40
- SAPUI5 Version 1.38
- SAPUI5 Version 1.36
- SAPUI5 Version 1.34
- SAPUI5 Version 1.32
- SAPUI5 Version 1.30
- SAPUI5 Version 1.28
- SAPUI5 Version 1.26
- Latest SAPUI Version 1.124
- SAPUI5 Version 1.122
- SAPUI5 Version 1.120
- SAPUI5 Version 1.118
- SAPUI5 Version 1.116
- SAPUI5 Version 1.114
- SAPUI5 Version 1.112
- SAPUI5 Version 1.110
- SAPUI5 Version 1.108
- SAPUI5 Version 1.106
- SAPUI5 Version 1.104
- SAPUI5 Version 1.102
- SAPUI5 Version 1.100
- SAPUI5 Version 1.98
- SAPUI5 Version 1.96
- SAPUI5 Version 1.94
- SAPUI5 Version 1.92
- SAPUI5 Version 1.90
- SAPUI5 Version 1.88
- SAPUI5 Version 1.86
- SAPUI5 Version 1.84
- SAPUI5 Version 1.82
- SAPUI5 Version 1.80
- SAPUI5 Version 1.78
- SAPUI5 Version 1.76
- SAPUI5 Version 1.74
- SAPUI5 Version 1.72
- SAPUI5 Version 1.70
- SAPUI5 Version 1.68
- SAPUI5 Version 1.66
- SAPUI5 Version 1.64
- SAPUI5 Version 1.62
- SAPUI5 Version 1.60
- SAPUI5 Version 1.58
- SAPUI5 Version 1.56
- SAPUI5 Version 1.54
- SAPUI5 Version 1.52
- SAPUI5 Version 1.50
- SAPUI5 Version 1.48
- SAPUI5 Version 1.46
- SAPUI5 Version 1.44
- SAPUI5 Version 1.42
- SAPUI5 Version 1.40
- SAPUI5 Version 1.38
- SAPUI5 Version 1.36
- SAPUI5 Version 1.34
- SAPUI5 Version 1.32
- SAPUI5 Version 1.30
- SAPUI5 Version 1.28
- SAPUI5 Version 1.26
Manage Simple Objects
Intro
Simple edit (compact mode) on split screen
Split-Screen Layout
Edit – Starting in Display Mode
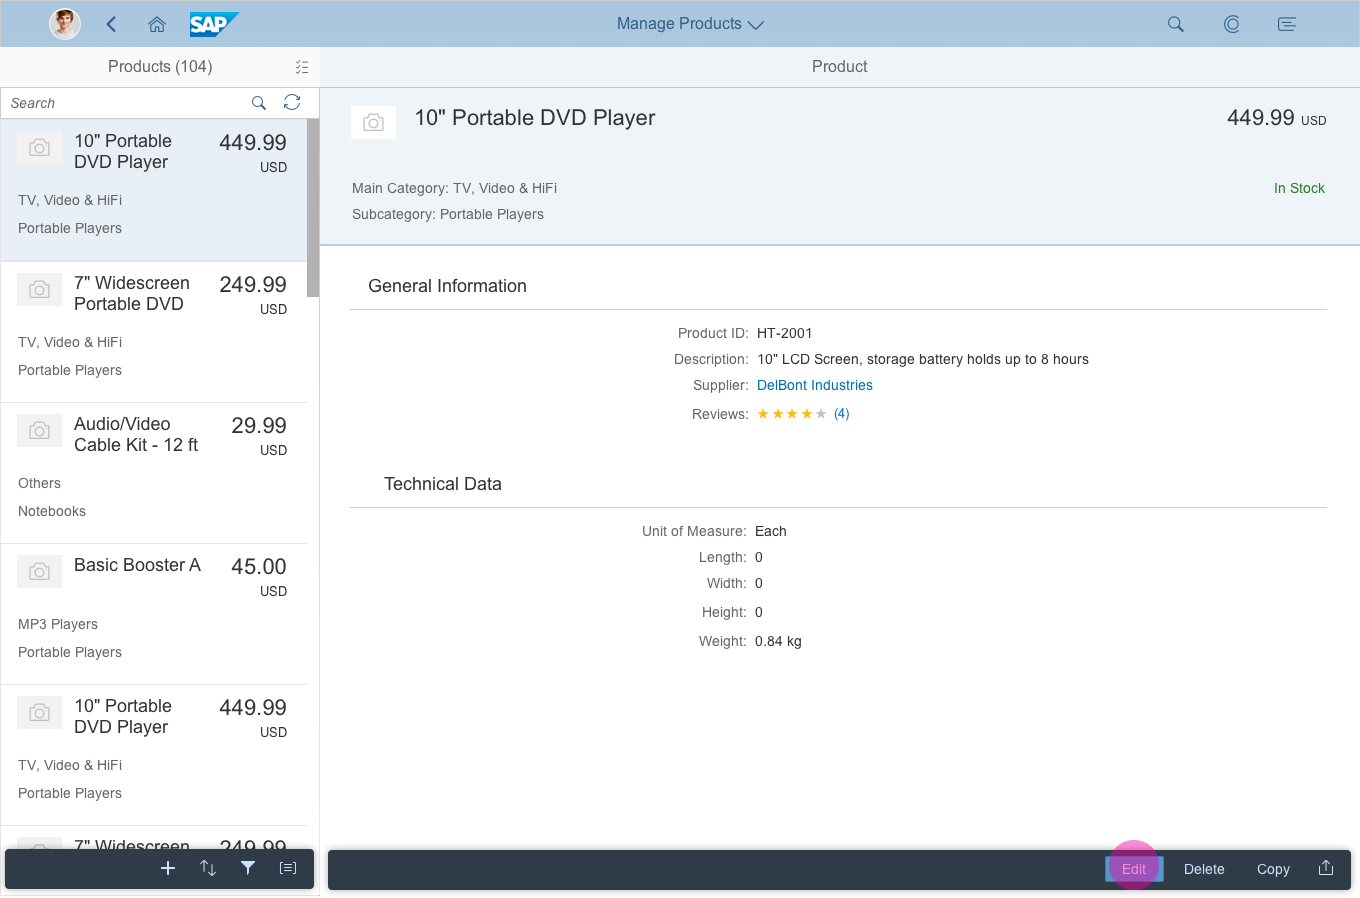
The “simple edit” flow for the split-screen layout describes how a user can edit an object selected in the master list.
1. To switch from display mode to edit mode, the user clicks Edit on the footer toolbar of the detail screen.
2. After editing, the user clicks Save.
3. The object details change back to display mode, and a message toast confirms that the object has been saved.
4. Click on Cancel opens a quick confirmation popover.

Simple edit for split-screen layout - starting in display mode
Edit – Starting in Edit Mode
In some scenarios, an object is always editable. In this case, the object opens in edit mode as soon as the user selects it in the master list.
The footer toolbar of the detail screen offers two buttons: Save and Cancel. If the user clicks Save, the object stays in edit mode. A message toast confirms that the object has been saved.
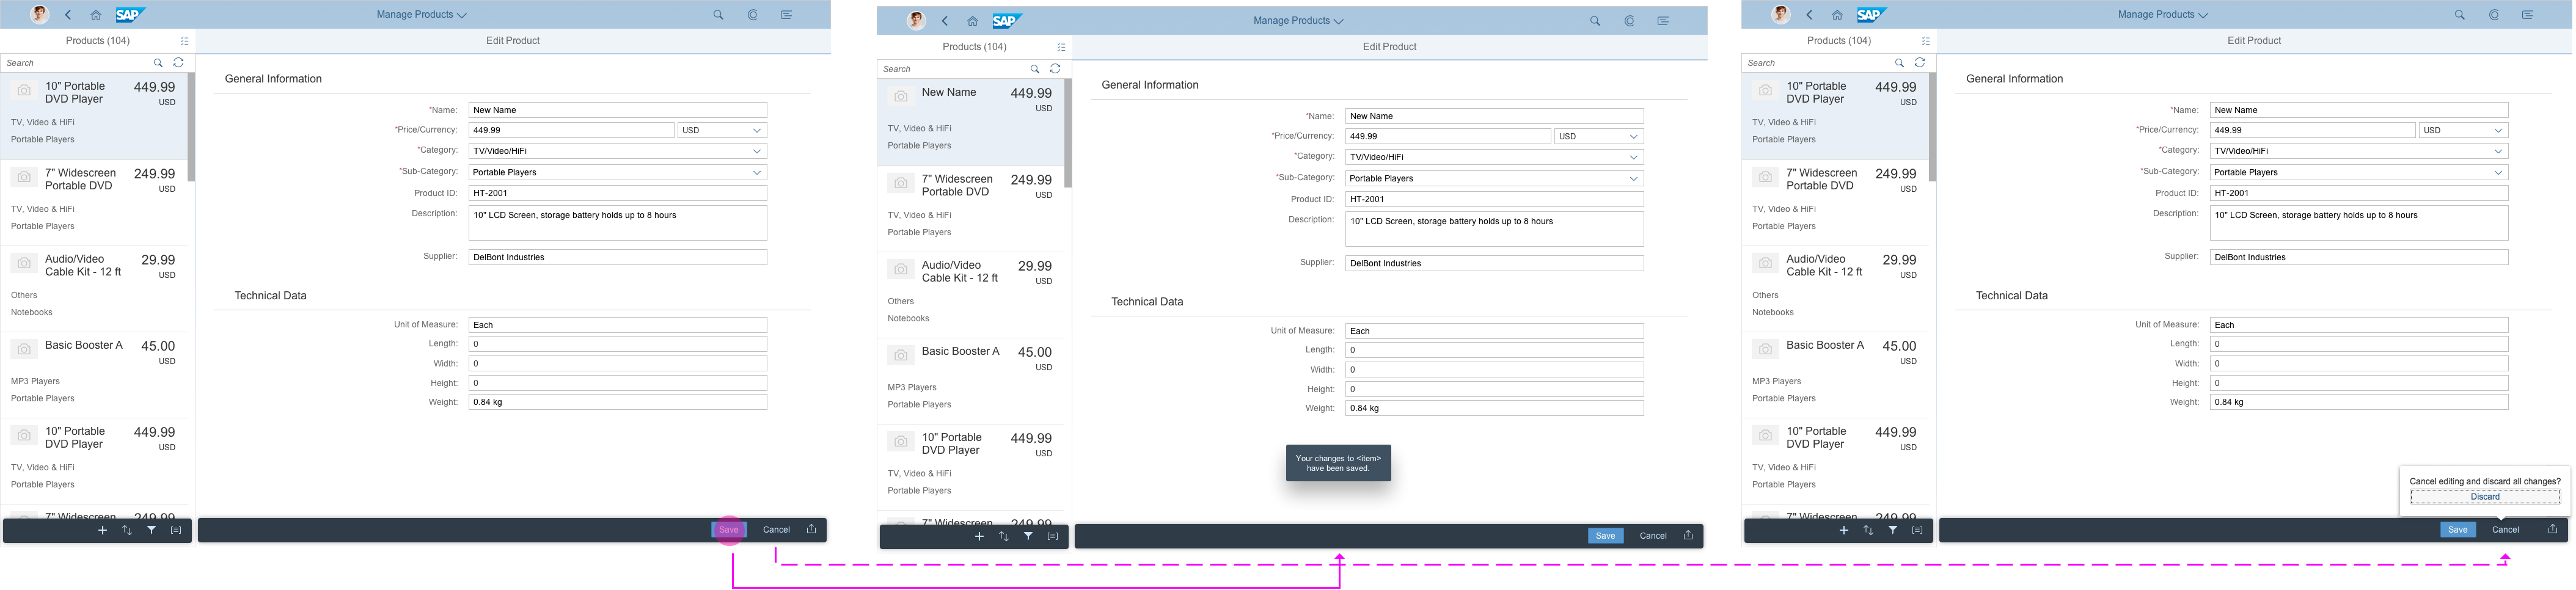
Simple edit for split-screen layout - starting in edit mode
Create an Object
To create a new object, the user clicks the Add icon ( ) in the footer toolbar of the master list. For more information, see the create page floorplan.
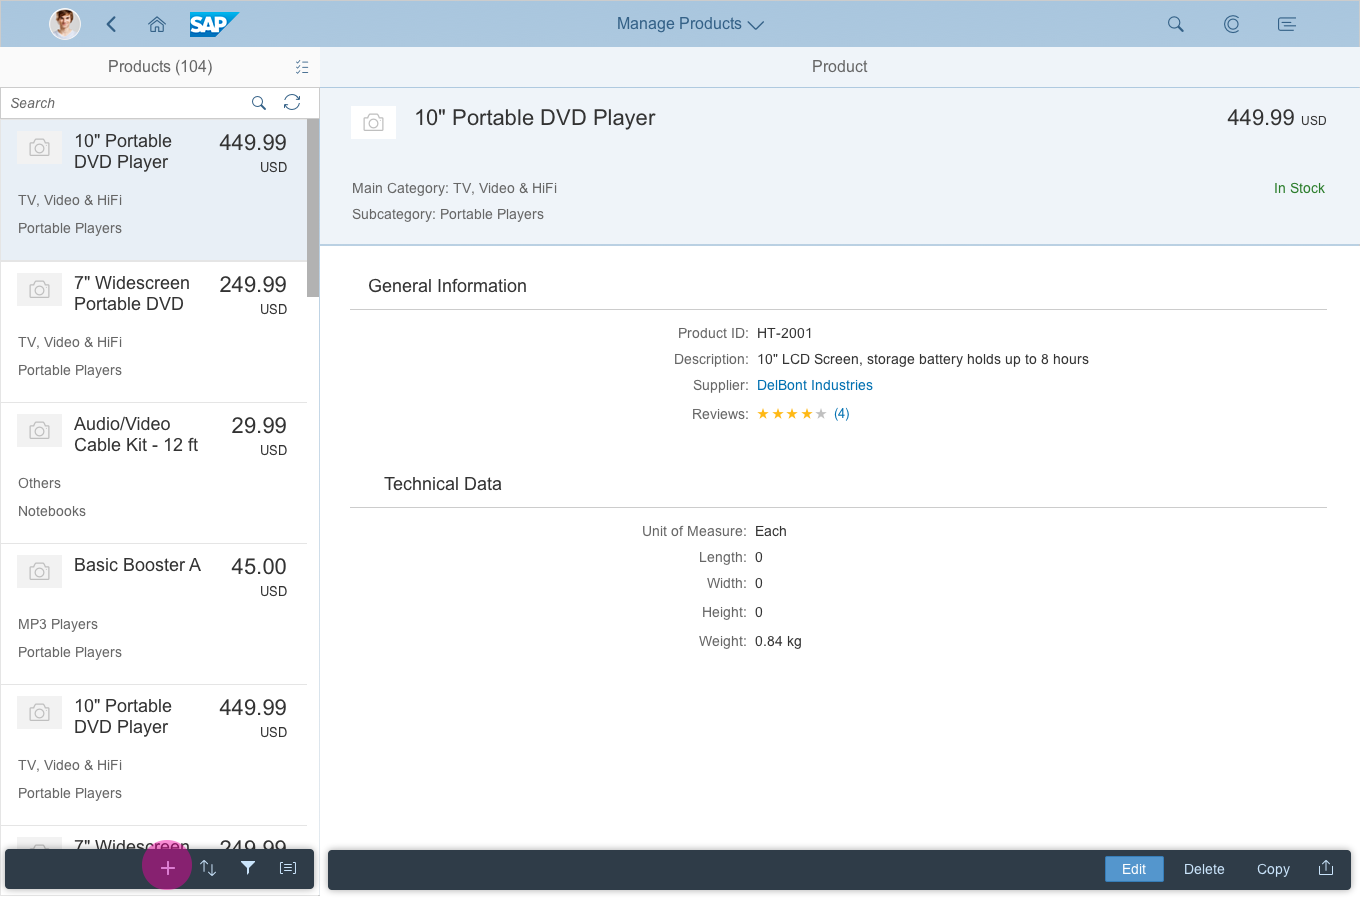
Create a simple object - Split-screen layout
Delete an Object
There are two ways of deleting an object in the split-screen layout:
- To delete only one item, the user can click Delete in the footer toolbar of the details screen. The Delete button is only available in display mode. It disappears when the user switches to edit mode.
- To delete several items, the user can select multiple items in the master list. For more information, see master list (section: Deleting Multiple Items).
If the user clicks Delete, a dialog appears prompting the user to confirm the deletion.
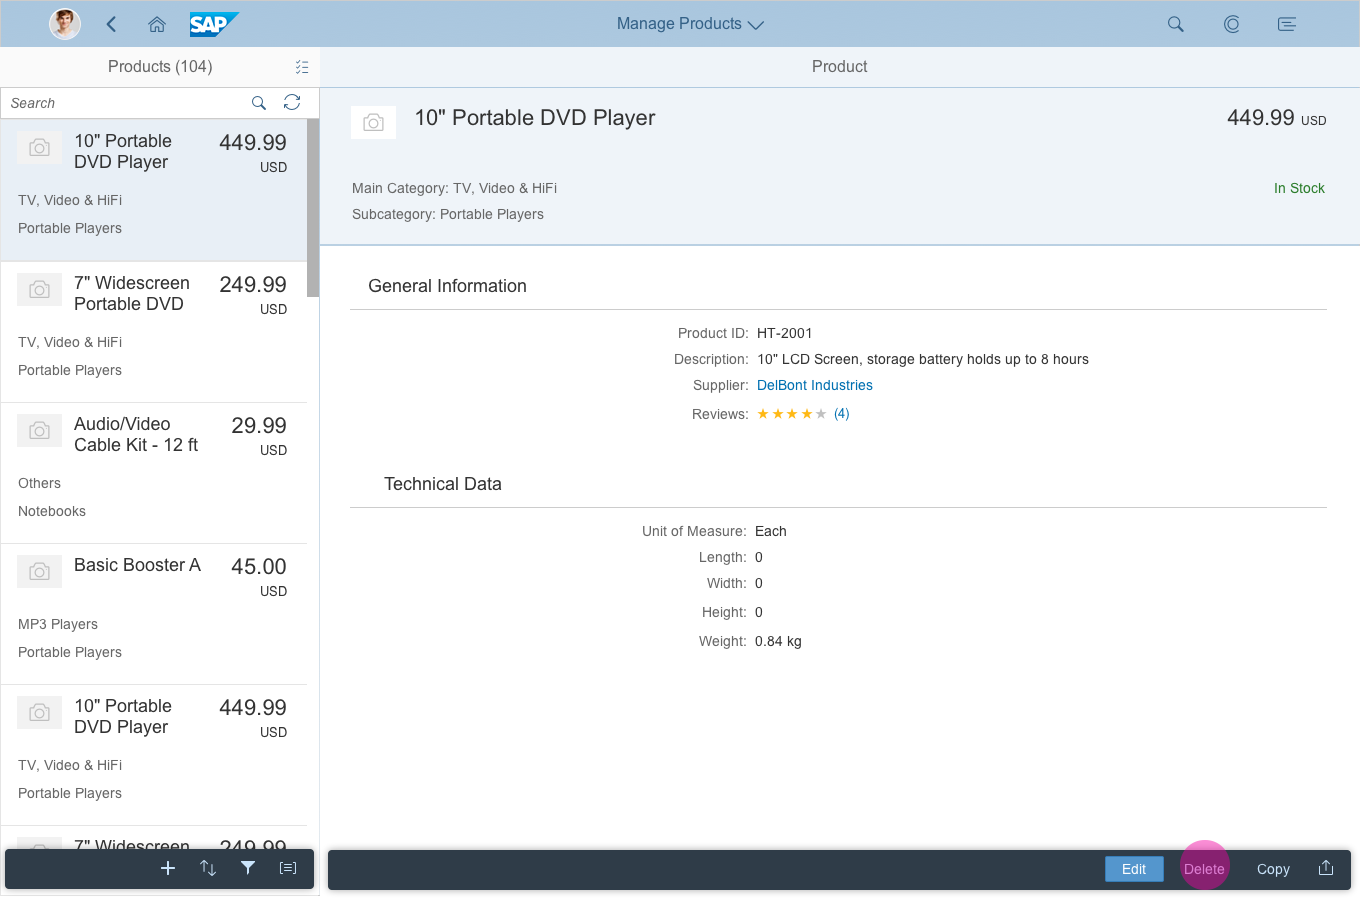
Delete a simple object - Split-screen layout
Full Screen Layout
The edit flow for the full screen layout describes how a user can edit a line item in the table. Often, the user has to navigate to a detail page to edit all the values for a line item. Once the user is finished editing the detail page, he or she clicks Save.
After saving, there are two navigation options, depending on the use case.
Variant 1:
The app automatically returns to the previous page and shows the updated line item in the table. A message toast confirms that the item has been saved.

Simple edit for full screen layout - Variant 1
Variant 2:
The updated line item on the detail page switches to display mode, and a message toast confirms that the item has been saved. The user can check the entries and, if necessary, change them again by clicking Edit in the header toolbar. To navigate back to the table, the user has to click the Back button in the app header.
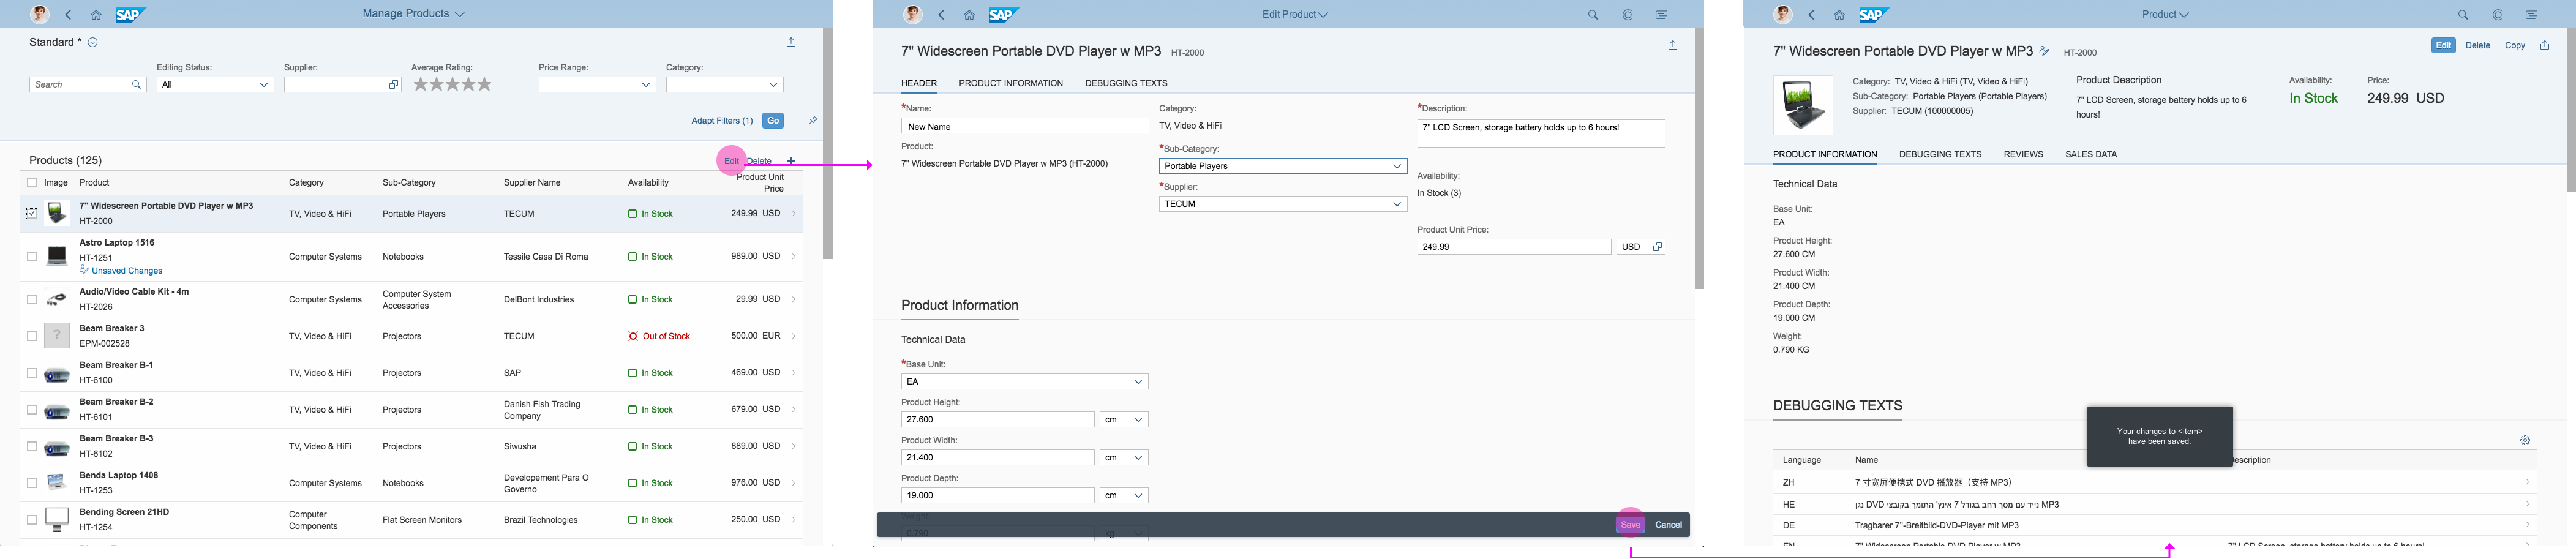
Simple edit for full screen layout - Variant 2
Data Loss Message
If the user has made changes in edit mode, show a data loss message whenever the user navigates away from the edit page or clicks Cancel. The data loss message is required for both split-screen and full screen layouts (see the examples for editing in the split-screen layout above).
If you want to keep unsaved changes, you need to implement draft handling.
Resources
Want to dive deeper? Follow the links below to find out more about related controls, the SAPUI5 implementation, and the visual design.
 Your feedback has been sent to the SAP Fiori design team.