
- Latest SAPUI Version 1.124
- SAPUI5 Version 1.122
- SAPUI5 Version 1.120
- SAPUI5 Version 1.118
- SAPUI5 Version 1.116
- SAPUI5 Version 1.114
- SAPUI5 Version 1.112
- SAPUI5 Version 1.110
- SAPUI5 Version 1.108
- SAPUI5 Version 1.106
- SAPUI5 Version 1.104
- SAPUI5 Version 1.102
- SAPUI5 Version 1.100
- SAPUI5 Version 1.98
- SAPUI5 Version 1.96
- SAPUI5 Version 1.94
- SAPUI5 Version 1.92
- SAPUI5 Version 1.90
- SAPUI5 Version 1.88
- SAPUI5 Version 1.86
- SAPUI5 Version 1.84
- SAPUI5 Version 1.82
- SAPUI5 Version 1.80
- SAPUI5 Version 1.78
- SAPUI5 Version 1.76
- SAPUI5 Version 1.74
- SAPUI5 Version 1.72
- SAPUI5 Version 1.70
- SAPUI5 Version 1.68
- SAPUI5 Version 1.66
- SAPUI5 Version 1.64
- SAPUI5 Version 1.62
- SAPUI5 Version 1.60
- SAPUI5 Version 1.58
- SAPUI5 Version 1.56
- SAPUI5 Version 1.54
- SAPUI5 Version 1.52
- SAPUI5 Version 1.50
- SAPUI5 Version 1.48
- SAPUI5 Version 1.46
- SAPUI5 Version 1.44
- SAPUI5 Version 1.42
- SAPUI5 Version 1.40
- SAPUI5 Version 1.38
- SAPUI5 Version 1.36
- SAPUI5 Version 1.32
- SAPUI5 Version 1.30
- SAPUI5 Version 1.28
- SAPUI5 Version 1.26
- Latest SAPUI Version 1.124
- SAPUI5 Version 1.122
- SAPUI5 Version 1.120
- SAPUI5 Version 1.118
- SAPUI5 Version 1.116
- SAPUI5 Version 1.114
- SAPUI5 Version 1.112
- SAPUI5 Version 1.110
- SAPUI5 Version 1.108
- SAPUI5 Version 1.106
- SAPUI5 Version 1.104
- SAPUI5 Version 1.102
- SAPUI5 Version 1.100
- SAPUI5 Version 1.98
- SAPUI5 Version 1.96
- SAPUI5 Version 1.94
- SAPUI5 Version 1.92
- SAPUI5 Version 1.90
- SAPUI5 Version 1.88
- SAPUI5 Version 1.86
- SAPUI5 Version 1.84
- SAPUI5 Version 1.82
- SAPUI5 Version 1.80
- SAPUI5 Version 1.78
- SAPUI5 Version 1.76
- SAPUI5 Version 1.74
- SAPUI5 Version 1.72
- SAPUI5 Version 1.70
- SAPUI5 Version 1.68
- SAPUI5 Version 1.66
- SAPUI5 Version 1.64
- SAPUI5 Version 1.62
- SAPUI5 Version 1.60
- SAPUI5 Version 1.58
- SAPUI5 Version 1.56
- SAPUI5 Version 1.54
- SAPUI5 Version 1.52
- SAPUI5 Version 1.50
- SAPUI5 Version 1.48
- SAPUI5 Version 1.46
- SAPUI5 Version 1.44
- SAPUI5 Version 1.42
- SAPUI5 Version 1.40
- SAPUI5 Version 1.38
- SAPUI5 Version 1.36
- SAPUI5 Version 1.34
- SAPUI5 Version 1.32
- SAPUI5 Version 1.30
- SAPUI5 Version 1.28
- SAPUI5 Version 1.26
Grid Table
sap.ui.table.Table
Intro
A grid table contains a set of data that is structured in rows and columns. It allows the user to scroll in both directions and can handle large numbers of items and columns.
Usage
Use the grid table if:
- The cell level and the spatial relationship between cells are more important than the line item. Examples include spreadsheet analyses and waterfall charts. Note that a grid table is not fully responsive. It is only available for desktops and tablets, so you will need to take an adaptive approach by offering an additional UI for smartphones.
- You have to work on more than 1,000 rows. In this case, the grid table is easier to handle. In contrast to the responsive table, the architecture of the grid table is optimized for handling large numbers of items. Note that a grid table is not fully responsive. It is only available for desktop and tablets, so you will need to take an adaptive approach by offering an additional UI for smartphones.
- Comparing items is a major use case. In this case, a grid table might be more appropriate than a responsive table. In the grid table, each cell contains only one data point. In contrast, the responsive table is more flexible regarding line items, including the ability to add more data points per cell and also the pop-in function. Both make comparisons more difficult. Note that a grid table is not fully responsive. It is only available for desktops and tablets, so you will need to take an adaptive approach by offering an additional UI for smartphones.
- You need an analytical table, but you cannot provide an analytical binding on the technical side. In this case, a grid table will do the work. Note that the grid table provides only one level of grouping, no aggregation options, and is also not fully responsive. It is only available for desktops and tablets, so you will need to take an adaptive approach by offering an additional UI for smartphones.
Do not use the grid table if:
- You need a table. The responsive table is the default table in SAP Fiori. Additional use cases where you might need the responsive table include:
- The focus is on working on line items, not on cells. The responsive table is optimized for displaying complete items on all devices, such as file browsing and a list of documents you want to act on, like purchase orders and purchase requisitions.
- Selecting one or several items is the main use case and details are needed to choose the correct item.
- Line items are independent of each other and no operation across columns is needed.
- You want to have only one implementation for all devices.
- The main use case is choosing one item from a very small number of items with no additional details. A select or combo box might be more appropriate.
- The main use case is choosing one out of several items with only a few details per item. A list might be more appropriate. Pay attention to the layout of the list item to ensure that it has a pleasant appearance. Examples include the master list and the attachment list.
- Data needs to be structured in a hierarchical manner. Use a tree table instead. Note that neither the tree table nor the grid table are responsive. You will need to take an adaptive approach by offering an additional UI for smartphones and tablets.
- You need an overview of a large amount of data. In this case, use charts.
- You just need it for layout reasons. In this case, use a layout container such as HBox or VBox.
- You need read-only or editable field-value pairs. Use a form instead. The grid table is not optimized for form-like input navigation.
Responsiveness
A grid table is available for desktops and tablets, but not in smartphone sizes. It supports touch devices, but is not optimized for small screens.
If you use a grid table, note that you have to implement a fallback solution for small screens. This fallback solution does not need to support all use cases.
You could create a fallback by using a responsive table, but a completely different solution, such as showing charts in a read-only case, might be more appropriate.
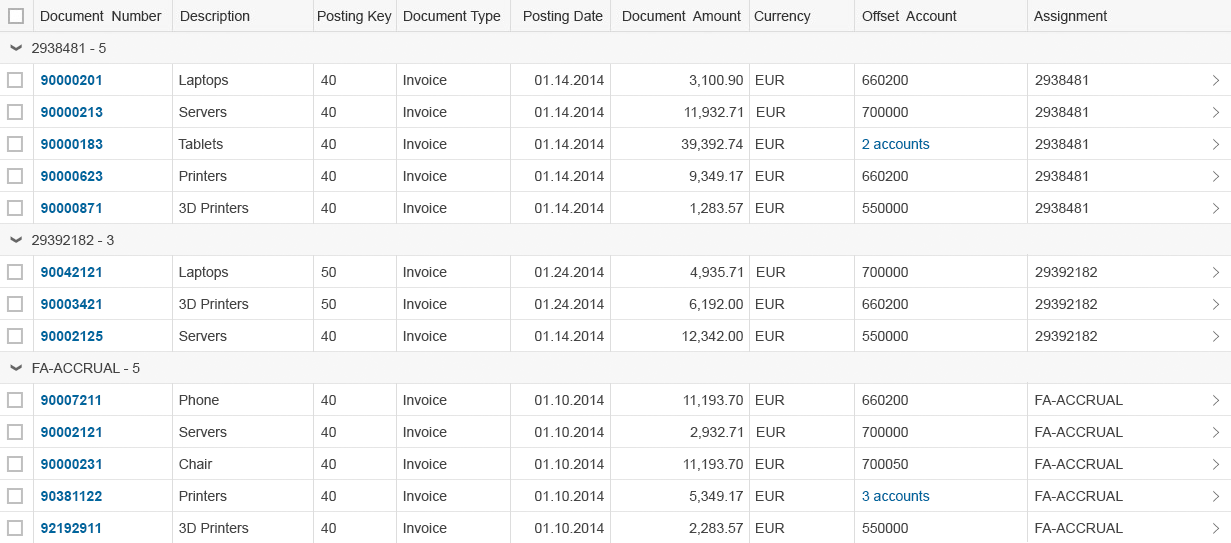
Grid table shown on a desktop
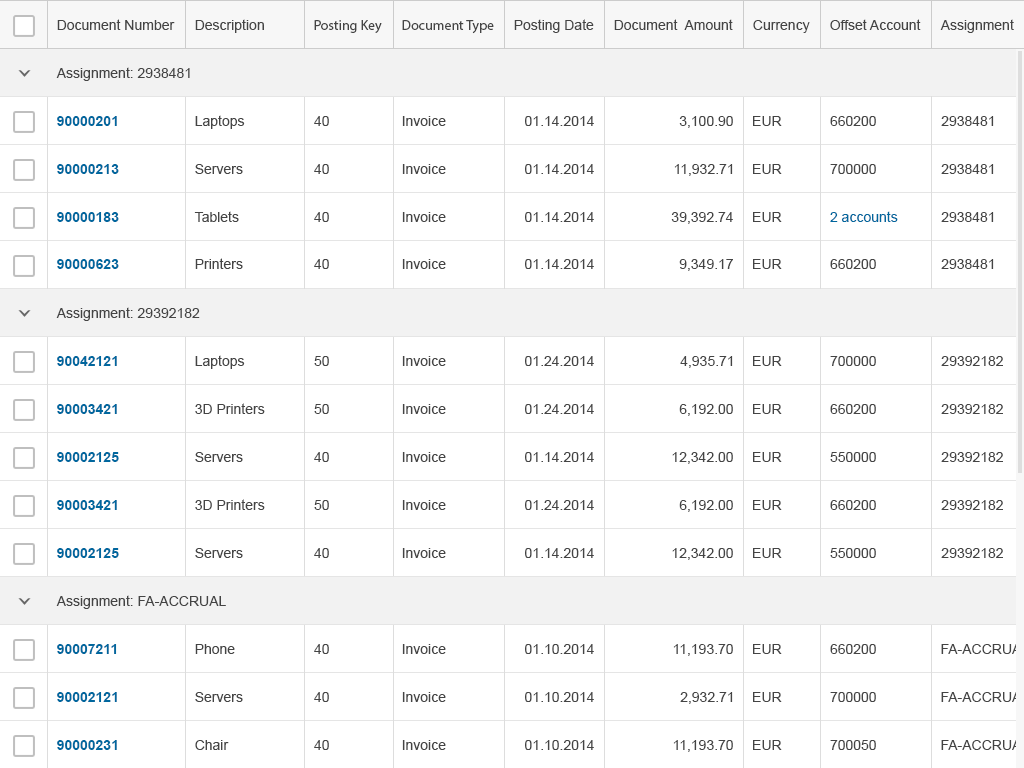
Grid table shown on a tablet
Layout
The column header allows the user to resize and rearrange columns. It also provides access to a menu with column-specific commands.
The collection of items, or rows, occupies the main part of the grid table.
The selector cells allow the user to select one or more items.
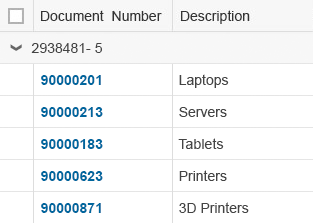
The Select All button selects or deselects all items.
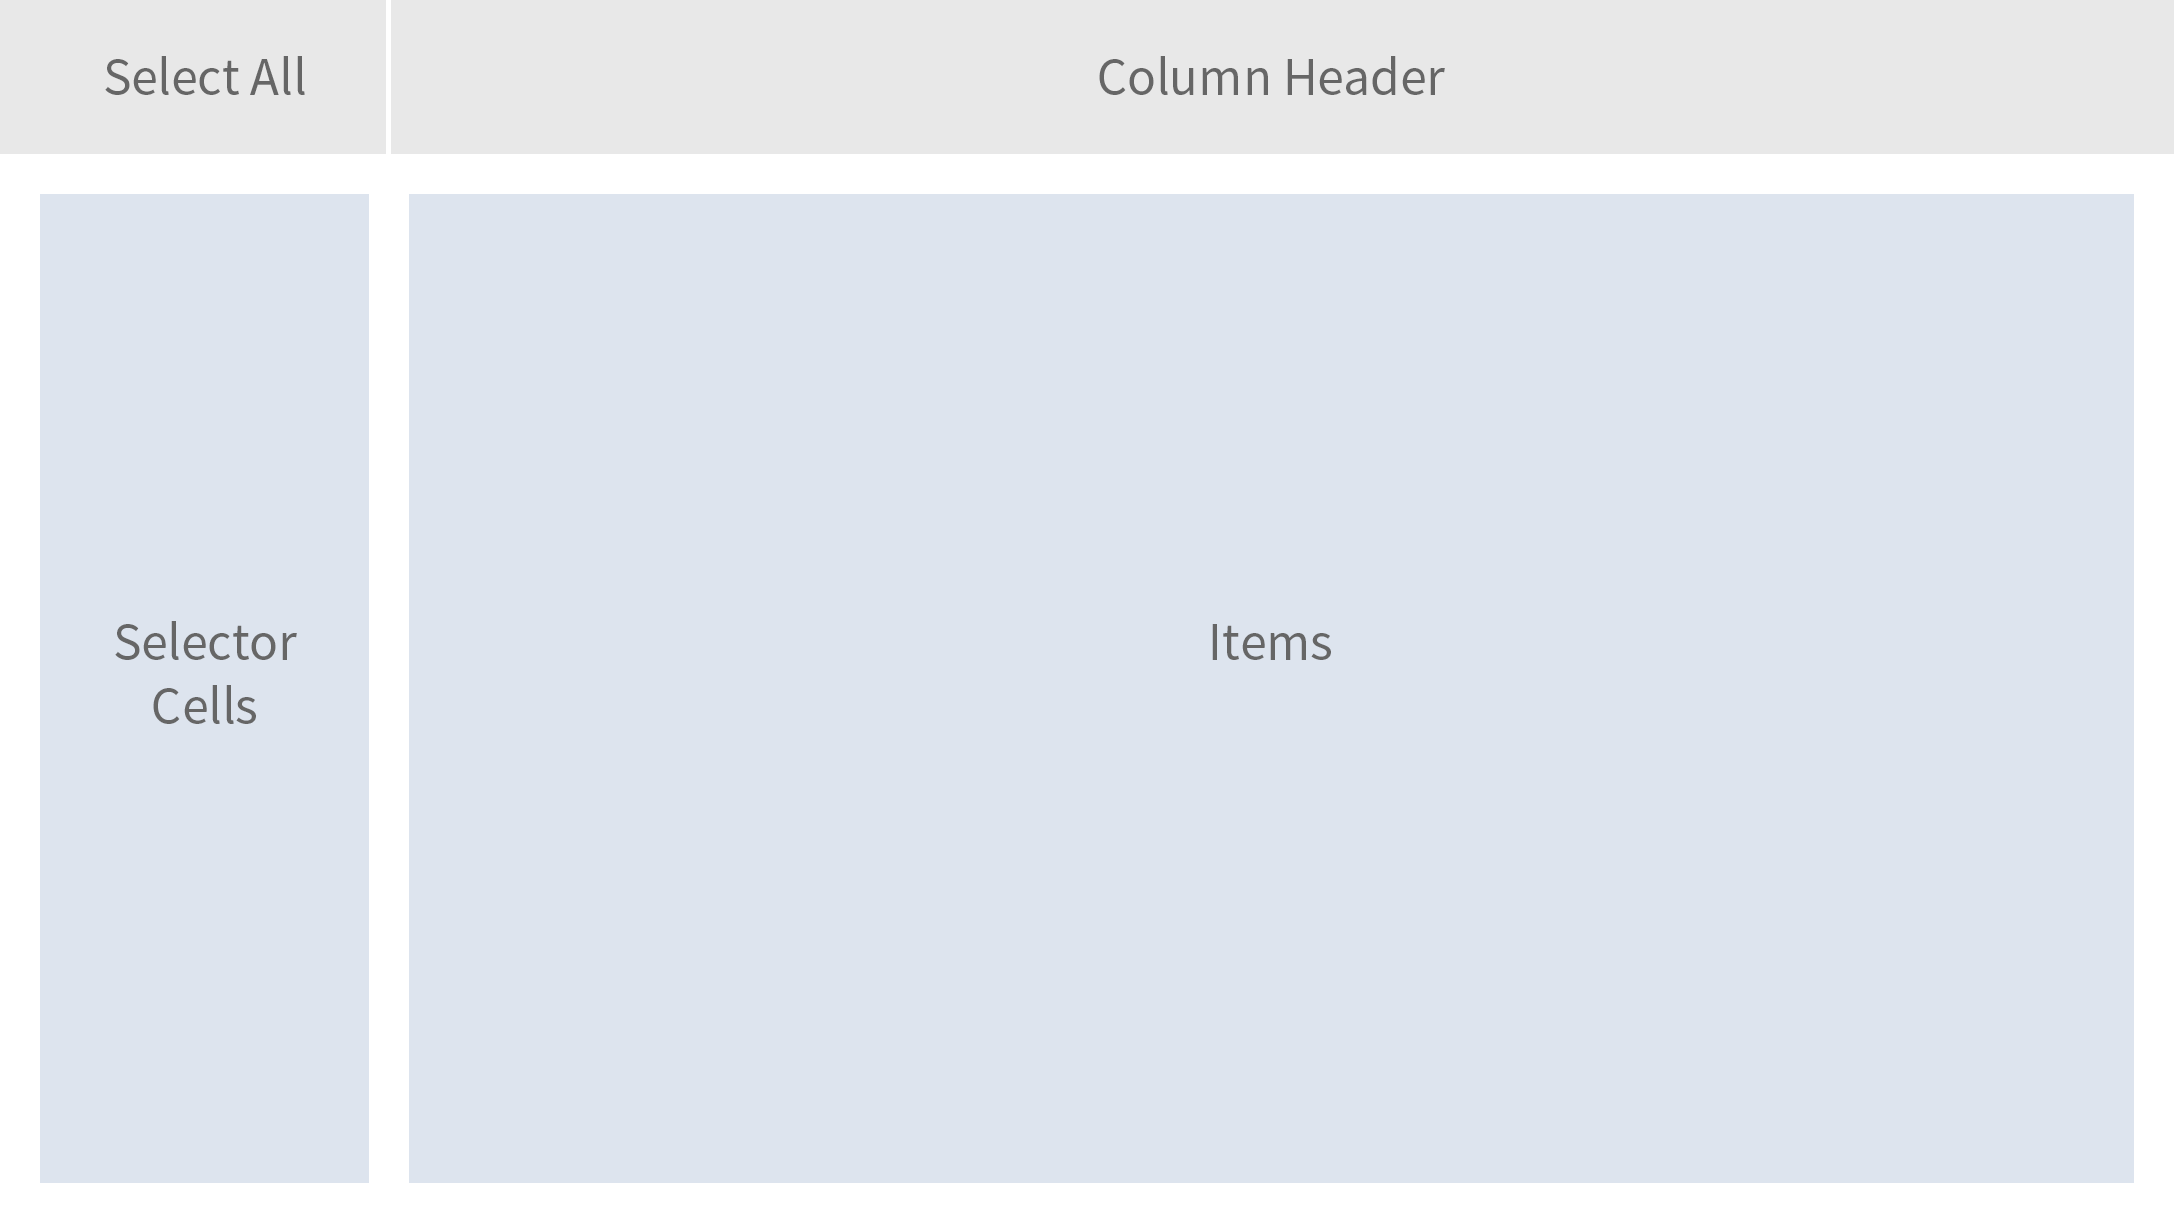
Schematic visualization of the grid table
Components
A grid table does not consist of other elements. However, it is common to use a toolbar above the grid table.
The toolbar can contain entry points for the view settings dialog and the table personalization dialog or for the p13n dialog, as well as view switches in the form of a segmented button, and buttons for Add, Edit, and other actions.
Behavior and Interaction
A grid table is quite restricted in terms of its content.
Table Level
Scroll
A grid table allows horizontal and vertical scrolling (sap.ui.table.Table, property: navigationMode, value: Scrollbar).
You can add any number of line items to the grid table, which is known as “lazy loading”.
To prevent adverse side effects when scrolling vertically, all line items must have the same height (sap.ui.table.Table, property: rowHeight).

Scroll bar
Select
A grid table can have one of the following selection types (sap.ui.table.Table/ property: selectionMode):
- None: Items cannot be selected.
A non-selection grid table
- Single: One item in the grid table can be selected. A row selector column is shown.
A single-selection grid table
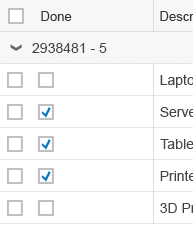
- Multi Toggle: A multiselection mode that allows one or more items to be selected. For this, the grid table provides a column with checkboxes on the left-hand side. Clicking a checkbox toggles the state of the corresponding row from deselected to selected and back.
- Select All: Works via a checkbox on the left of the column header (sap.ui.table.Table, property: enableSelectAll). Using the Select All checkbox selects or deselects all items the user can reach via scrolling. Use Select All only if it makes sense. Note that selecting a lot of data also takes time and might not be appropriate for all use cases. For example, a delete operation on two million database entries might not be very helpful in many cases.
You can also use the keyboard keys Shift and Ctrl for multiselection.
Avoid having checkboxes in the first column after the multiselect column of multiselection grid tables.
A multiselection grid table
Do not add checkboxes to the first column
An item can be selected in different ways, depending on the configuration of the grid table (sap.ui.table.Table, property: selectionBehavior):
- Row: An item is selected by clicking the checkbox or the row. Use this for multiselection grid tables if clicking a row is not used for something else.
- RowSelector: An item is selected only by clicking the checkbox in the selector cell. Use this if you need to click the row for something else, such as navigation.
- RowOnly: An item is selected only by clicking the row, and not the the checkboxes in the selector cells. Use this for single-selection grid tables if clicking a row is not used for something else, such as navigation.
Compact, Cozy, and Condensed
Like all SAP Fiori controls, the grid table is shown in compact mode on a desktop and in cozy mode on tablets.
For a desktop, you can also display even more rows on the same screen height by using condensed mode. This renders less white space for each item.
Note that neither compact mode nor condensed mode can be interacted with via touch. Even on a desktop with a touch screen, users will have difficulty selecting rows or using controls inside the cells when using their fingers.
Furthermore, condensed mode is not available for Internet Explorer 9. If condensed mode is to be used, please provide a fallback.
Column Header
The column header provides the label for the corresponding column and access to the column header menu.
Columns are resized as follows:
- Mouse interaction: The user drags the separator line between two columns (sap.ui.table.Column, property: Resizable). Double-clicking the line optimizes the column according to the length of the currently visible data and the label of the column header (sap.ui.table.Column, property: Autoresizable). Note that auto-resizing works only if the cells in this column contain one of the following controls: text, label, link, or input.
- Touch interaction: The user clicks or taps the column header to reveal two buttons – one to show the column header menu, and one for resizing. The user drags the latter to resize the column.
Columns can be rearranged by dragging the column header to another position (sap.ui.table.Table, property: EnableColumnReordering).

Column header
Opening the column header menu on touch devices
Column Header Menu
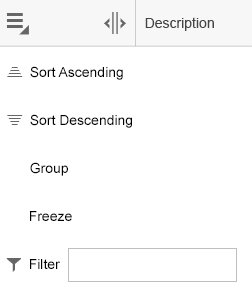
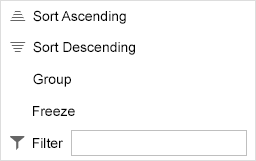
For each column, a menu can contain the following menu items (sap.ui.table.ColumnMenu, property: visible):
- Sort Ascending/Descending (sap.ui.table.Column, property: showSortMenuEntries)
- Free text filter (sap.ui.table.Column, property: showFilterMenuEntries)
- Group (sap.ui.table.Table, property: enableGrouping)
- Freeze from the first to the last specified column (sap.ui.table.Table, property: enableColumnFreeze)
For each column, the menu can be replaced by an app-specific menu.
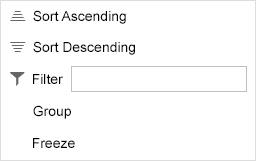
Column header menu
Sort
The column header menu can provide two sort options (sap.ui.table. Column, properties: sortProperty, showSortMenuEntry):
- Sort Ascending
- Sort Descending
The user selects one of these options to sort the corresponding column accordingly (sap.ui.table. Column, properties: sorted, sortOrder, sortProperty).
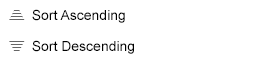
Sort settings in column header menu
Filter
The column header menu can provide a search field for entering free text (sap.ui.table.Column, properties: filterProperty, showFilterMenuEntries).
If the user enters a term in the input field and triggers the search by pressing Enter when the focus is on the filter input field, the grid table is filtered by the corresponding column and value (sap.ui.table.Table, properties: filtered, filterProperty, filterValue, filterOperator, sap.ui.table.Column, property: filterType).
Note that the filter may return zero results, in which case, the table might be empty.
General recommendations for filtering:
- If filtering is a main use case, choose the filter bar or any other filtering UI over the built-in free text filter.
- Only use the free text filter if filtering is a secondary use case and if the filter bar is too heavy.

Free text filter in column header menu
Group
The column header menu can provide the option to group by this column (sap.ui.table.Column, property: enableGrouping).
One group collects all items with the same value within the corresponding column.

Group setting in column header menu
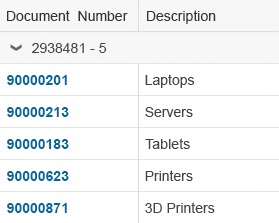
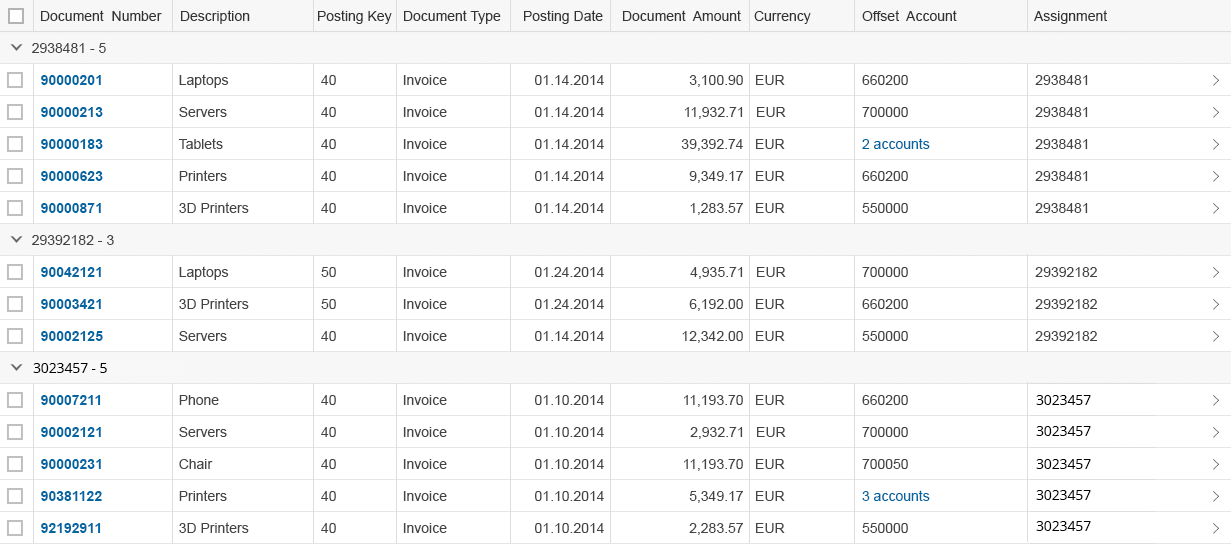
If line items are grouped in a column, every group is provided with a collapsible or expandable group header. The header text consists of the name of the value and the number of items in the specific group. Only one grouping level is possible.

Group header
Once line items have been grouped, the corresponding column is hidden. There is no built-in possibility to ungroup the grid table again. Therefore, provide a view settings dialog or table presonalization dialog to offer an additional way to group by a column and a way to ungroup the complete table.
An exception to this is when the table is grouped from the start and should not be ungrouped at all.

Group headers shown, the corresponding column hidden: no duplicates, but a confusing change
Freeze Columns
The column header menu can provide the option to freeze columns (sap.ui.table.Table, property: enableColumnFreeze). Selecting Freeze freezes all columns up to the one in which the operation was triggered (sap.ui.table. Table, property: fixedColumnCount).
When Freeze is triggered, the menu item changes to Unfreeze for the corresponding column.

Freeze setting in column header menu
Line Item Level
A line item contains a set of cells and provides options for selecting the item.
To prevent adverse side effects when scrolling vertically, all line items must have the same height (sap.ui.table.Table, property: rowHeight).

Line item
Cell Level
A cell provides one data point.
It can contain one of the following controls to display this data point:
- Text
- Label
- Object status
- Icon
- Button
- Input
- Date picker
- Select
- Combo box
- Multi-combo box
- Checkbox
- Link
- Currency
If you use text, use only single-line text to keep the same row height. Truncate if necessary as this prevents adverse side effects when scrolling vertically (sap.m.Text, property: wrapping, value: false).

Cell
Cells can provide a context menu that allows the corresponding column to be filtered by the value provided by the specific cell (sap.ui.table.Table, property: enableCellFilter).
This menu is only shown on non-touch devices.
Cell context menu
Guidelines
Data Density vs. Complexity
The grid table can be used to display large amounts of data. Unfortunately, the grid table has a high data density and therefore conveys an immediate feeling of complexity.
Only show tables with a lot of data as a last resort. Try the following instead:
- Break down the data into manageable chunks and allow the user to navigate or drill down between them.
- Use charts with drilldown functionality until the amount of data is more manageable.
Try to avoid horizontal scrolling in the default delivery.
Try to minimize the number of columns, especially if there is a large number of rows.
Table Title
You can implement the table title by using a title control in a toolbar.
Use a table title if the title of a grid table is not indicated in the surrounding area. Do not use a table title if it simply repeats text that is already above the grid table, for example, if a pricing conditions grid table is the only control placed on a tab labeled Pricing Conditions.
Use a table title if you need the table toolbar. To avoid repeating text, feel free to use generic text as a table title, such as Items.
You can add an item count to the table title. If you do so, use the following format:
Items (345)
Text as well as text and an item count can both be combined with variant management.
Loading Data
To indicate that the table is currently loading items, use the busy state. (sap.ui.table.Table, property: busy). Do not show any items or text. As soon as the data is loaded, remove the busy state and show all items.
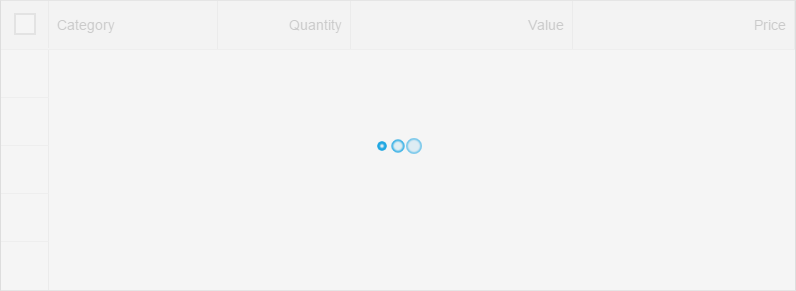
Grid table in busy state while loading data
Columns – Best Practices
Minimize the number of columns. Avoid the need to scroll horizontally in the default delivery.
The grid table assigns the same width to each column by default. It is recommended that you overwrite this default to provide optimal space for your content (sap.ui.table.Column, property: width). Ideally, you should specify initial column sizes in pixels or rems. If you define the column width as a percentage, the text becomes truncated when the browser window size is reduced. If you define the column width in pixels or rems, reducing the browser window size results in a scrollbar, which is what the user expects. Note that when the user changes the column width, the width is internally calculated in pixels.
Optimize column width for its initial visible content, including the column header texts.
Maintain a constant column width and avoid automatically adjusting it based on content changes.
Do not: In the default delivery, the initial visible content should not be truncated
Column Headers – Best Practices
Provide a label for each column in the column header. In the default delivery, do not truncate the column header texts.
Content Alignment
For alignment of cell content, follow the guidelines below.
Left-align the following: text, IDs, phone numbers, URLs, passwords, and email addresses.
Left-alignment of text
Right-align numbers (except IDs).
This ensures comparability of numbers and amounts.
Right-alignment of numbers
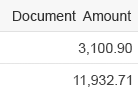
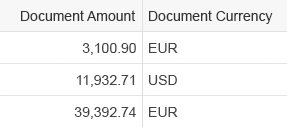
Right-align amounts with currencies to the cell and align them in terms of their respective decimal points.
This ensures that amounts with different currencies are shown correctly, whether these currencies have 0, 2, or 3 decimals.
For aligning to the decimal point, use the sap.ui.uinified.Currency control.

Alignment to decimal point
Right-align dates and times.
This ensures comparability for most formats and locales.
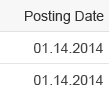
Right-alignment of dates
In general, center one-word status information and icons.
If there is an icon and text, or if the status contains more than two words in the English language, left-align the entire status column.
Center-alignment of one-word texts
Content Formatting
Locale Settings
Be locale-aware: show dates, times, numbers, and so on in the format corresponding to the user’s locale settings.
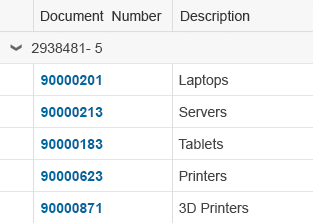
Key Identifier
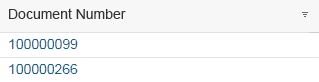
Use a bold label or an emphasized link as the key identifier of an item. In the default delivery, show the key identifier in the first column.
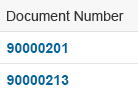
Emphasized link
For strings with IDs, use one of the following:
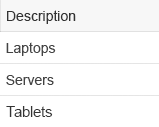
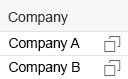
- Show the ID in brackets after the corresponding string. Use this formatting if sorting, grouping, or filtering is only needed on the string, but not on the ID.
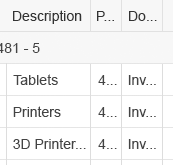
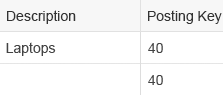
- Show the ID in a separate column. Use this format if sorting, grouping, or filtering on the string and the ID is needed.
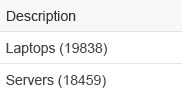
Text and ID in one column – Sorting, filtering, and grouping only on the text
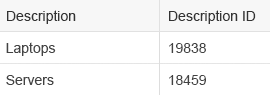
Text and ID in two columns – Allows sorting, filtering, and grouping on both
Truncation
Avoid truncation of typical content in the default delivery (sap.ui.table.Column, property: width). However, since the columns are resizable, do not worry too much if truncation occurs as columns can still be enlarged if necessary.
To prevent adverse side effects when scrolling vertically, all line items must also have the same height. If you need to decide between truncation and different row heights, choose truncation.
Optimize column width for typical content, not all content
Number of Links
Are there too many links? Use subtle links to avoid a wall of links. Standard links are also emphasized more if they are surrounded by subtle links.

Emphasized links, links, subtle links, and text
Missing Value
If there is no value for a cell, leave it blank. Do not display text as N/A.
Leave empty fields blank
Numbering Items
In terms of numbering items:
- If the item number is more like an ID with regard to its description, use ID formatting as described above.
- In all other cases, use a separate column for the item number.
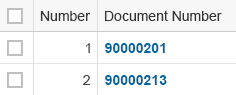
Add a separate column for the item number
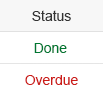
Status
For status information, use semantic colors on the foreground elements.
For status information on text, use an object status.
Semantic colors on text
Empty Tables
Avoid empty grid tables. If necessary, provide instructions on how to fill the grid table with data (sap.ui.table.Table, properties: noDataText, showNoData).
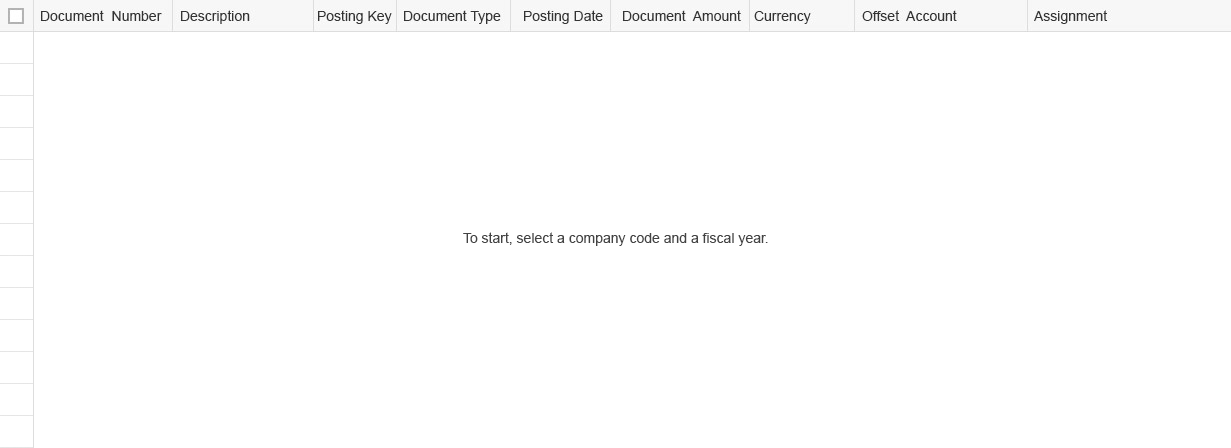
Provide meaningful instructions
Invalid State
To show an invalid state of the grid table within the list report floorplan, show an overlay on the grid table and the corresponding toolbar (sap.ui.table.Table, property: showOverlay). The overlay prevents user interactions.
Use this within the list report floorplan if filter settings have been changed but the grid table is has not yet been updated.
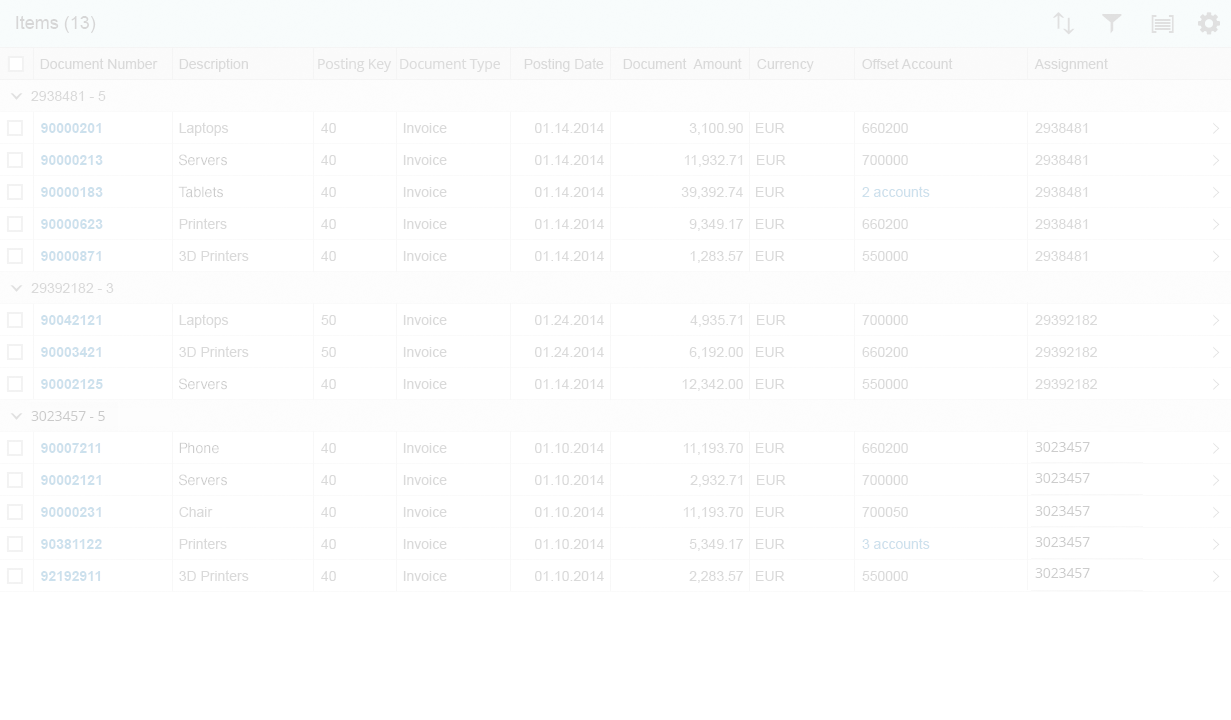
Grid table with invalid data
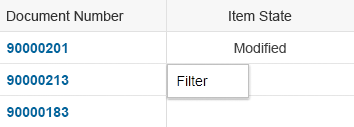
Item States
To show that an item has been modified, for example, within the global edit flow, add the string Modified in an additional column with the label Editing Status.
In the default delivery, add a column directly behind the key identifier.
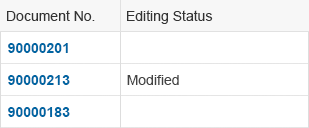
A modified item
To show that a modified item has an error, for example, within the global edit flow, add the string Contains errors in the Editing Status column. This string replaces the Modified string.
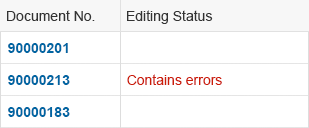
A modified item with an error
To show that an item is locked, add a transparent-style button with the corresponding icon and the text Locked by [name] in the Editing Status column.

A locked item
To show that an item is in draft state, add a transparent-style button with the text Draft in the Editing Status column.
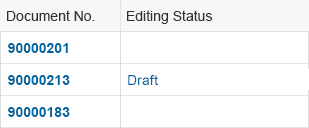
Item in draft state
Show only one state at a time.
Numbers and Units
Show the unit of measurement in one of the following ways:
Number and Unit in Same Cell
The number and the unit are in the same cell. Do this if sorting, filtering, or grouping by the unit of measurement are not needed.
Use a currency control to display the concatenated string.
Number and unit of measurement in one cell
Number and Unit in Separate Columns
The number and unit are in separate columns. Do this if sorting, filtering, or grouping by the unit of measurement are a common use case.
Note that this column can be hidden or moved independently of the column containing the corresponding number. Therefore, be sure to have clear labels for both columns to communicate the dependency.
Number and unit of measurement in two columns
Do not put the unit of measurement in the column header.
Actions
Multiple Items
To trigger actions on multiple items, use a mutliselection grid table (sap.ui.table.Table, property: selectionMode, value: MultiToggle). Offer the corresponding actions in the table toolbar.
Do not offer action triggering on multiple items if the table is generally expected to have fewer than 10 items. In this case, try to use the responsive table instead of the grid table.
Single Item
To trigger actions on a single item (sap.ui.table. Table, property: selectionMode, value: Single):
- Show the actions on the table toolbar.
- In rare cases, show the actions within the line item. Since these actions are repeated in every line and thus use a lot of screen real estate, do this only for a maximum of one or two actions. In this case, show the action trigger near the content to which it belongs. Do not add a specific column for actions. Use transparent-style buttons instead, except if the action trigger belongs to a link.
In contrast to the responsive table, the grid table does not support navigation by clicking or tapping a single line item. To achieve similar behavior, choose one of the following options:
- Use a link for the attribute that identifies the row. Clicking this link triggers the navigation. Choose this solution over the other two options.
- Provide a toolbar button that triggers the navigation on a selected line item. This button only works if just one item is selected.
- If neither option is possible, add an additional column showing the navigation indicator (>) and no column header text at the end of the row. Provide click events on all cells that do not contain interactive content, including the cells in the column with the navigation indicators. Clicking or tapping such a cell triggers the navigation. Note that this solution is not ideal as users can show, hide, and rearrange this column.
Single Cell
To trigger actions on a single cell, create the corresponding click event. Do not use the cell click event if the cell contains interactive controls, such as links.
Adding an Item
When you add an item, add the row beneath the last item and scroll accordingly.
Ignore sort, filter, and group settings for new items when you add them. As soon as the grid table is sorted, filtered, or grouped again, the new items are handled accordingly, but not before.
Editable Content
For editable content, only use the following controls, and only one control per cell:
Only these controls are optimized for all viewing modes of the grid table.
If you need edit mode, change your text controls, such as label, text, link, object status, icons, and currencies, to editable controls as soon as you switch to edit mode, but not before. You can do this by exchanging the controls, for example, from sap.m.Text to sap.m.Input.
For mass editing items:
- Provide multiselection.
- Provide an Edit button.
- If several items are selected, clicking the Edit button opens a dialog in which the user edits the corresponding fields for all selected items.
This is similar to mass editing in the split-screen layout floorplan. For more information, see editing multiple items in the master list article.
Interactive controls – In line
View Settings
There are several ways to show Sort, Filter, and/or Group settings:
- Column header menu: In all cases, show the corresponding settings in the column header menu.
- View settings dialog: Simple and more flexible with regard to filter settings. No advantage for sorting. Allows the user to ungroup grouped columns.tables with a medium amount of items.
- Table personalization dialog: Provides complex options for sorting items by several levels and allows the user to ungroup grouped columns. It also provides a query-builder-like approach for filter settings. The complexity of the options is also its downside. Use the table personalization dialog for tables with a large number of items.
- If filtering is a main use case, use the filter bar. In this case, avoid offering additional filter settings on the table. If you do, the filter settings on the grid table work only on the result set provided by the filter bar.
Always be careful when synchronizing the settings in the dialog with the settings from the column header menu.
Trigger the dialogs in one of the following ways:
- View settings dialog: Provide several buttons, one for each of these view settings. Each button opens the view settings dialog on the corresponding page.
- Table personalization dialog: Provide a settings button, which opens the table personalization dialog containing all pages.
Use only the view settings you really need. For example, do not offer grouping if it does not support your use case.
Be persistent. When reopening the app, show the analytical table in the same view settings (sort/ filter/ group/ aggregation settings) as it was left by the user before.
Column header menu with view settings

Table toolbar with triggers for view settings dialog

Table toolbar with trigger for table personalization dialog
Sort
To display the current sort state, an icon is shown in the column header of the last sorted column. This icon indicates the sort direction (sap.ui.table.Column, properties: sorted, sortOrder, sortProperty).
For the default sort settings, sort by the column that identifies the row, which is usually the first column in default delivery. Use a meaningful sort order, such as an alphabetical order for text, a numeric order for numbers, or a chronological order for dates.

Column, sorted ascending
Column, sorted descending
Filter
To display the current filter state, an icon is shown in the column header of the filtered column (sap.ui.table.Column, properties: filtered, filterProperty, filterValue, filterOperator, defaultFilterOperator, filterType).
Column, filtered
Group
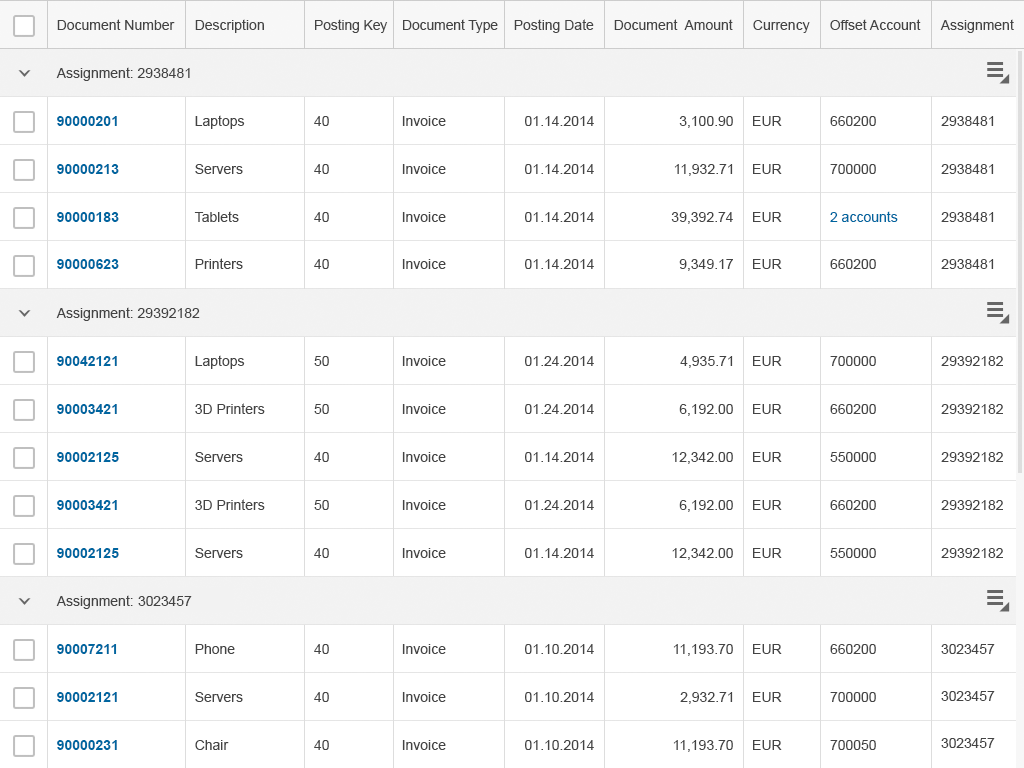
To display the current group state, group headers are shown. Show the following text in the group header:
[Grouping value] – [Item count for the group]
Group headers
In general, offer reasonable grouping by default if appropriate. Enable the user to ungroup via the view settings dialog or via the table personalization dialog.
Personalization
Only offer personalization if you need more columns than those that fit on a tablet screen, which is usually five, to fulfill 80% of your main use cases.
Persist the column layout. When a user reopens the app, show the grid table with the same column layout settings as last defined by this user.
Add, Remove, and Rearrange Columns
To add, remove, or rearrange columns, use one of the following:
- The table personalization dialog: It offers some simple settings for column layout. Use this if you have only a few columns to choose from and/or you use the view settings dialog.
- The p13n dialog: Besides various complex view settings, it also provides settings for column layout. Use this if you have a large number of columns to choose from and/or you use this dialog anyway for view settings.
In both cases, trigger the dialog via the settings button in the table toolbar.
You can also use drag and drop to rearrange columns (sap.ui.table.Table, property: enableColumnReordering). If you allow rearranging via drag and drop as well as via a dialog, keep both places in sync.
Resize Columns
Resizing columns works differently on touch and non-touch devices.
- Non-touch devices: Drag and drop the column separator on the right side of the column. Double-clicking the column separator optimizes the width of the column to the data currently loaded into the front end, which is usually about 100 rows.
- Touch devices: Clicking the column header reveals two buttons: one for opening the column header menu, another one for resizing the column. Drag and drop this second button to resize the column.
Freeze Columns
To freeze columns, offer the setting in the column header menu (sap.ui.table.Table, property: enableColumnFreeze). Selecing Freeze on a column freezes all columns from the first one to the one where Freeze is selected. On this column, the menu entry changes from Freeze to Unfreeze.
Frozen column
Properties
sap.ui.table.Table
The following additional properties are available for the grid table:
- The property: width defines the width of the grid table.
- The property: rowHeight defines the height of each row in the grid table. Since the height required is calculated automatically by the grid table, this property is only needed rarely.
- The property: columnHeaderHeight defines the height of the column headers. Since the height required is calculated automatically by the grid table, this property is only needed rarely.
- The property: columnHeaderVisible can be used to hide the column headers. Always show the column headers.
- The property: showColumnVisibilityMenu provides an additional entry in the column header menu that allows columns to be shown or hidden. In SAP Fiori, columns are shown and hidden via the table personalization dialog or via the table personalization dialog. Do not use this property.
- The property: visibleRowCount defines the height of the grid table. Show as many rows as fit on the screen.
- The property: visibleRowCountMode defines whether the height of the grid table is fixed or automatically calculated based on the space provided by the underlying container. For automatic calculation, make sure that all rows have the same height.
- The property: minAutoRowCount defines the minimum number of rows that must be shown if the property: visibleRowCountMode is set to “auto”. Show at least three to five rows.
- The property: firstVisibleRow defines the first row shown in the visible area of the grid table. The grid table is scrolled accordingly.
- The property: allowColumnReordering is deprecated. Do not use it. Use the property: enableColumnReordering instead.
- The property: editable does not have a visible effect. Do not use it.
- The property: enableGrouping turns the experimental grouping on or off. Handle with care.
- The property: enableCustomFilter changes the filter entry in the column header menu from an edit box to Filter…. Selecting this entry throws an event to which apps can react, for example, by opening a dialog. In general, you should choose the built-in filter over your own implementation. Specifically, keep filtering via the column header menu simple, while offering more advanced options via the table personalization dialog.
- The property: enableBusyIndicator has not yet been fully implemented. Do not use it.
- The property: title adds a line of text on top of the grid table. Do not use this. To add a title to the table, use a toolbar.
- The property: footer adds a short text at the bottom of the table.
- The property: Busy sets the grid table to busy state. While in busy state, the whole table cannot be used and items cannot be read due to an overlay.
- The property: Tooltip does not have an effect. Do not use it.
sap.ui.table.Column
The following additional properties are available for the column:
- The property: visible defines whether a column is shown or hidden.
- The property: name defines the name shown in the column header menu for showing and hiding columns. In SAP Fiori, columns are shown and hidden via the table personalization dialog or via the table personalization dialog. Do not use this property.
- The property: headerSpan defines whether one column header is used for one or several columns. To prevent adverse side effects, always use one column header for only one single column. Do not use this property.
- The property: Tooltip does not have an effect. Do not use it.
Resources
Want to dive deeper? Follow the links below to find out more about related controls, the SAPUI5 implementation, and the visual design.
Elements and Controls
- Table Toolbar (guidelines)
- Variant Management (guidelines)
- View Settings Dialog (guidelines)
- Table Personalization Dialog (guidelines)
- Link (guidelines)
- Responsive Table (guidelines)
- Analytical Table (guidelines)
- Tree Table (guidelines)
- List Report Floorplan (guidelines)
- Feed List Item (guidelines)
Implementation
- Grid Table (SAPUI5 samples)
- Column (SAPUI5 samples)
- Grid Table (SAPUI5 API reference)
- Column (SAPUI5 API reference)
- Column Menu (SAPUI5 API reference)
 Your feedback has been sent to the SAP Fiori design team.