- Latest Version 1.128
- Version 1.126
- SAPUI Version 1.124
- SAPUI5 Version 1.122
- SAPUI5 Version 1.120
- SAPUI5 Version 1.118
- SAPUI5 Version 1.116
- SAPUI5 Version 1.114
- SAPUI5 Version 1.112
- SAPUI5 Version 1.110
- SAPUI5 Version 1.108
- SAPUI5 Version 1.106
- SAPUI5 Version 1.104
- SAPUI5 Version 1.102
- SAPUI5 Version 1.100
- SAPUI5 Version 1.98
- SAPUI5 Version 1.96
- SAPUI5 Version 1.94
- SAPUI5 Version 1.92
- SAPUI5 Version 1.90
- SAPUI5 Version 1.88
- SAPUI5 Version 1.86
- SAPUI5 Version 1.84
- SAPUI5 Version 1.82
- SAPUI5 Version 1.80
- SAPUI5 Version 1.78
- SAPUI5 Version 1.76
- SAPUI5 Version 1.74
- SAPUI5 Version 1.72
- SAPUI5 Version 1.70
- SAPUI5 Version 1.68
- SAPUI5 Version 1.66
- SAPUI5 Version 1.64
- SAPUI5 Version 1.62
- SAPUI5 Version 1.60
- SAPUI5 Version 1.58
- SAPUI5 Version 1.56
- SAPUI5 Version 1.54
- SAPUI5 Version 1.52
- SAPUI5 Version 1.50
- SAPUI5 Version 1.48
- SAPUI5 Version 1.46
- SAPUI5 Version 1.44
- SAPUI5 Version 1.42
- SAPUI5 Version 1.40
- SAPUI5 Version 1.38
- SAPUI5 Version 1.36
- SAPUI5 Version 1.32
- SAPUI5 Version 1.30
- SAPUI5 Version 1.28
- SAPUI5 Version 1.26
- Latest Version 1.128
- Version 1.126
- SAPUI Version 1.124
- SAPUI5 Version 1.122
- SAPUI5 Version 1.120
- SAPUI5 Version 1.118
- SAPUI5 Version 1.116
- SAPUI5 Version 1.114
- SAPUI5 Version 1.112
- SAPUI5 Version 1.110
- SAPUI5 Version 1.108
- SAPUI5 Version 1.106
- SAPUI5 Version 1.104
- SAPUI5 Version 1.102
- SAPUI5 Version 1.100
- SAPUI5 Version 1.98
- SAPUI5 Version 1.96
- SAPUI5 Version 1.94
- SAPUI5 Version 1.92
- SAPUI5 Version 1.90
- SAPUI5 Version 1.88
- SAPUI5 Version 1.86
- SAPUI5 Version 1.84
- SAPUI5 Version 1.82
- SAPUI5 Version 1.80
- SAPUI5 Version 1.78
- SAPUI5 Version 1.76
- SAPUI5 Version 1.74
- SAPUI5 Version 1.72
- SAPUI5 Version 1.70
- SAPUI5 Version 1.68
- SAPUI5 Version 1.66
- SAPUI5 Version 1.64
- SAPUI5 Version 1.62
- SAPUI5 Version 1.60
- SAPUI5 Version 1.58
- SAPUI5 Version 1.56
- SAPUI5 Version 1.54
- SAPUI5 Version 1.52
- SAPUI5 Version 1.50
- SAPUI5 Version 1.48
- SAPUI5 Version 1.46
- SAPUI5 Version 1.44
- SAPUI5 Version 1.42
- SAPUI5 Version 1.40
- SAPUI5 Version 1.38
- SAPUI5 Version 1.36
- SAPUI5 Version 1.34
- SAPUI5 Version 1.32
- SAPUI5 Version 1.30
- SAPUI5 Version 1.28
- SAPUI5 Version 1.26
SAP Fiori Launchpad Home Page
Intro
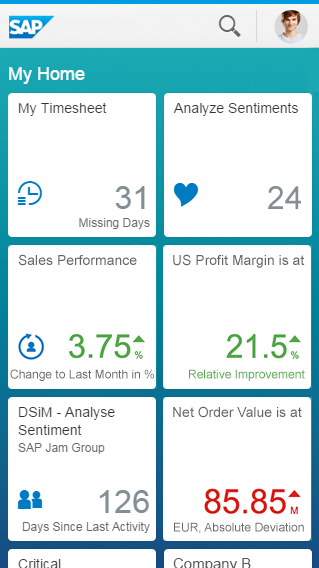
The SAP Fiori launchpad home page is the first page that users see after they have logged in. It is the main entry point to SAP Fiori apps on mobile and desktop devices.
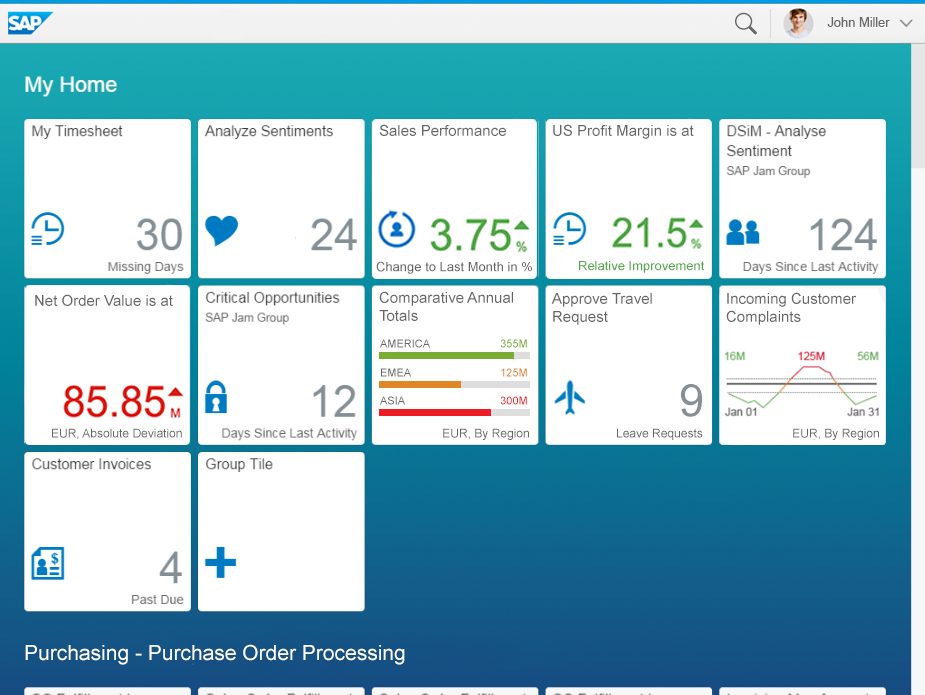
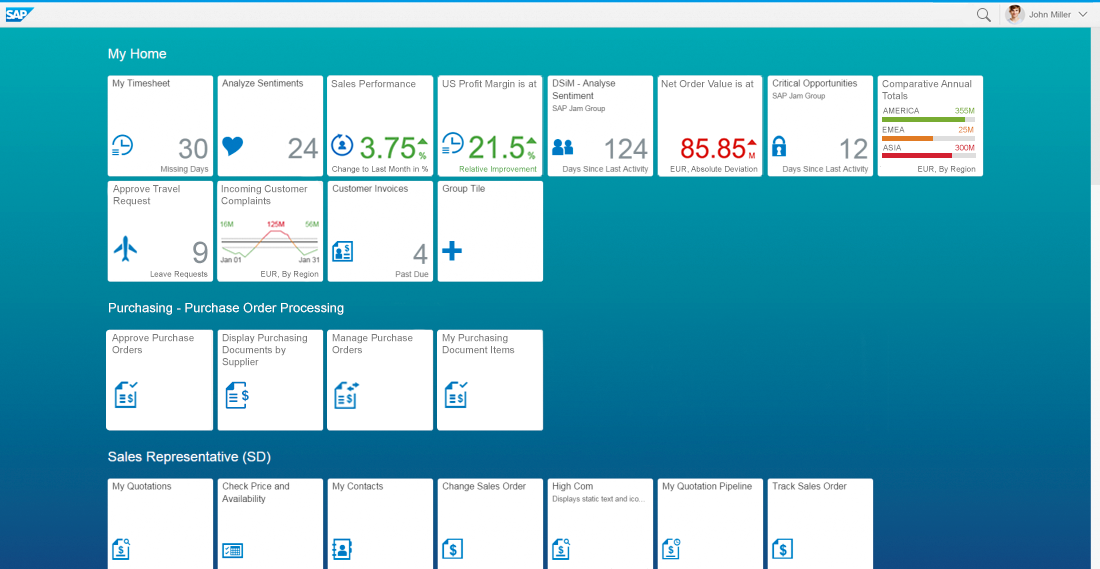
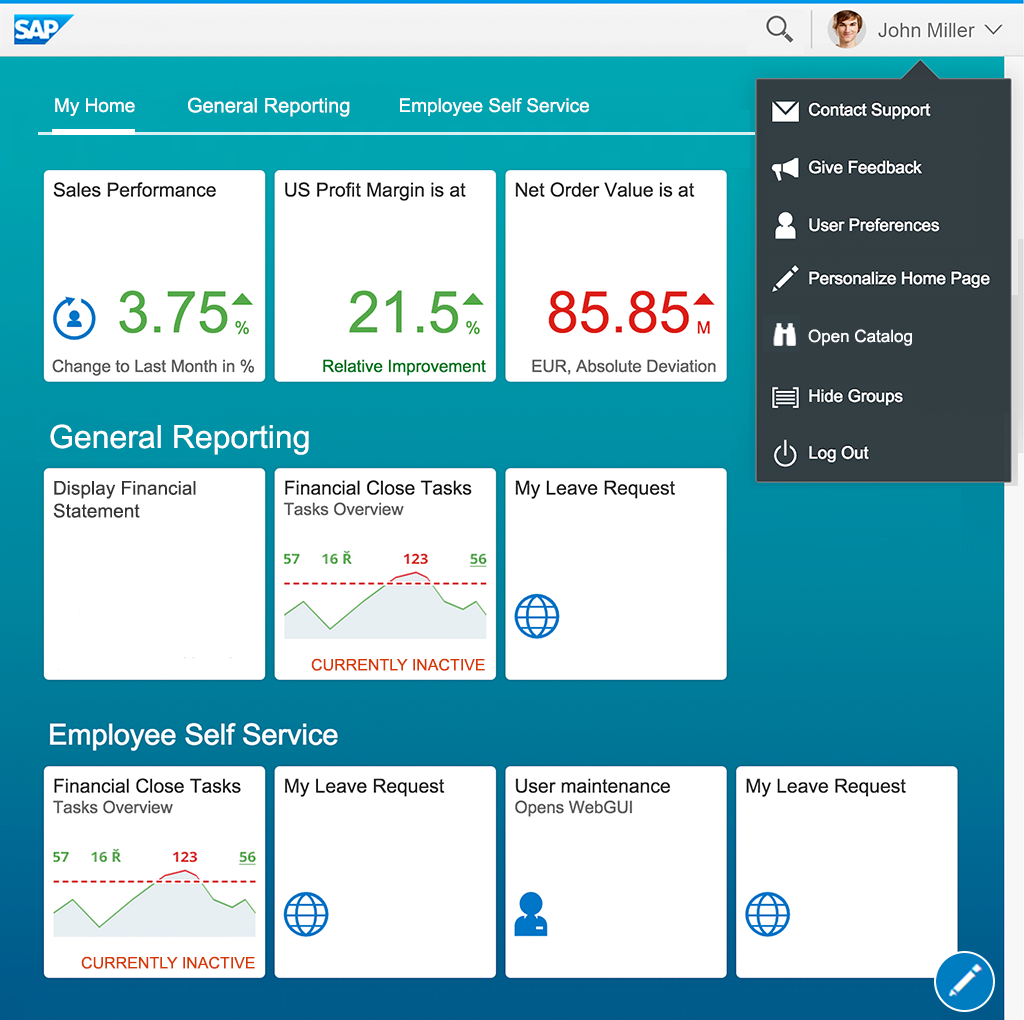
The launchpad home page displays tiles that allow the user to launch apps, and may also show additional information. The page can be personalized and tiles can be added, removed, or bundled in groups.
The home page is provided by the SAP Fiori launchpad. Apps use this home page and do not have their own individual design.
Responsiveness
Components
Tiles
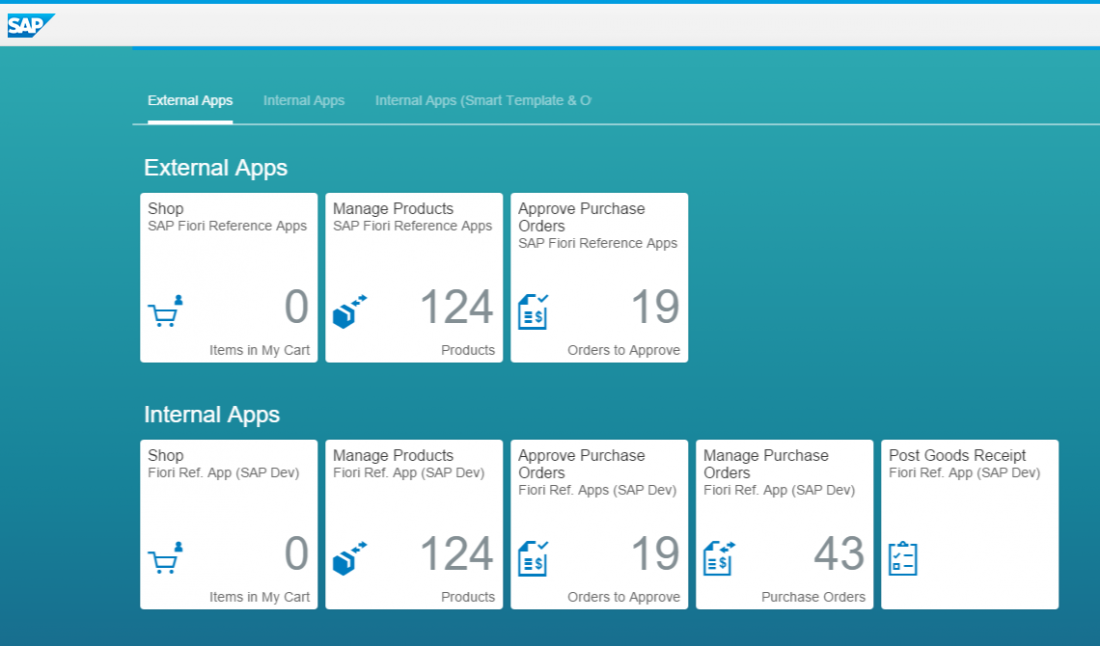
The tiles provide direct access to apps or content. They are similar to large icons and have a rectangular shape.
The launchpad home page comes with a predefined set of groups and tiles. However, the user can also personalize the launchpad home page to reflect their individual roles by choosing from a wide range of ready-to-use tiles from the tile catalog.
Tiles differ in the content they display. They can contain an icon, a title, some informative text, numbers, and charts. The information that is shown depends on the function of the tile or app.
The number of tiles visible on a page depends on the screen resolution. The tiles are placed below each other and are resized for smaller screens.
Anchor Bar
In the launchpad home page, tiles are usually clustered in groups. These groups are listed in the anchor bar at the top of the page.
By clicking on an entry, it gets highlighted and the according group is displayed at the top of the home page.
As the group panel does not exist anymore, the tile catalog is displayed in the options menu top right.
Behavior and Interaction
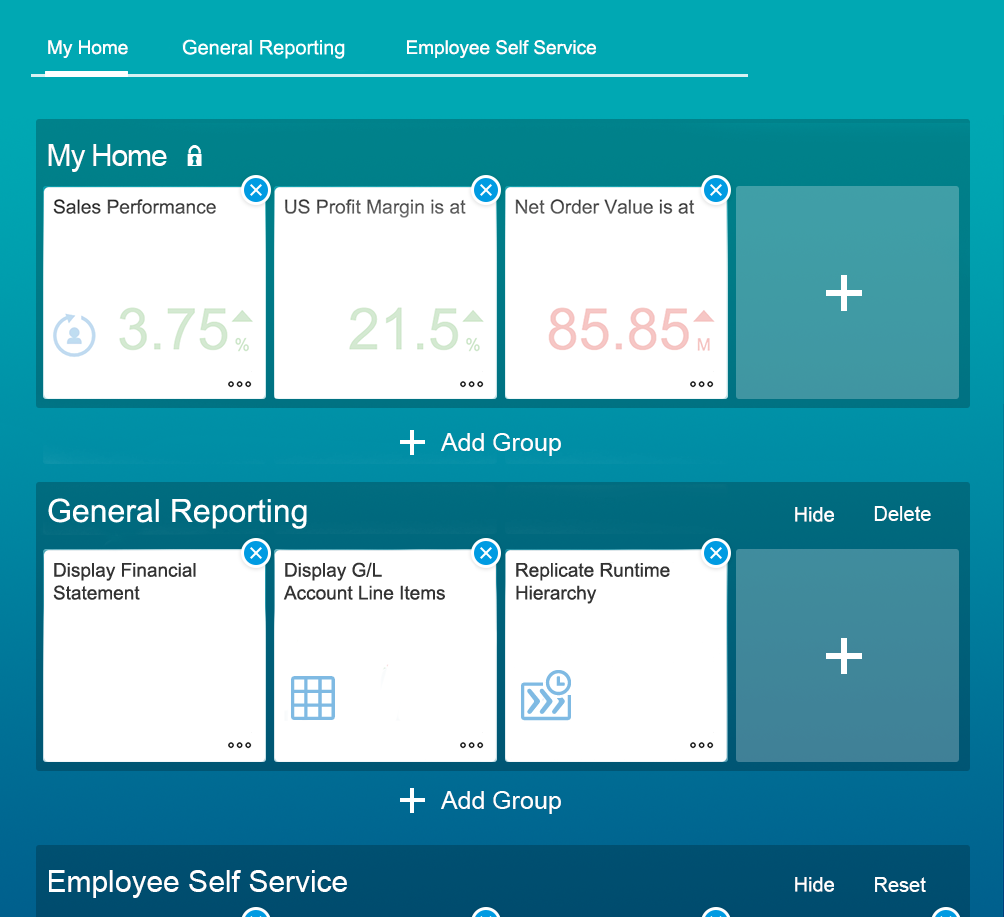
Users can personalize their home page in a variety of ways. Some actions can be carried out directly, while others require the user to activate the personalization mode.
To enable more enhanced personalization functions, such as the ability to rearrange groups or to customize tiles, the user must select Personalize Home Page via the action sheet or via a floating icon on the top right corner of the home page.
Tiles
Tiles have the following behavior and interactions:
Generic Actions
(via Personalize Home Page only)
When the Personalize Home Page is activated and the user clicks or taps a tile, an action sheet appears showing a list of generic actions, such as Settings or Move. Tile designers can also add additional generic actions.
Settings opens a dialog in which the user can change the information that is displayed on a tile, such as the title or description.
If you want to move the tile to a different group, Move opens a dialog in which the user can move the selected tile to a different group.
Removing Tiles
(via Personalize Home Page only)
The user can remove tiles by clicking or tapping the Remove icon on the top right corner of a tile.
Adding Tiles
To add tiles, users can either click or tap the Add icon ( ) on an empty group or by using the tile catalog. This will take the user to the catalog displaying all available apps. To find a specific tile, the user can select a tile category from the dropdown box and/or use the search field.
Moving Tiles
The user can rearrange tiles by dragging them to a new location in the same group, or by dragging them to a different group.
Opening Tiles
Clicking or tapping a tile opens the underlying app or content item.
Groups
Via Personalize Home Page, users can customize groups to their needs:
Adding Groups
Users can add a new group by clicking or tapping the + Add Group button. The user will be prompted to enter a new group name. If the user doesn’t immediately enter a name, the placeholder text Enter group name will appear as the default name. Once the group is created, it will appear below + Add Group on the launchpad home page.
Moving Groups
The user can rearrange a group by dragging it to a new location in the group panel.
Renaming Groups
Users can rename groups by clicking or tapping a group name. A text box appears in which the user can enter the new name, which is then saved automatically. To discard a change while the text box is visible, the user must press Escape.
Deleting Groups
Users can delete groups they have created (including all the tiles they contain) by pressing Delete. Note that predefined groups, such as My Home, or locked groups (as defined by customers) cannot be deleted.
Resetting Groups
By clicking or tapping Reset, a user can reset a predefined group to its initial state as defined by an administrator.
Hiding Groups
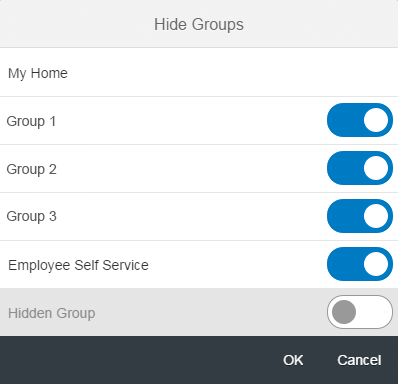
The Hide Groups dialog can be called up from the shell bar above the home page (see shell bar). It allows the user to temporarily hide one or more groups on the launchpad home page. It is only available on the launchpad home page.

 Your feedback has been sent to the SAP Fiori design team.