
2.00 - 1.90
Onboarding the User
Intro
Background:
Users need to understand what the Digital Assistant (DA) is, how it helps them, and what they can use it for.
Users generally think digital assistants are either a lot smarter than they are or write them off entirely. They also think that one enterprise’s digital assistant is the same as the next, and is capable of similar tasks. This is not the case, as Siri is not the same as Cortana, and Cortana is not the same as SAP’s own digital assistant. Because of this, users are less likely to explore and more likely to be disappointed.
Onboarding should correct these misassumptions and set appropriate expectations for further use.
We want to prevent users from disappointment when interacting with digital assistants, from losing trust and from writing it off.
Applicability:
- This framework was created to address first-time use of the Digital Assistant, but can be abstracted to address other use cases.
- Product updates do not use this framework–instead, updates are shown through notifications in Fiori.
Framework Overview:
When people think of onboarding, they usually only think of the “onboarding flow” section of the framework. This section is the main user experience of onboarding. However, things should also be done before and after to reinforce what we want users to learn during the onboarding flow. We want to set the same expectations repeatedly.
Usage:
This framework is a set of questions that should be addressed before one sits down to design the onboarding flow. Each question corresponds to actions and pages in the onboarding flow. Actions before and after the onboarding flow support expectations being set by the onboarding flow.
Guiding Principles
These principles are considered to be the best practices for onboarding users to new products.
- Build momentum towards using the app, don’t bring the user out of the flow with notifications, alerts or directing them away from the app.
- Be transparent with permissions.
- Keep onboarding flexible, as this allows users to feel like the app is tailored towards them.
- Have quick successes with users trying small tasks.
Part 1: Before Onboarding
The messaging users are given before onboarding flow is considered as part of onboarding. Messaging needs to be consistent throughout the parts of the onboarding framework.
1. Message to Customers
Question to answer:
What is the value to the business?
2. Message to End Users
Question to Answer:
What is the value to the end users?
3. Establish Awareness
Questions to Answer:
How do end users find out about this capability?
Guidance:
Customers and end users are not the same. Customers care about how it will impact their business. End users care about how it will impact their day.
Guidance:
The value should be simple, and specific relating to the user, describing the benefit and how it fits into their day-to-day life. Gross generalizations should be avoided.
It is important to not use marketing language here or elsewhere in the onboarding framework. Through testing, we found that people were much more suspicious and less trusting when marketing language was used.
Guidance:
This is about discoverability. It is best if the user hears about the product beforehand and understands its value before even opening the product. This, for example, could take place in an email the company sends out or as a part of feature highlights.
Part 2: Onboarding Flow
This flow is a series of steps that introduce the product and it takes place when the user opens up the app for the first time only.
Each step usually has one or two lines of text followed by an illustration. The Illustration should provide the same details as the text, so users who choose to not read the text will still grasp the concept.
The language used here should be straightforward and simple. It should tell the user what it is and why they might want to use it, but it should not try to sell the product. Do not use marketing language, as it diminishes trust.
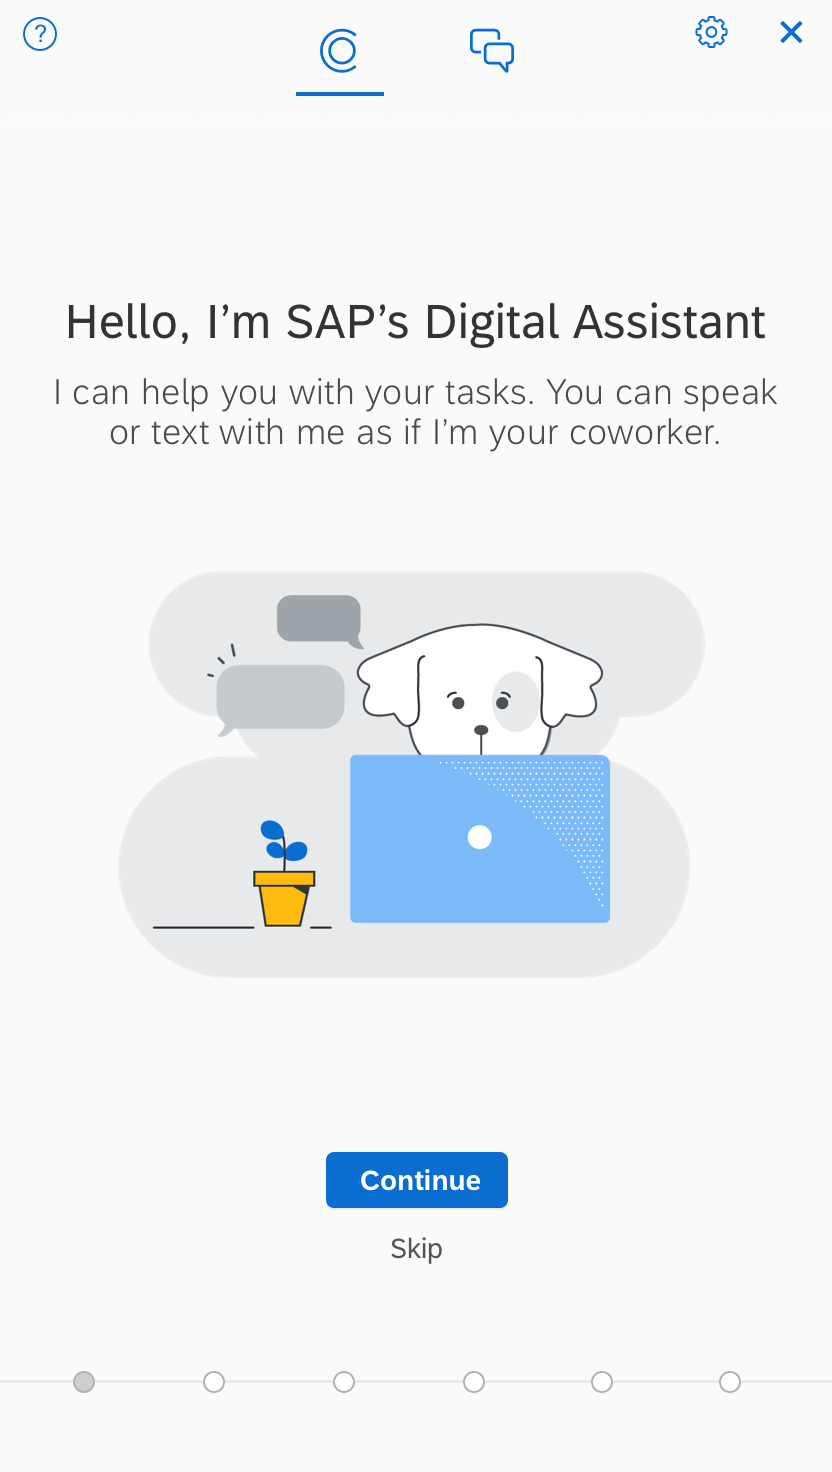
1. Welcome
Purpose:
Set the mental model. This should tell the user what the product is and how they should think about using it.
Guidance:
The mental model is how the user should think of this product. This should be stated in only a couple of words. The rest of the text should be aligned with the ‘Message to End Users’ in Part 1.
It’s also important to ensure the user is aware they are interacting with a non-human so as to not mislead them about the chatbot’s artificial identity. This is to not only comply with the B.O.T. Act, or California Senate bill 1001, but also to bolster transparency and trust between the user and the bot.
This step is mandatory.
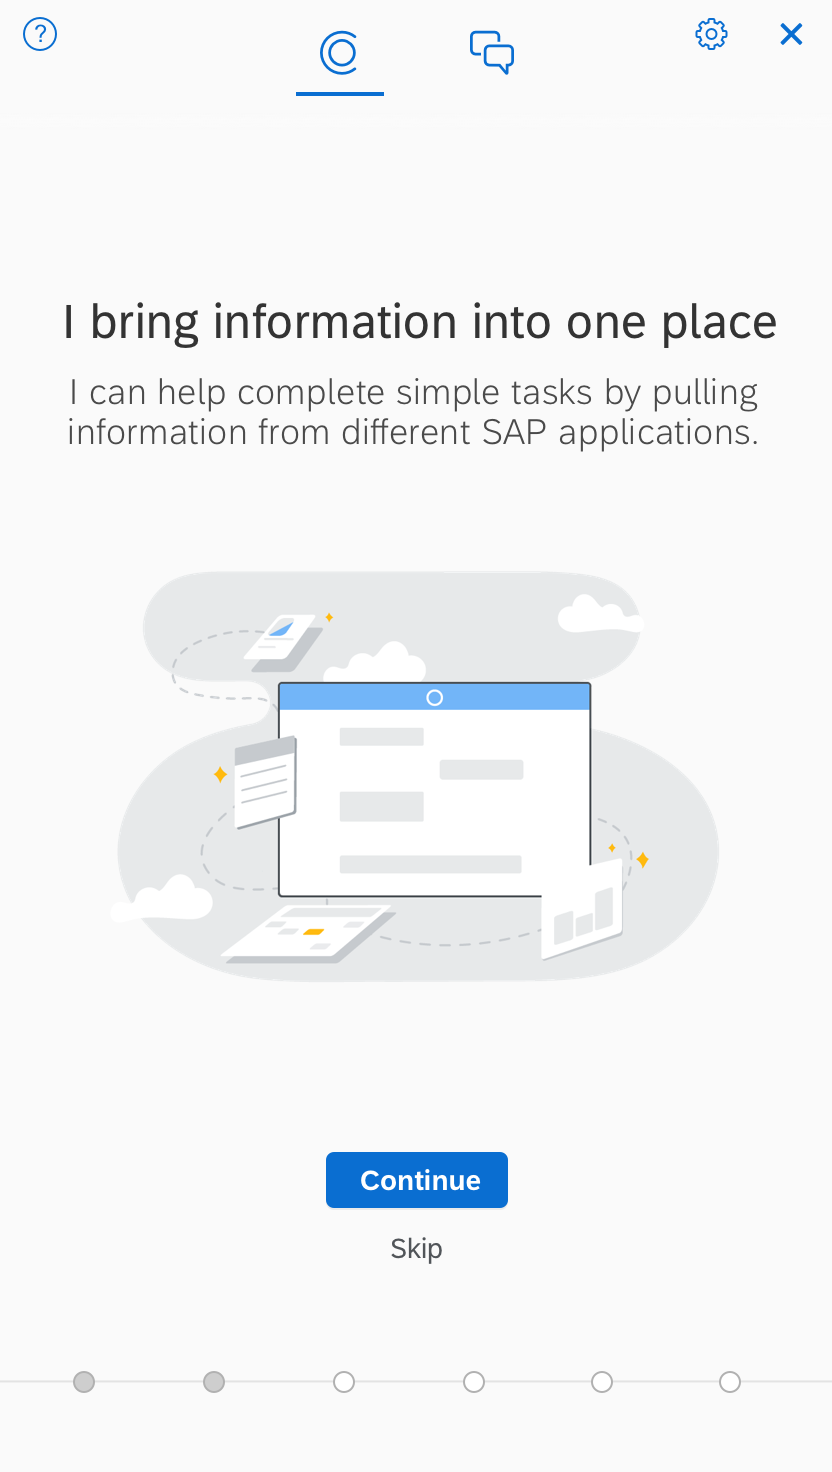
2. What is the product?
Purpose:
This step states what the product is intended to do and how it helps the end users in their day to day work.
Guidance:
Show the value to the end users. State how this product is different from other similar products. This should be in alignment with the ‘Message to End Users’ from Part 1, but focuses on differentiation.
This step is mandatory.
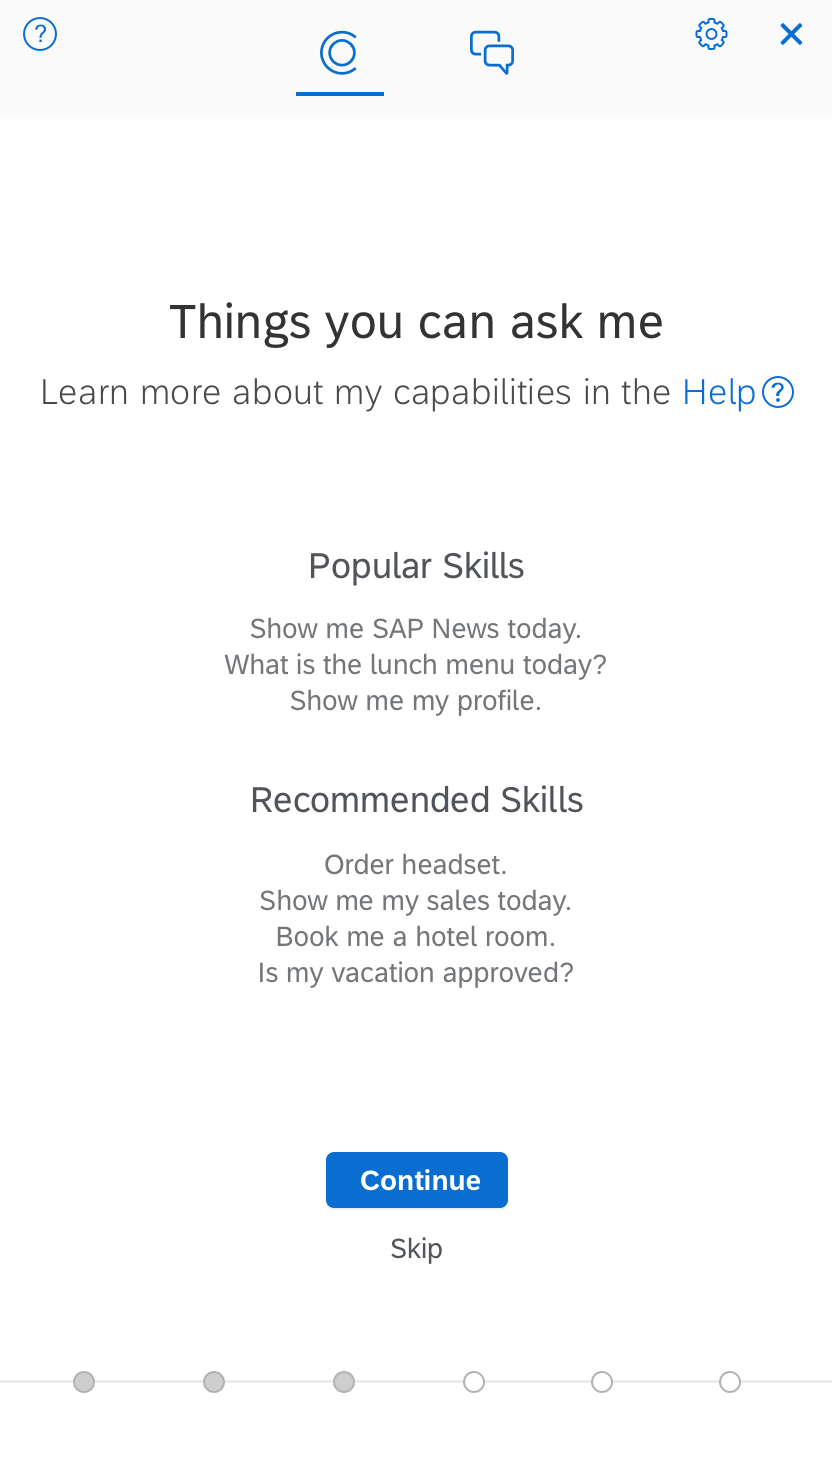
3. What can it do?
Purpose:
The users need to know what this product can do. State what its capabilities are, and highlight the capabilities that are specific to the end user’s work needs/role.
Guidance:
Capabilities are the most important information to communicate during onboarding. The capabilities show and reinforce the value of the tool.
Provide examples to show the range of product capabilities. Give examples of more complex tasks, to set expectations in the higher range. Users should step away from this screen having an overview of what they can do with the system.
This step is mandatory.
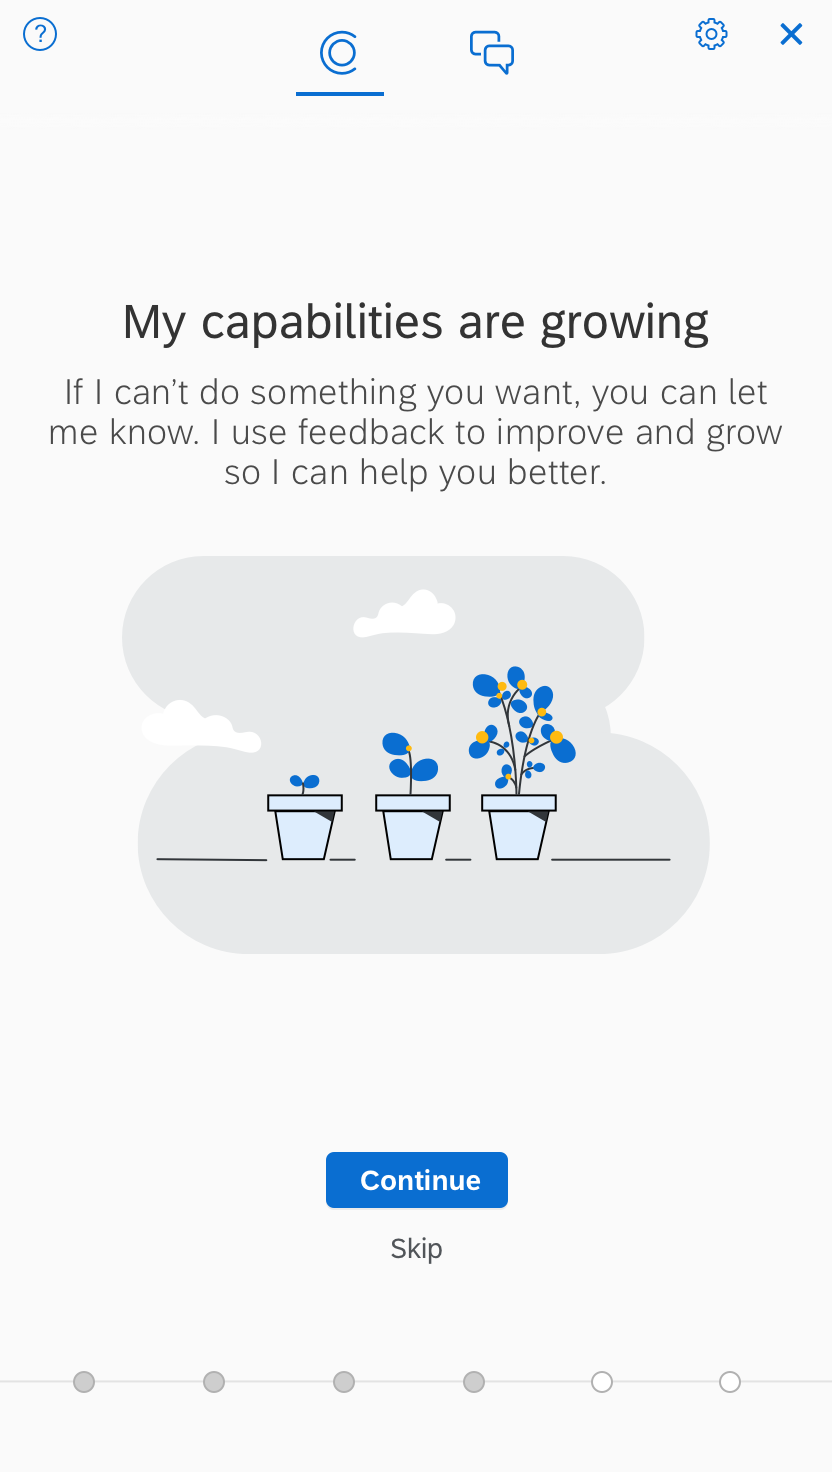
4. What can’t it do?
Purpose:
Users need to know what the product cannot do. State what the limitations are.
Guidance:
One should frame this in a positive way. Users should know what to expect, so they are not let down when the product cannot do what they want it to do.
This step should keep the users open to exploring at a later time.
Example:
We framed the limitations as ‘this product is growing’ and talked about the feedback loop of how the users could help make the Digital Assistant better. We found that when talking about feedback, the product seemed smarter without carrying any expectations that it was.
If ‘Error Handling’ is strong, this page is still highly suggested. If ‘Error Handling’ doesn’t exist, this page is mandatory.
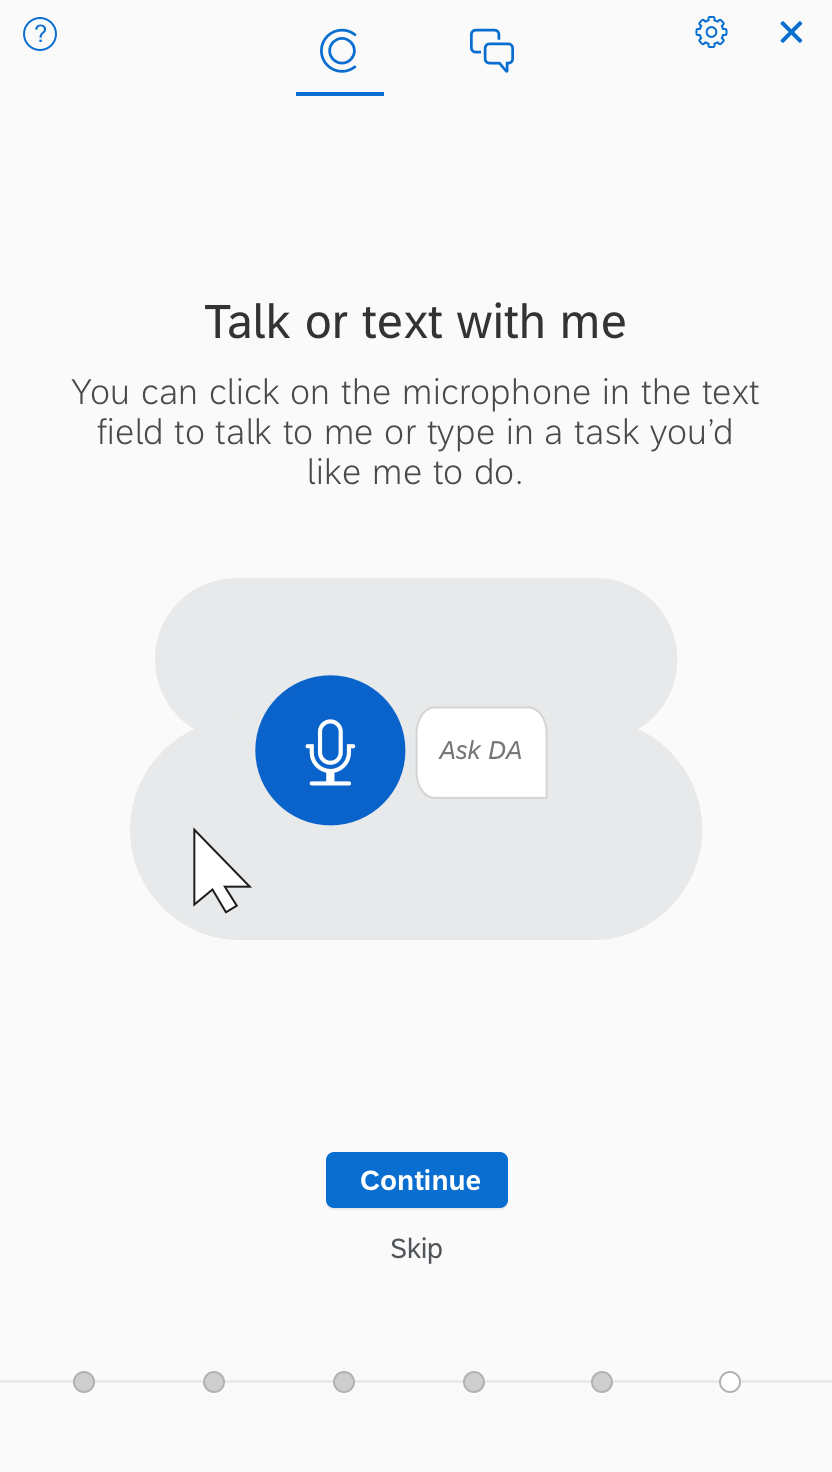
5. Train users
Questions to answer:
Based on testing, what are the users confused about?
Guidance:
When testing the prototype, take note of user errors. This step is meant to address those errors and any mismatch of usage or users expectations of the system.
For the image, if the concept requires animation, use animation. If the concept can be illustrated as a static image, use that.
Example:
When we tested the prototypes for this flow, users thought they could just talk to the Digital Assistant without clicking the microphone first. They were annoyed when it didn’t respond.
This step trains the users to press the microphone in order to talk to the Digital Assistant. As users become more familiar with chatbots, this page can disappear.
If there is nothing that users need training on, this step is optional.
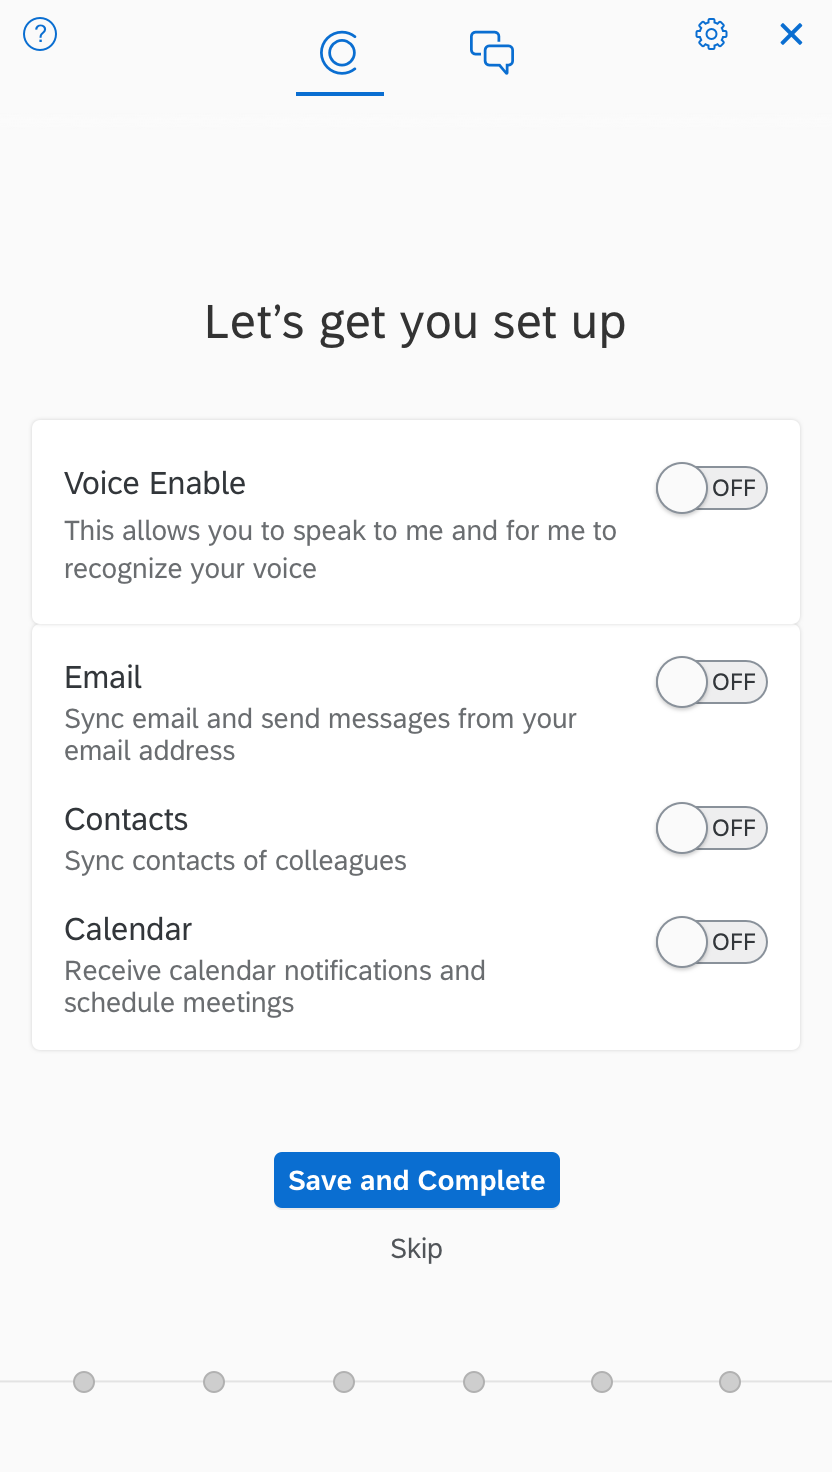
6. Settings
Purpose:
For each setting, state:
- What the setting is.
- What this setting will change.
- Why permission is needed for this setting.
Guidance:
The setting page can have nested settings. In the case of SAP’s Digital Assistant, these nested settings will be used for the adaptive personality.
If there’s only one setting, this step is optional. Either combine it with another page or have it shown in the UI.
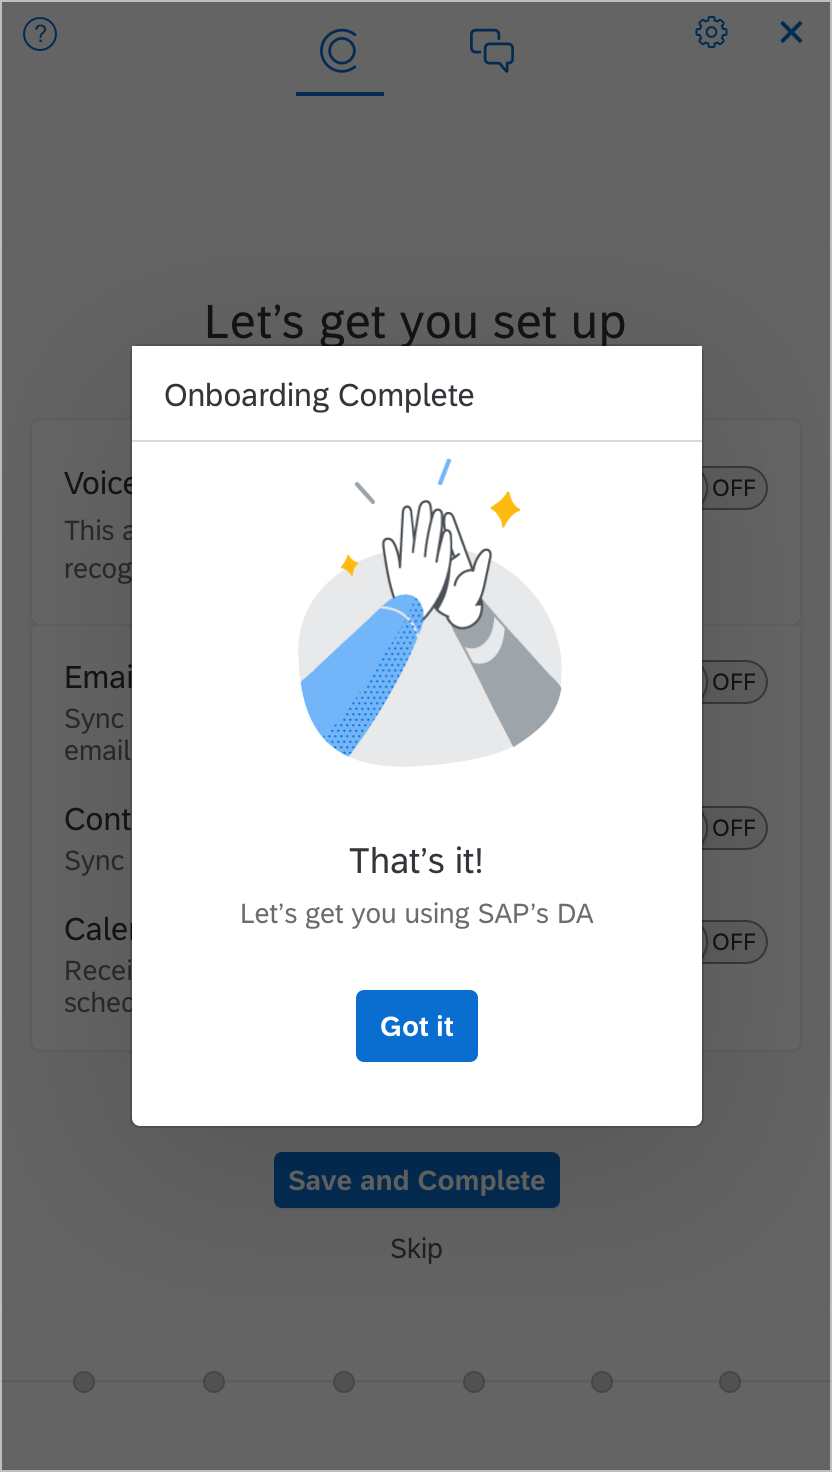
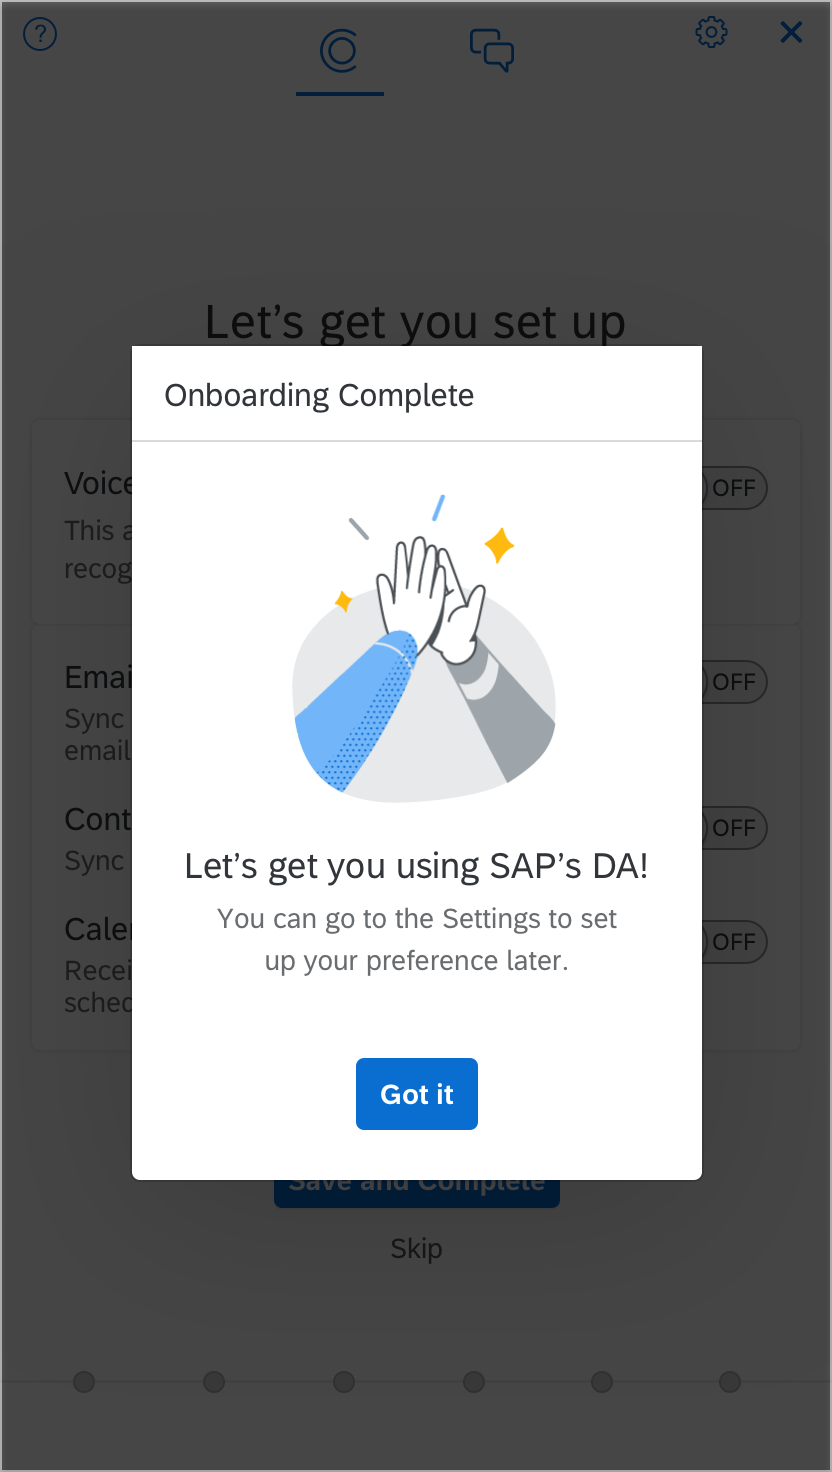
7. Success Message
Purpose: To let the user know that the onboarding steps have been completed successfully.
This step is mandatory.
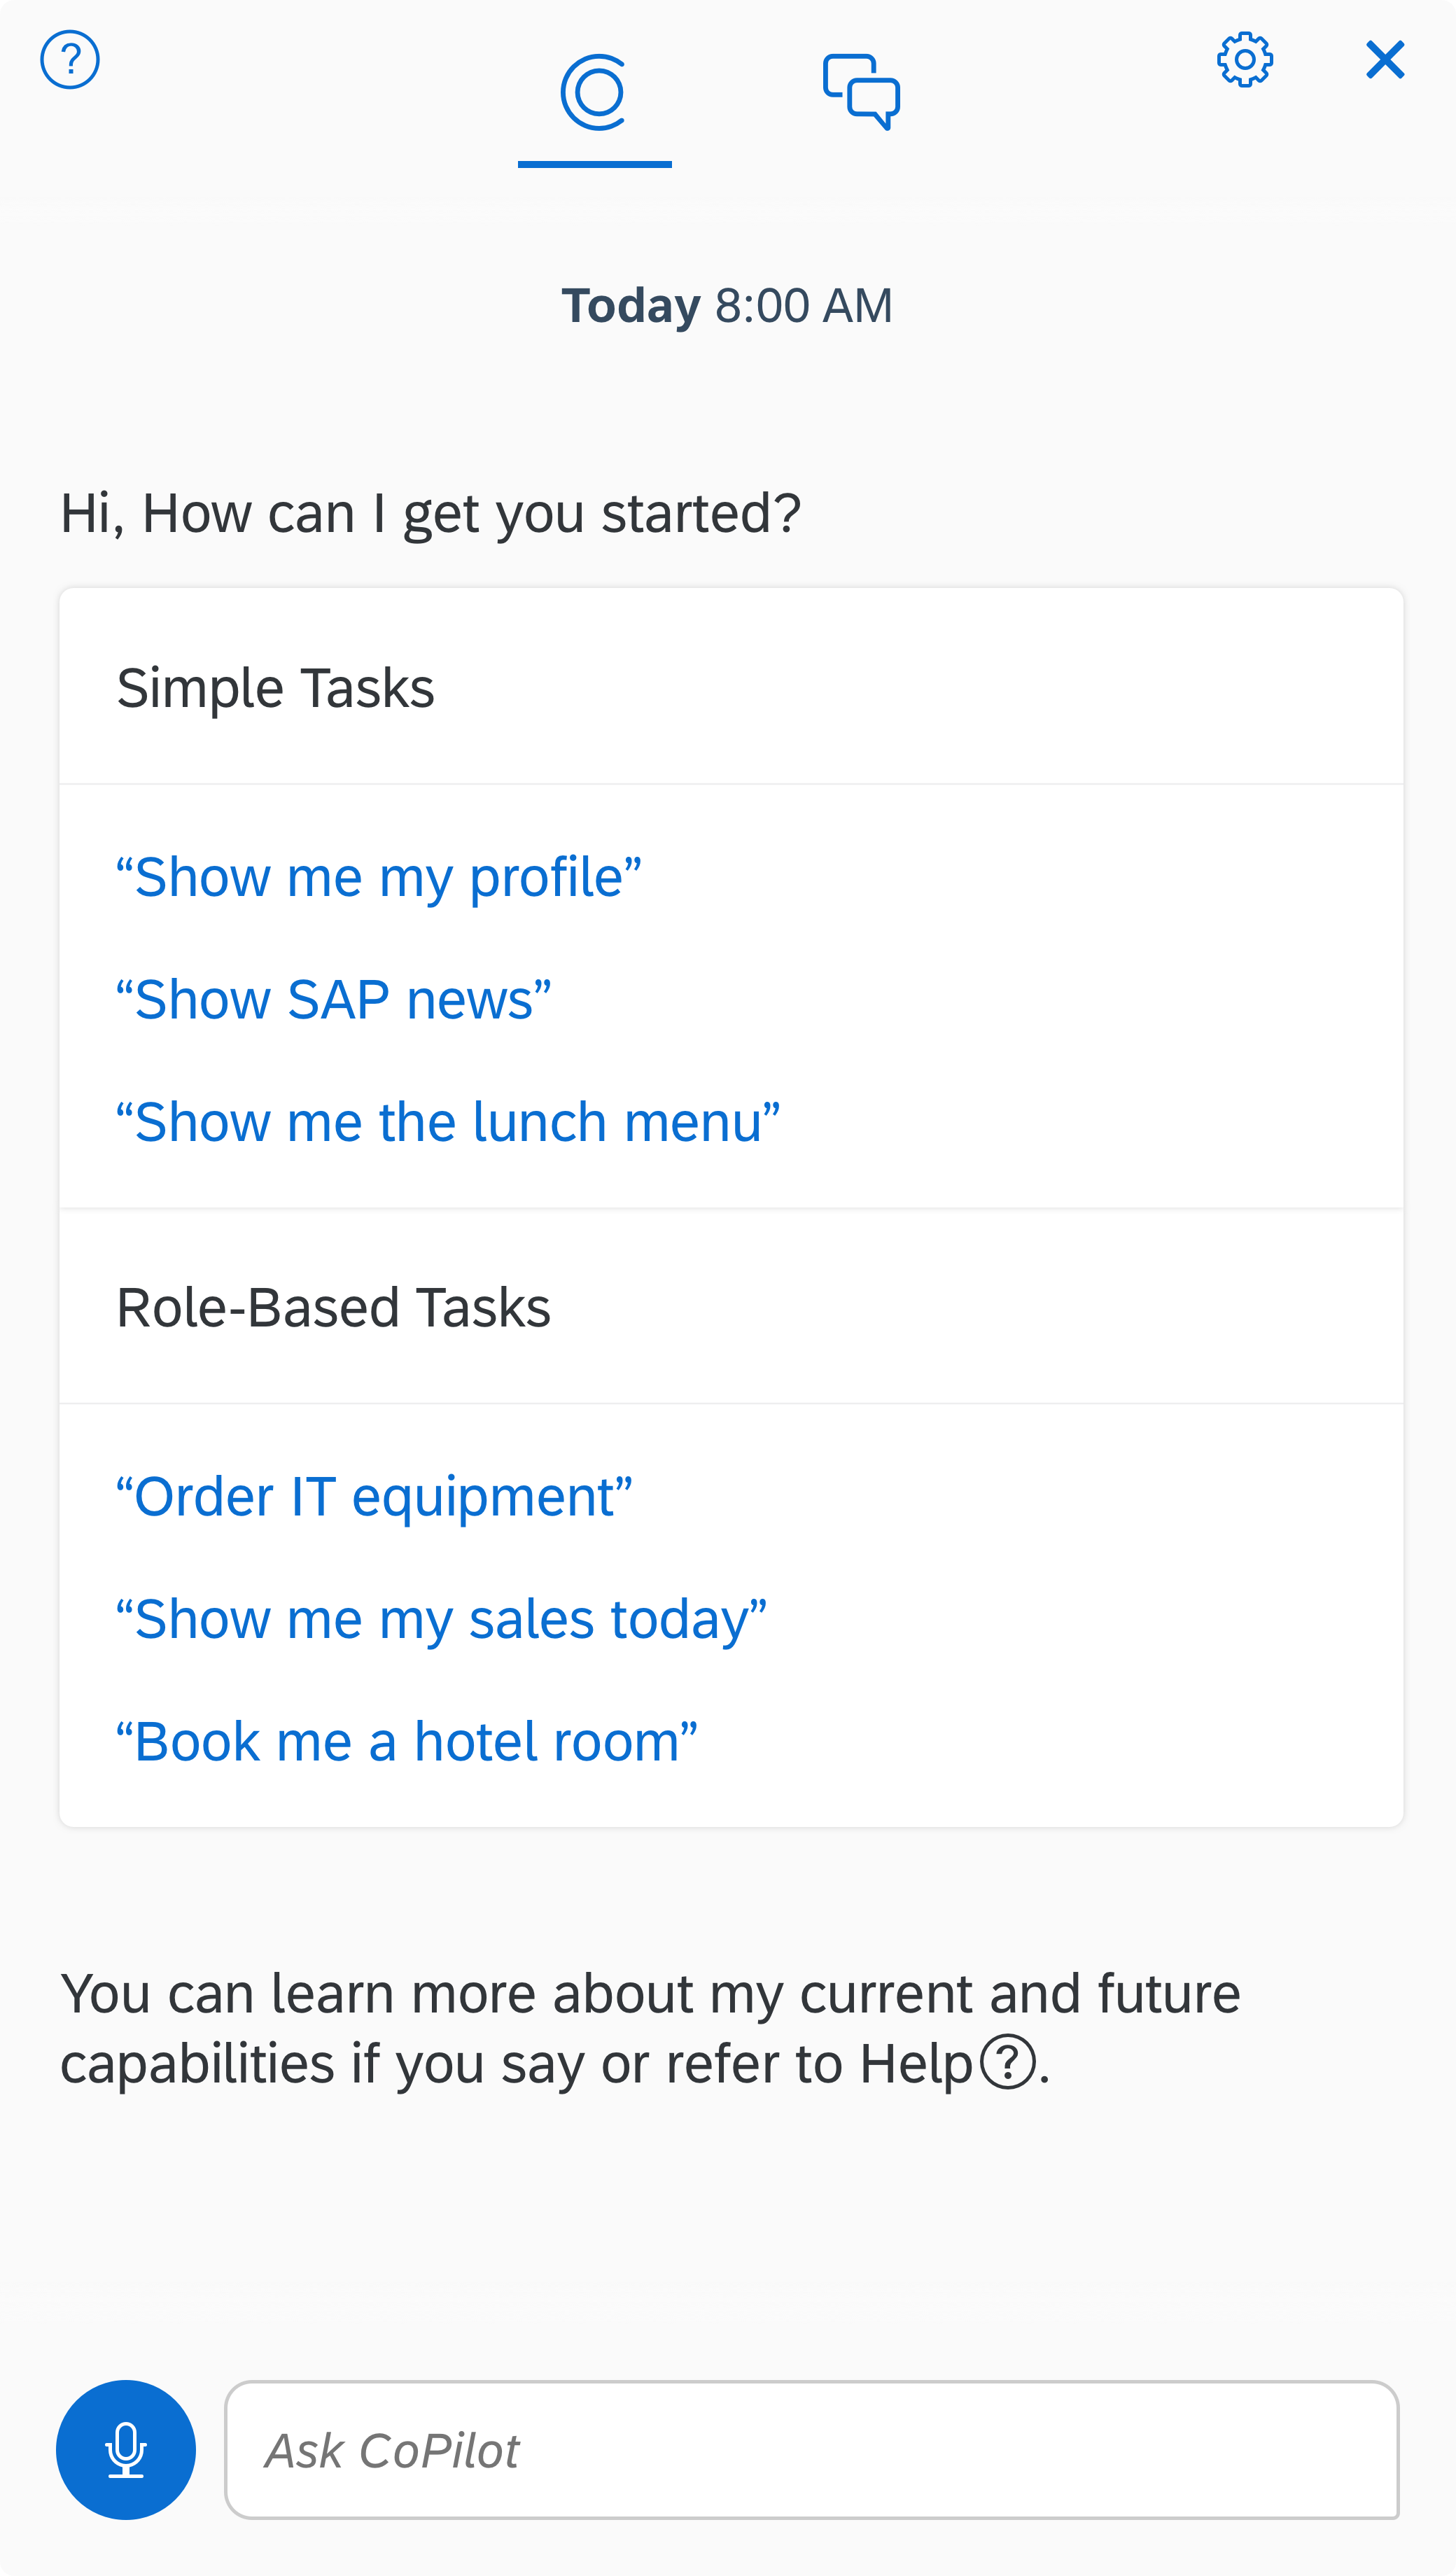
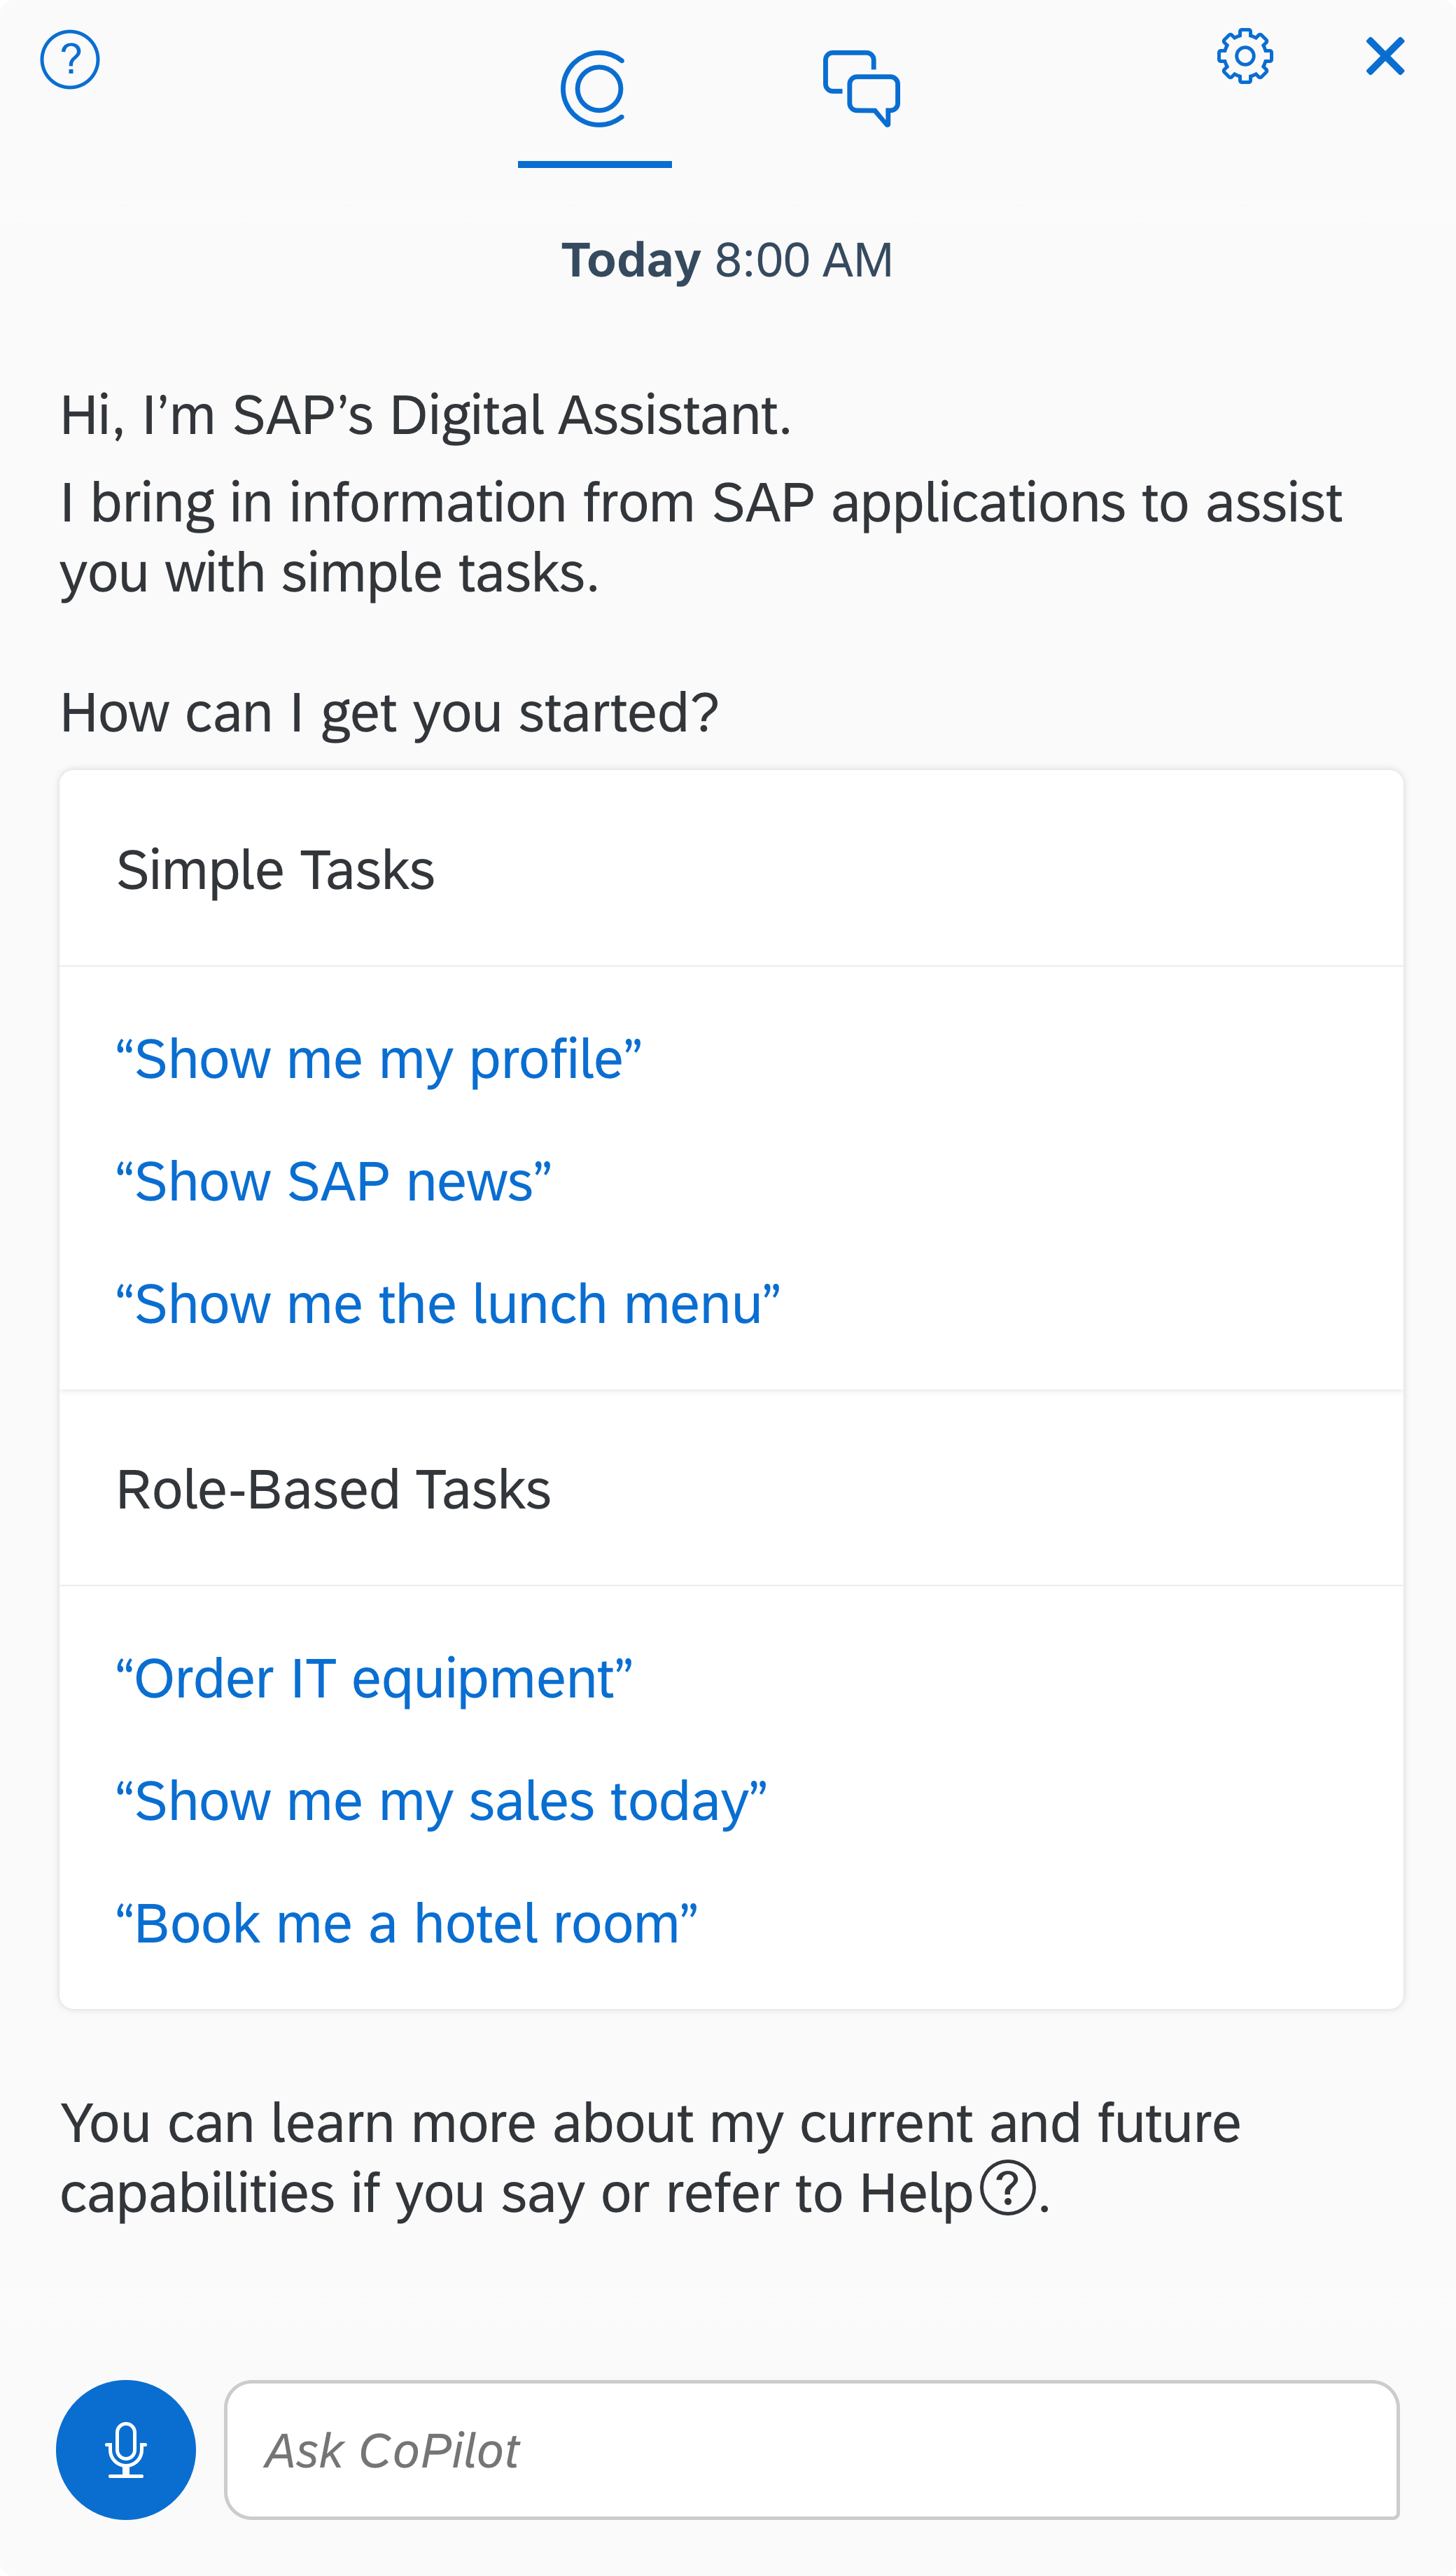
8a. End of Onboarding
After the success message, the user can start using the product.
Questions to answer:
What does the user see when first using the product? How is the user meant to start using the product? What information from the onboarding flow needs to be reinforced?
Example:
We show capabilities because people wanted to try out some of the skills. Whatever you show should encourage the user to use the tool on their own.
This step is mandatory.
8b. End of Onboarding: When Onboarding is skipped
A lot of people skip onboarding flow, or go from screen to screen without reading the content. How can we give these people the same key information but in a condensed form?
Guidance:
Summarize content from steps #1-5 into a couple of sentences. This should give the same high-level overview in a shorter form.
This step is mandatory.
Part 3: After Onboarding
1. Web Asisstant’s Tour/ Xray
Questions to answer:
What details need more guidance and should be included as part of the Web Assistant’s Tour?
2. One Week After
Questions to answer:
Where can you temporality augment current functionality to reinforce the mental model and the capabilities?
3. Ongoing
Questions to answer:
When a user utilizes something new within the product for the first time, how do you address this new experience?
Guidance:
The onboarding flow is high level and tells the user what they can expect in broad terms. The Web assistant should always follow this, not replace the onboarding flow. It is where you can go deep into the layout and explain the product’s interface.
Optional if there is nothing to explain further.
Guidance:
Features should return to normal state after a given period of a week or two.
Example:
For CUX, this would take place in small talk where it would talk more about its capabilities during that time period
Example:
‘Onboarding for Skills’ (i.e., one needs to answer the questions laid out in the onboarding flow when using a skill for the first time).
‘Onboarding for skills’ should communicate what that skill is, what it is not, get permissions, and walk them through the skill for the first time.
This step is mandatory.
4. Refresher for the user on what to expect.
Questions to answer:
How do you enable users to learn more about the product after onboarding?
Example:
For the Digital Assistant, this means skills inquiry.
Documents
Onboarding Framework
Digital Assistant Onboarding: