Adaptive Behavior and Navigation

Navigation Components

The navigation region holds the primary navigation components such as:


  • Navigation Bar
  • Navigation Rail
  • Navigation Drawer


These components help users to navigate between destinations within the app and access important actions. The adaptive navigation feature dynamically swaps out navigation components during runtime as the window sizes change. The scaffolding automation provided by Android automatically adjusts the standard M3 navigation components to fit the relevant breakpoints.
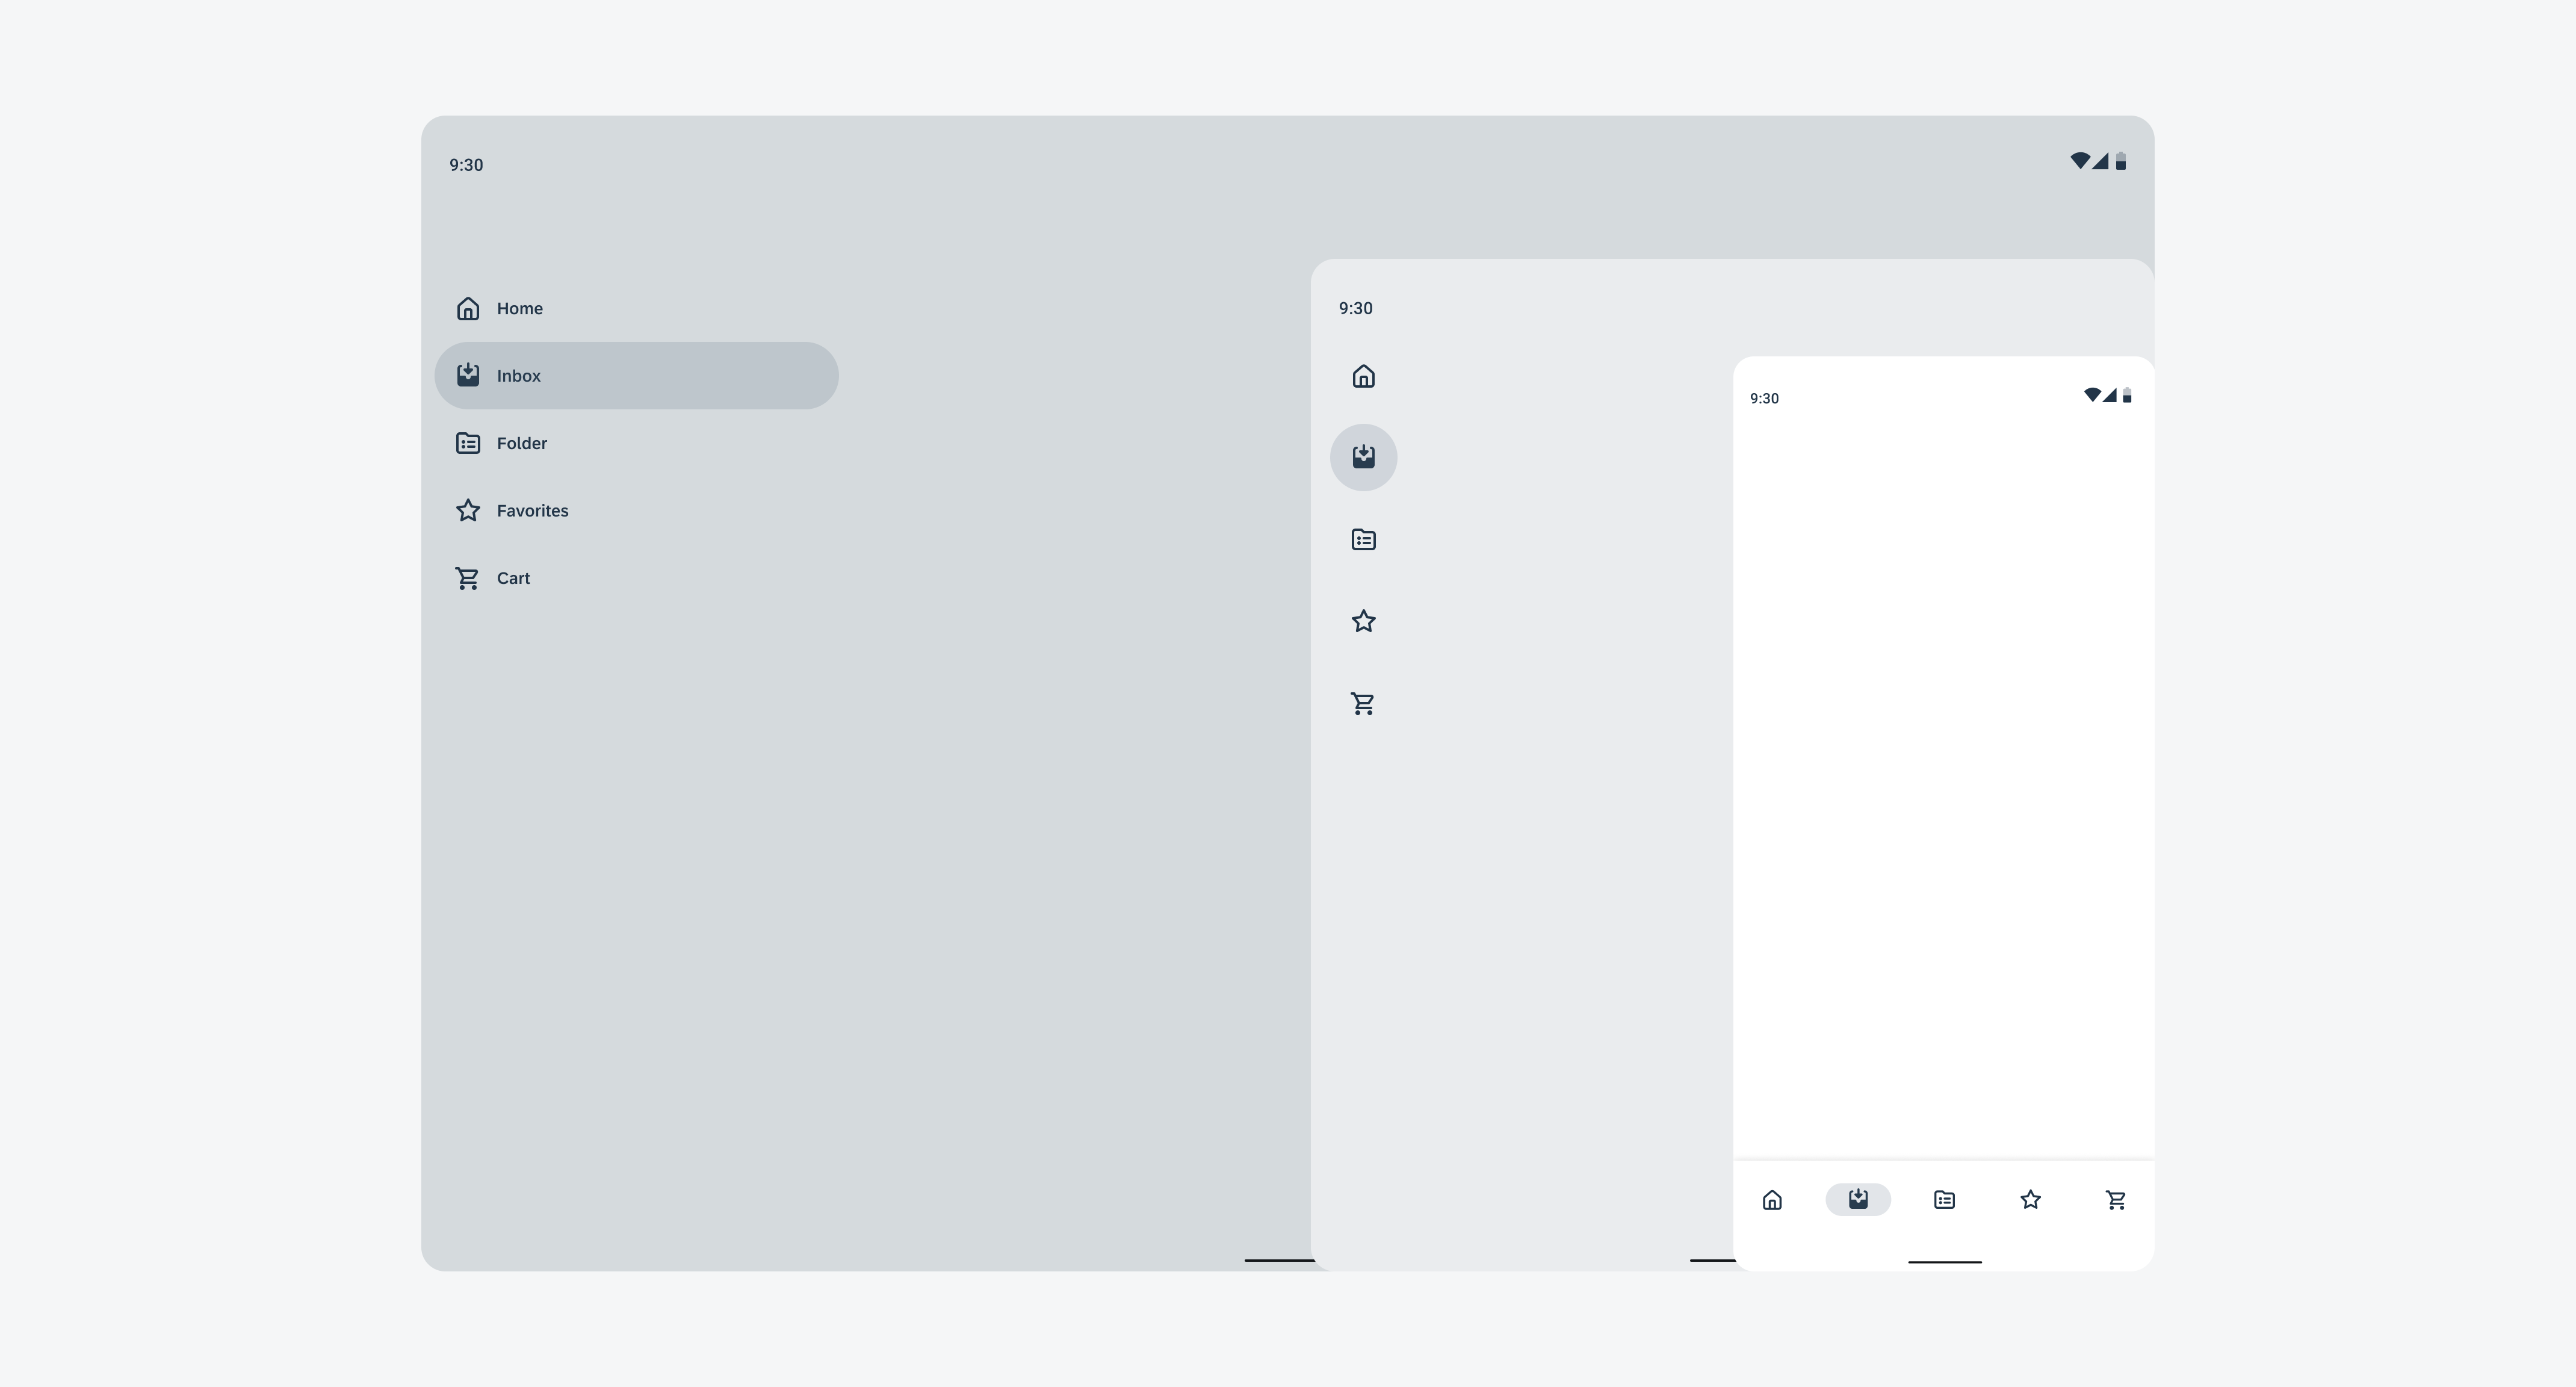
Schematics illustrating the swapping behavior of the navigation components

Profile and Setting

To maintain consistency across all SAP products, the entry point for the user profile and settings is located on the right side in the top app bar. It’s recommended to place the user profile on the home screen only.
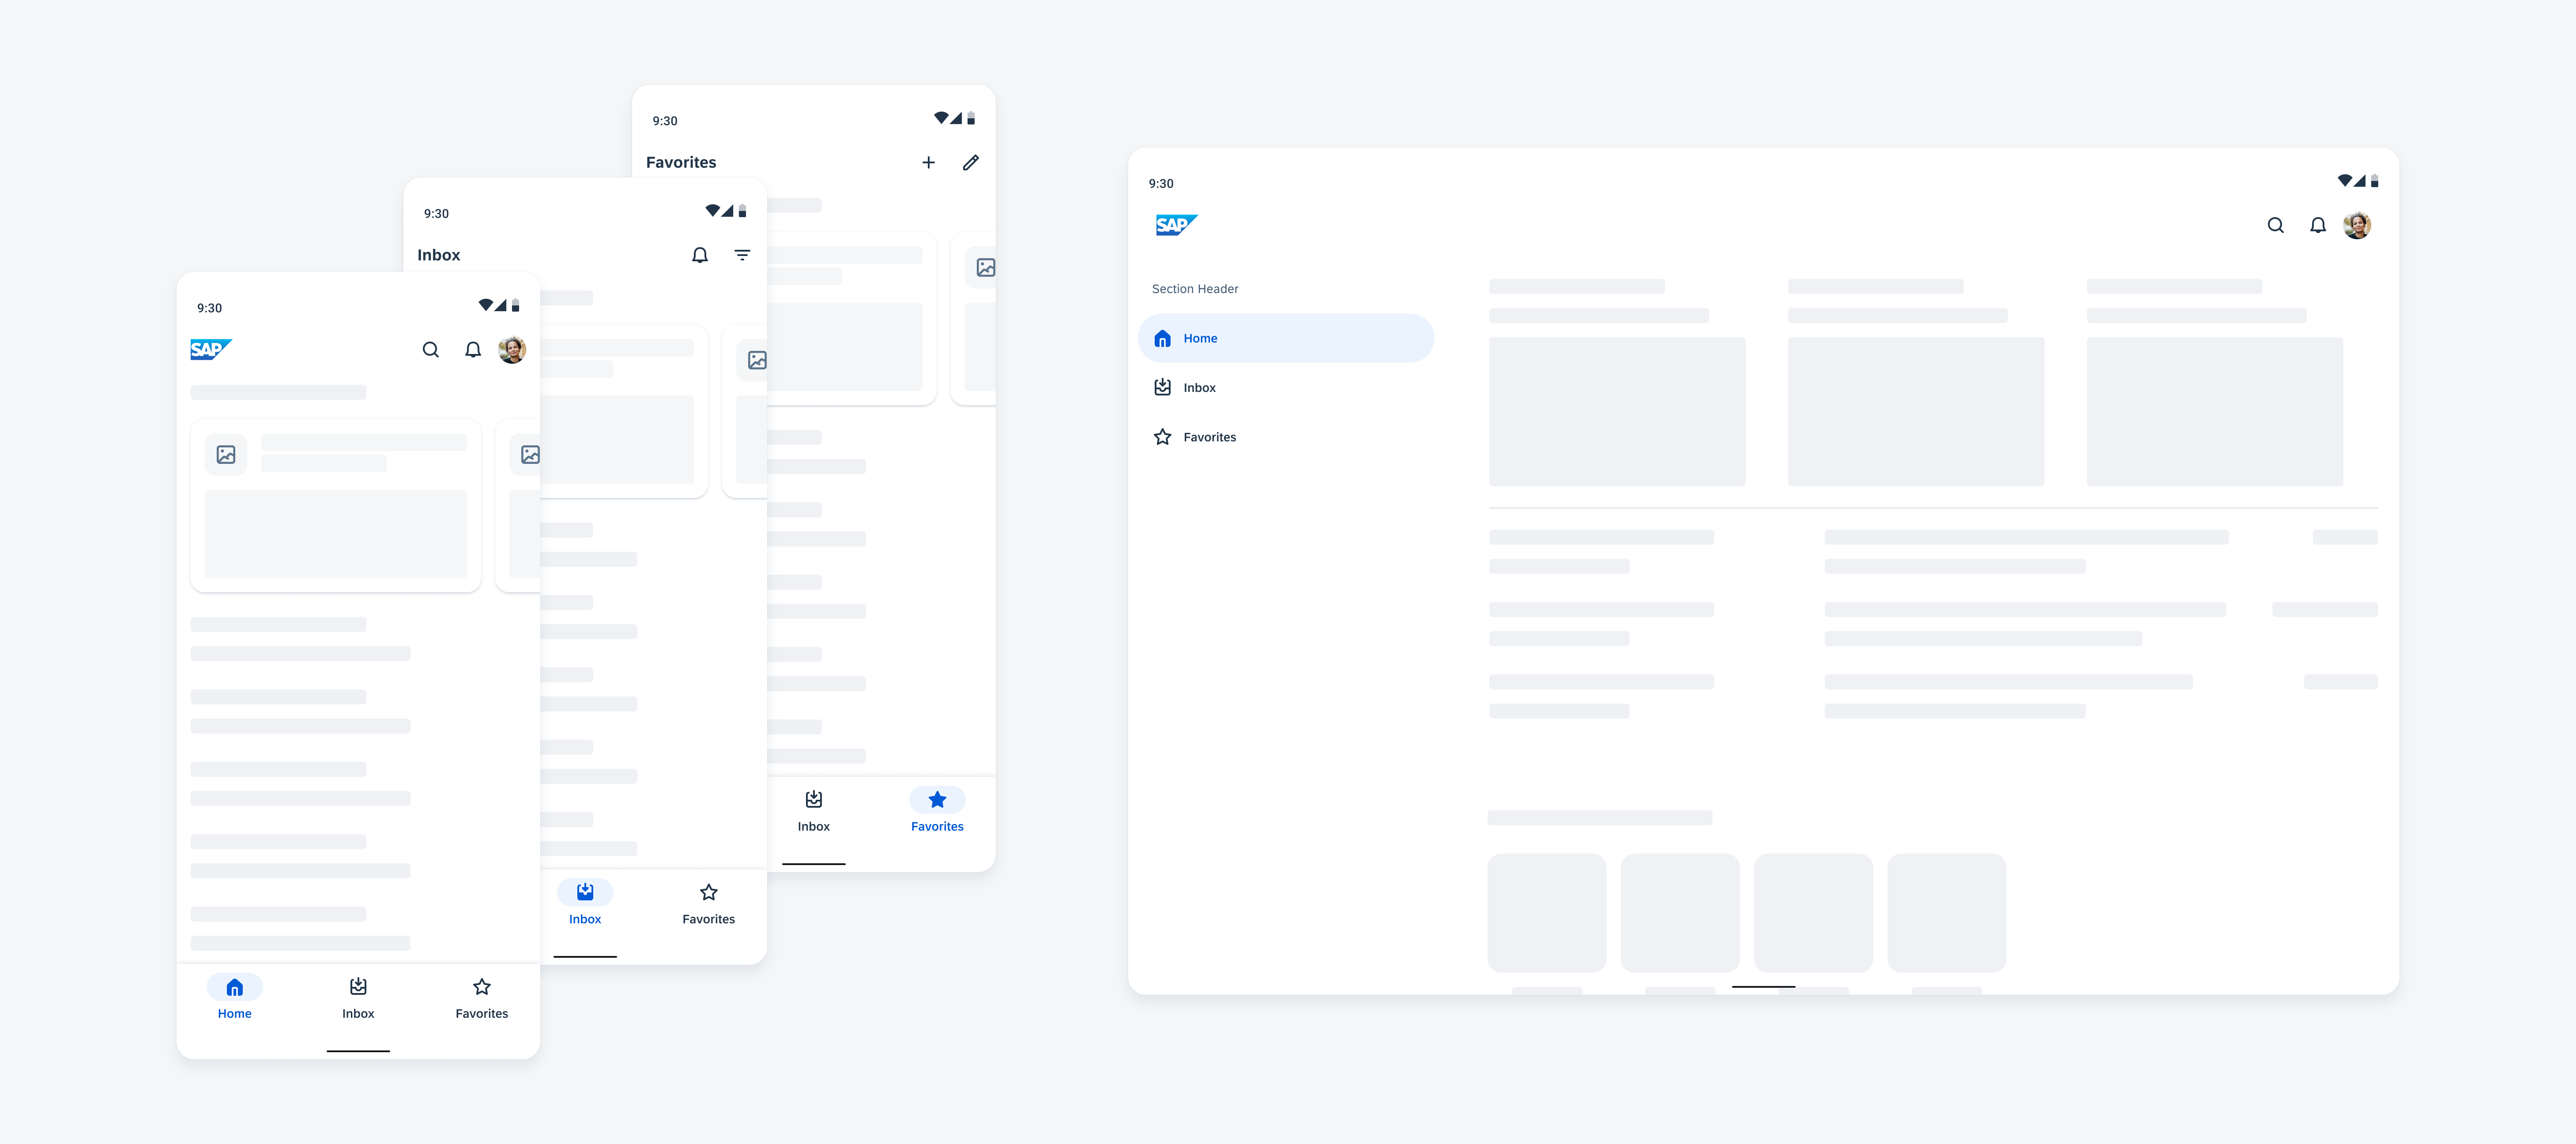
Profile placement on compact and expanded window size classes

Dialogs

Dialogs are a type of modal that are used to provide high priority information, display critical information, or ask for specific user actions or decisions. They prompt the user to react and interrupt the process of the application. It is recommended that dialogs have a clear and specific purpose, such as confirming an action or communicating critical details to the user. Dialogs should only be implemented when necessary to avoid disrupting the user experience. Additionally, dialogs should be responsive, adapting to different screen sizes and orientations to provide a consistent experience across devices.

Design Adaptive Apps

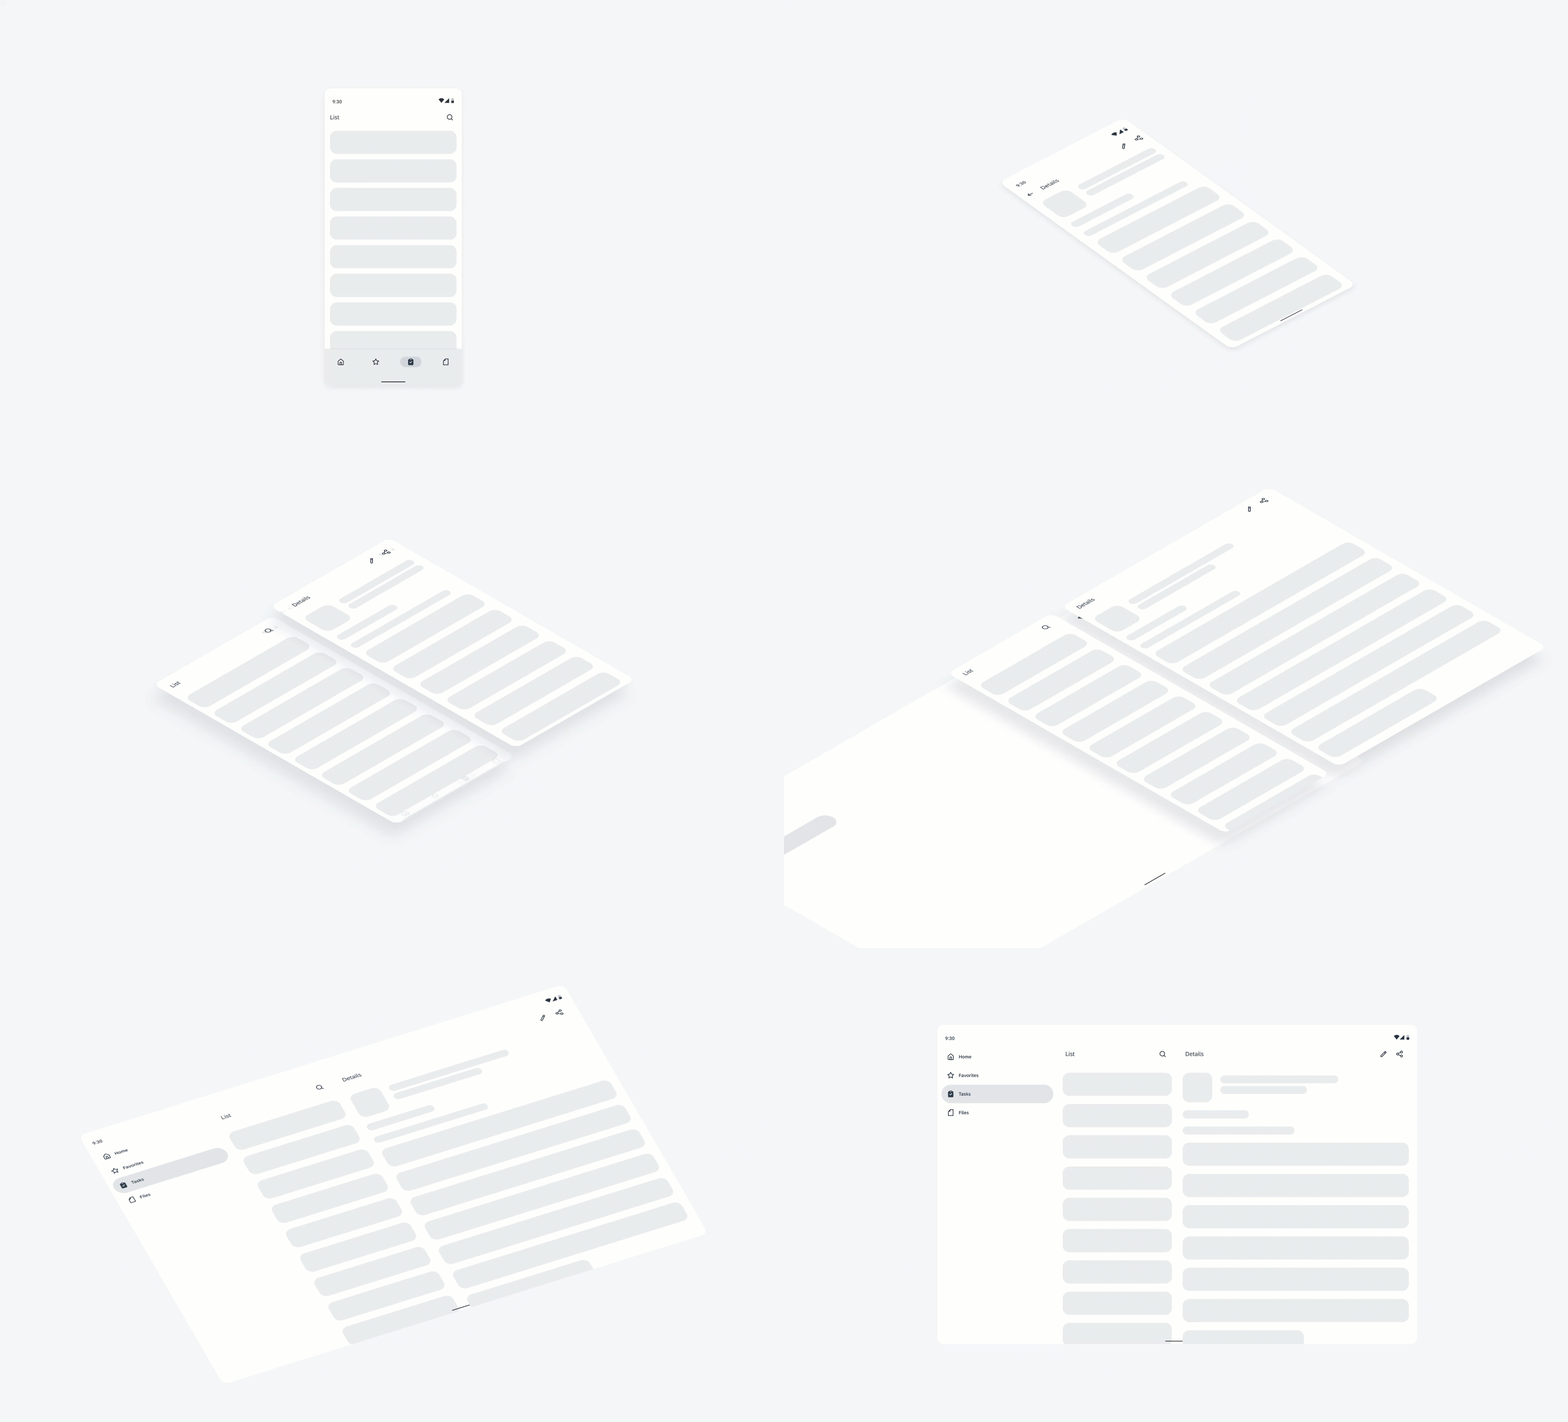
Optimizing your app for all window size classes requires a clear understanding of its structure and the relationships between screens. In compact mode, users navigate through screens hierarchically, whereas in larger window size classes, multiple panes can be displayed side by side on one screen.

Transformation from compact to an expanded window size class

Starting with One Window Size Class

Begin by designing your app for a specific window size class, such as compact, and make sure its layout is responsive and adaptive.

Creating an Information Architecture

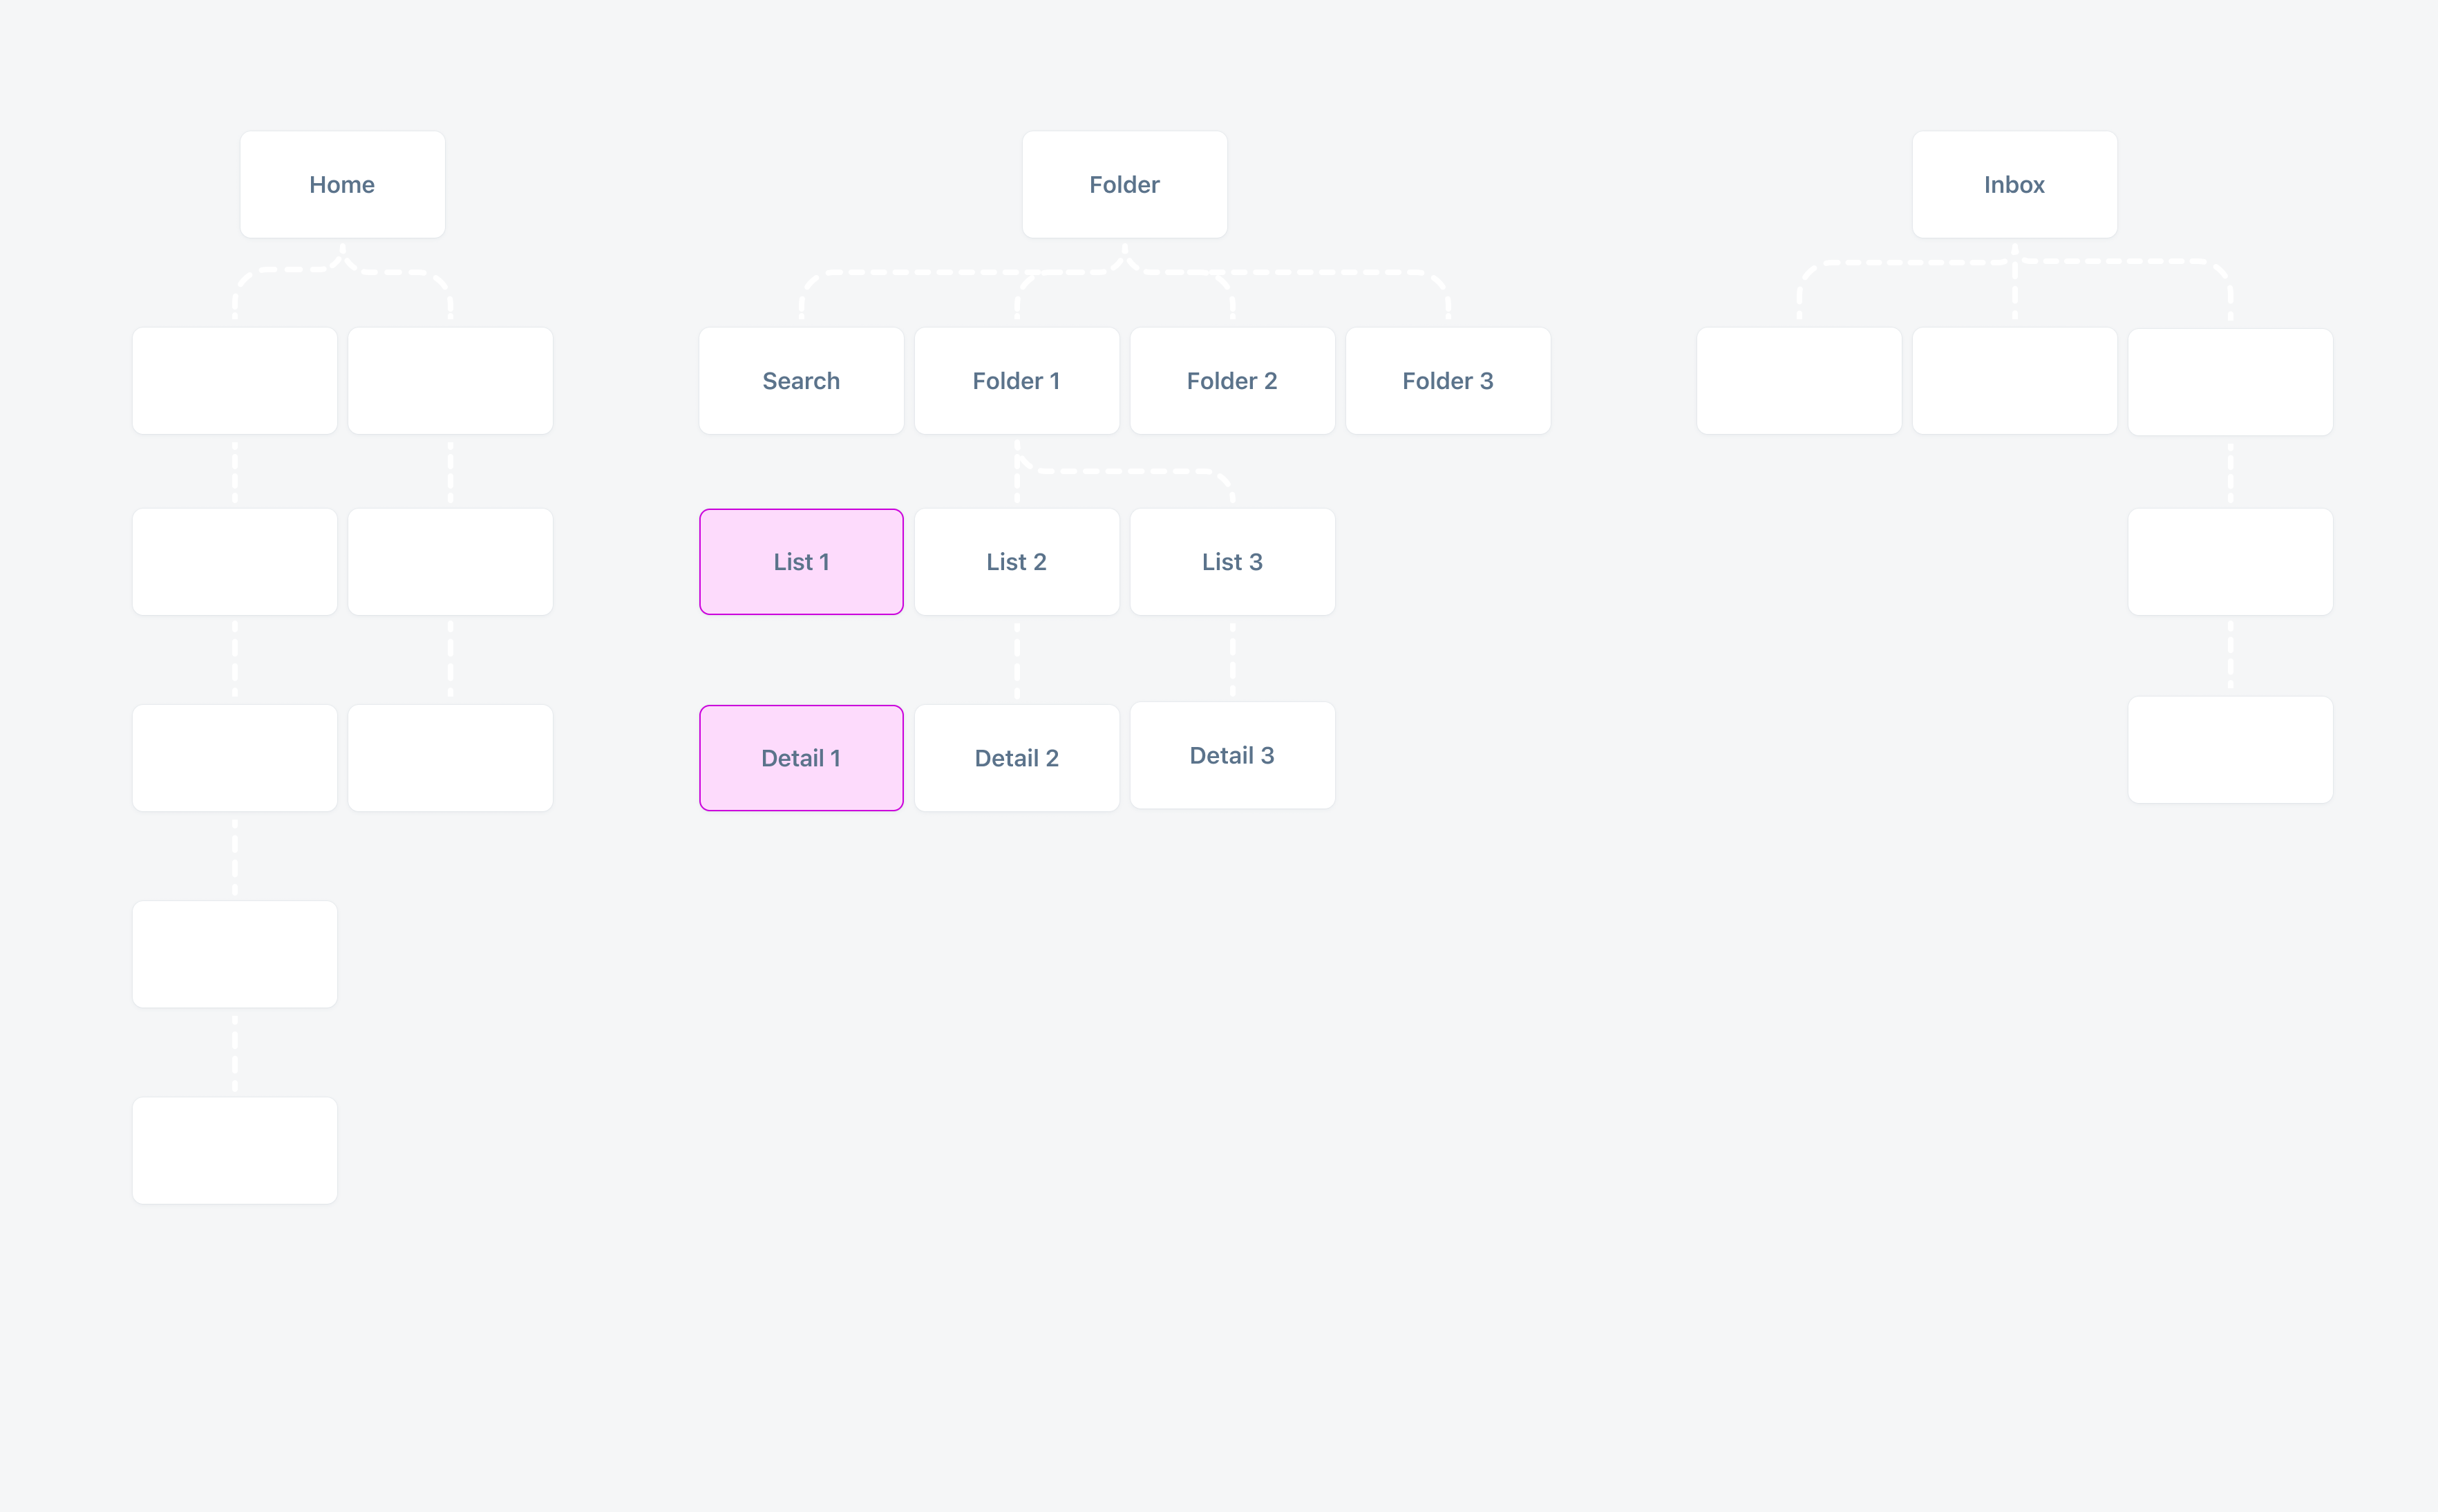
Develop a hierarchical model that illustrates the structure of your app.

Identifying Related Screens

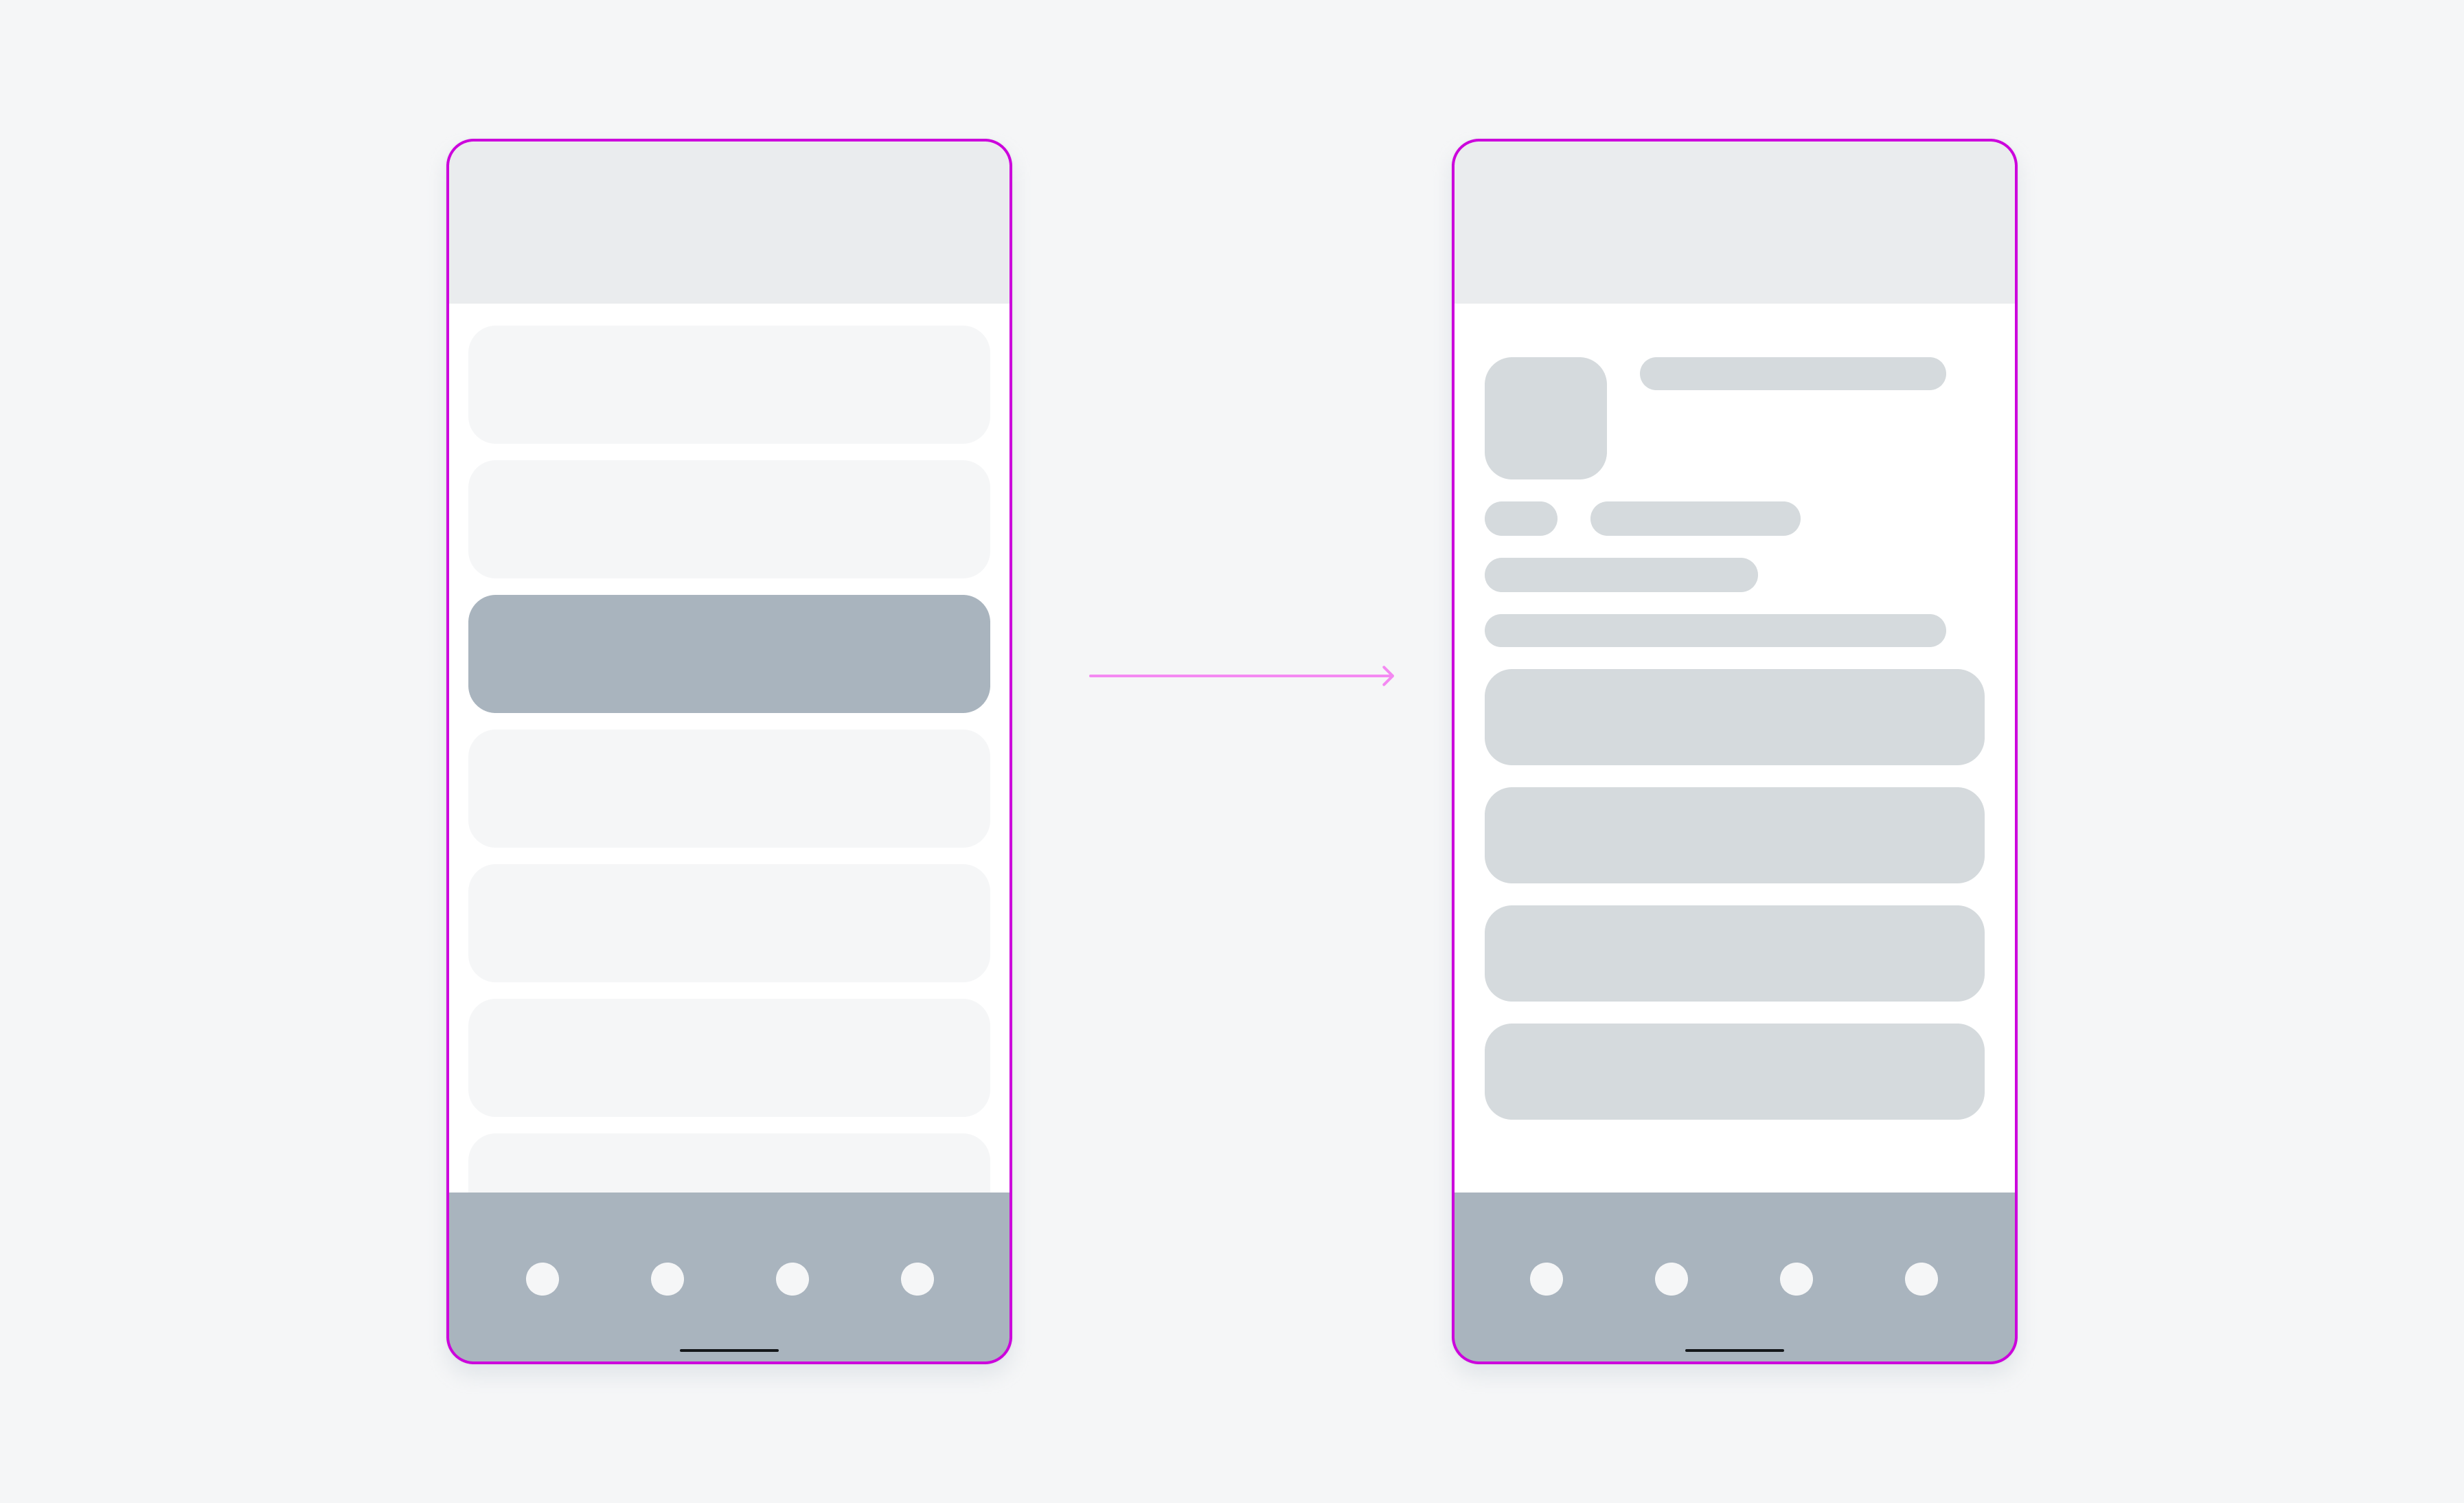
Look for screens that are closely related in the information architecture, such as a list screen and its detail view. These screens typically interact directly with each other.

Merging Related Screens into Panes

For larger screens, integrate related screens into a single display using multiple panes. For example, one pane could show the list, while another shows the detail view.

Adjusting Designs for Different Window Sizes Classes

Tailor your design for various window sizes by considering the following questions:

  • What needs to be displayed? Ensure that all essential details available on large and medium screens are available on compact screens, even if it requires an additional tap to view certain elements. For example, a filter might be shown beside a list on a large screen but open on a new screen after a tap in compact mode.
  • How should the screen be divided? Determine the best way to split content across panes for different screens.
  • What size adjustments are necessary? Adjust element sizes to fit different window sizes appropriately to make your app’s layout responsive and adaptive while maintaining visual coherence across devices.
  • What needs to be relocated? Some components might need to be moved. For example, the bottom navigation bar in compact mode might transition to a navigation rail or drawer on medium and large screens.
  • Which components should be exchanged? Replace certain elements better suited for specific window sizes. For example, a navigation bar in compact size could be swapped for a navigation rail or drawer on larger screens.
Information architecture of an app in a compact window size class
List and detail screen in compact window size classes
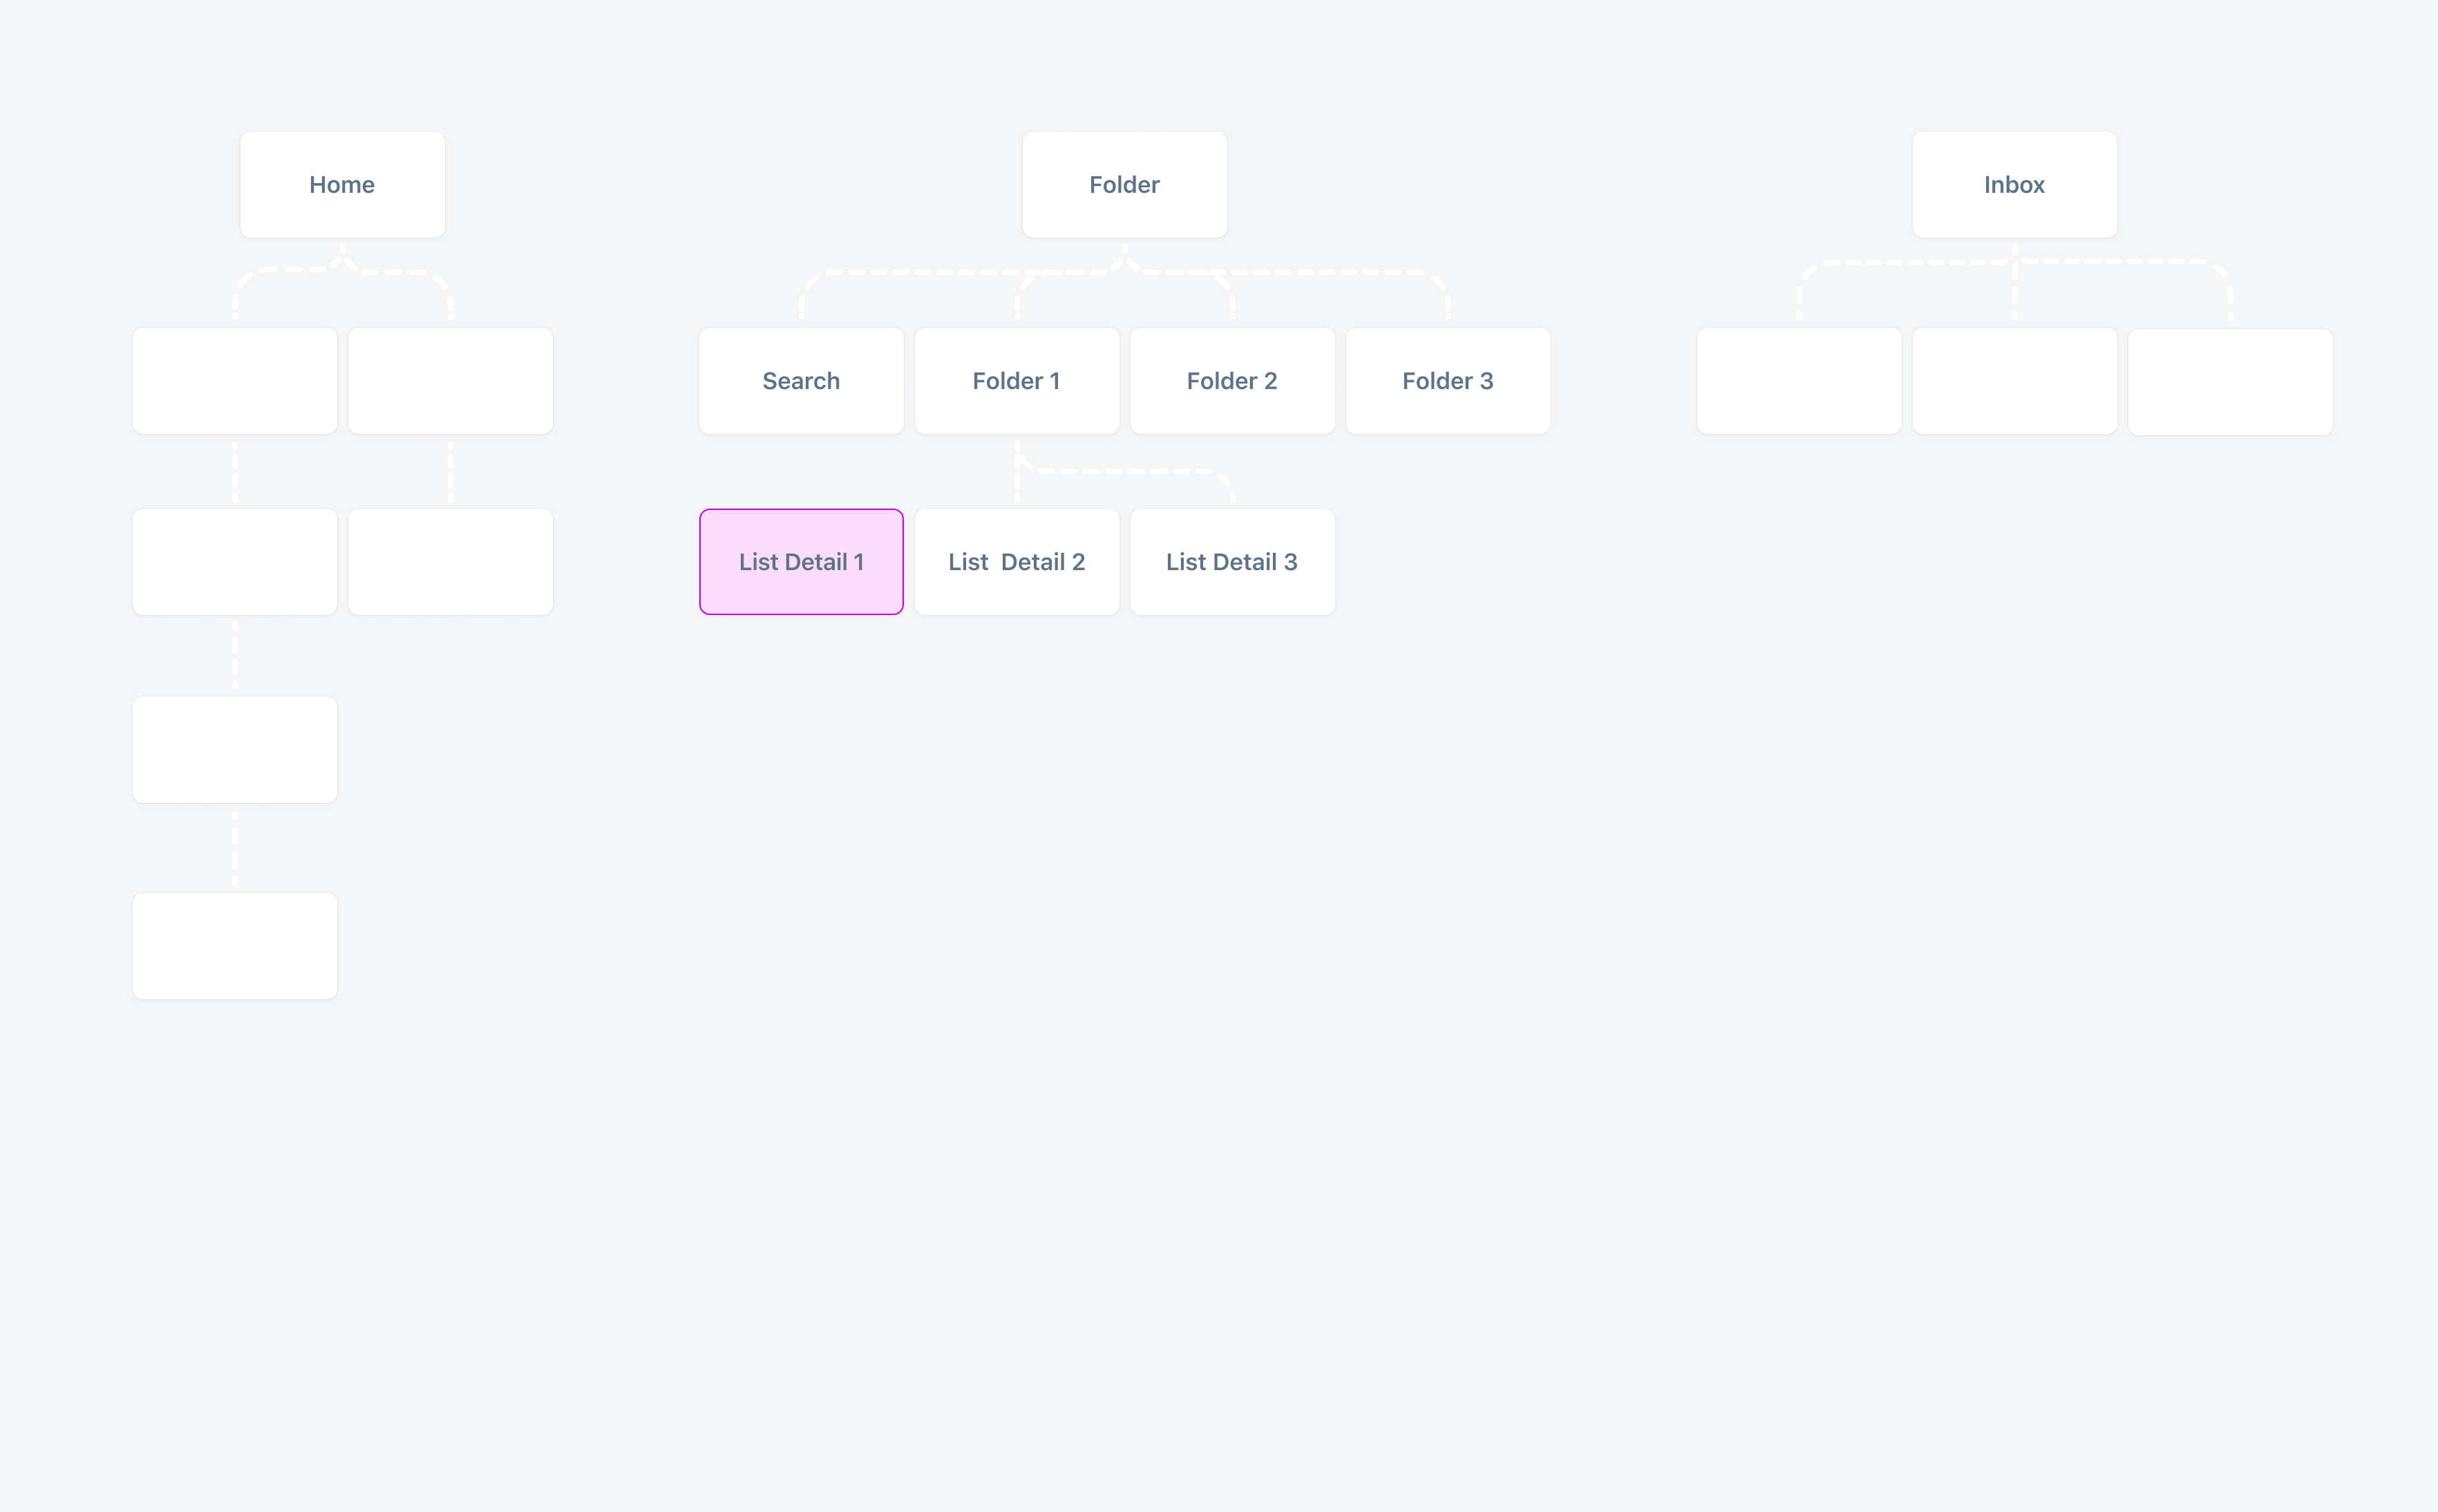
Information architecture of an app in expanded window size class with fewer levels as several screens from compact are combined into one
Two list detail screens from compact converted to one screen in expanded window size class

Canonical Layouts

Material 3 defines three standard canonical layouts: list-detail, supporting pane, and feed. Each layout offers a different approach to organizing content and components based on the available window space.

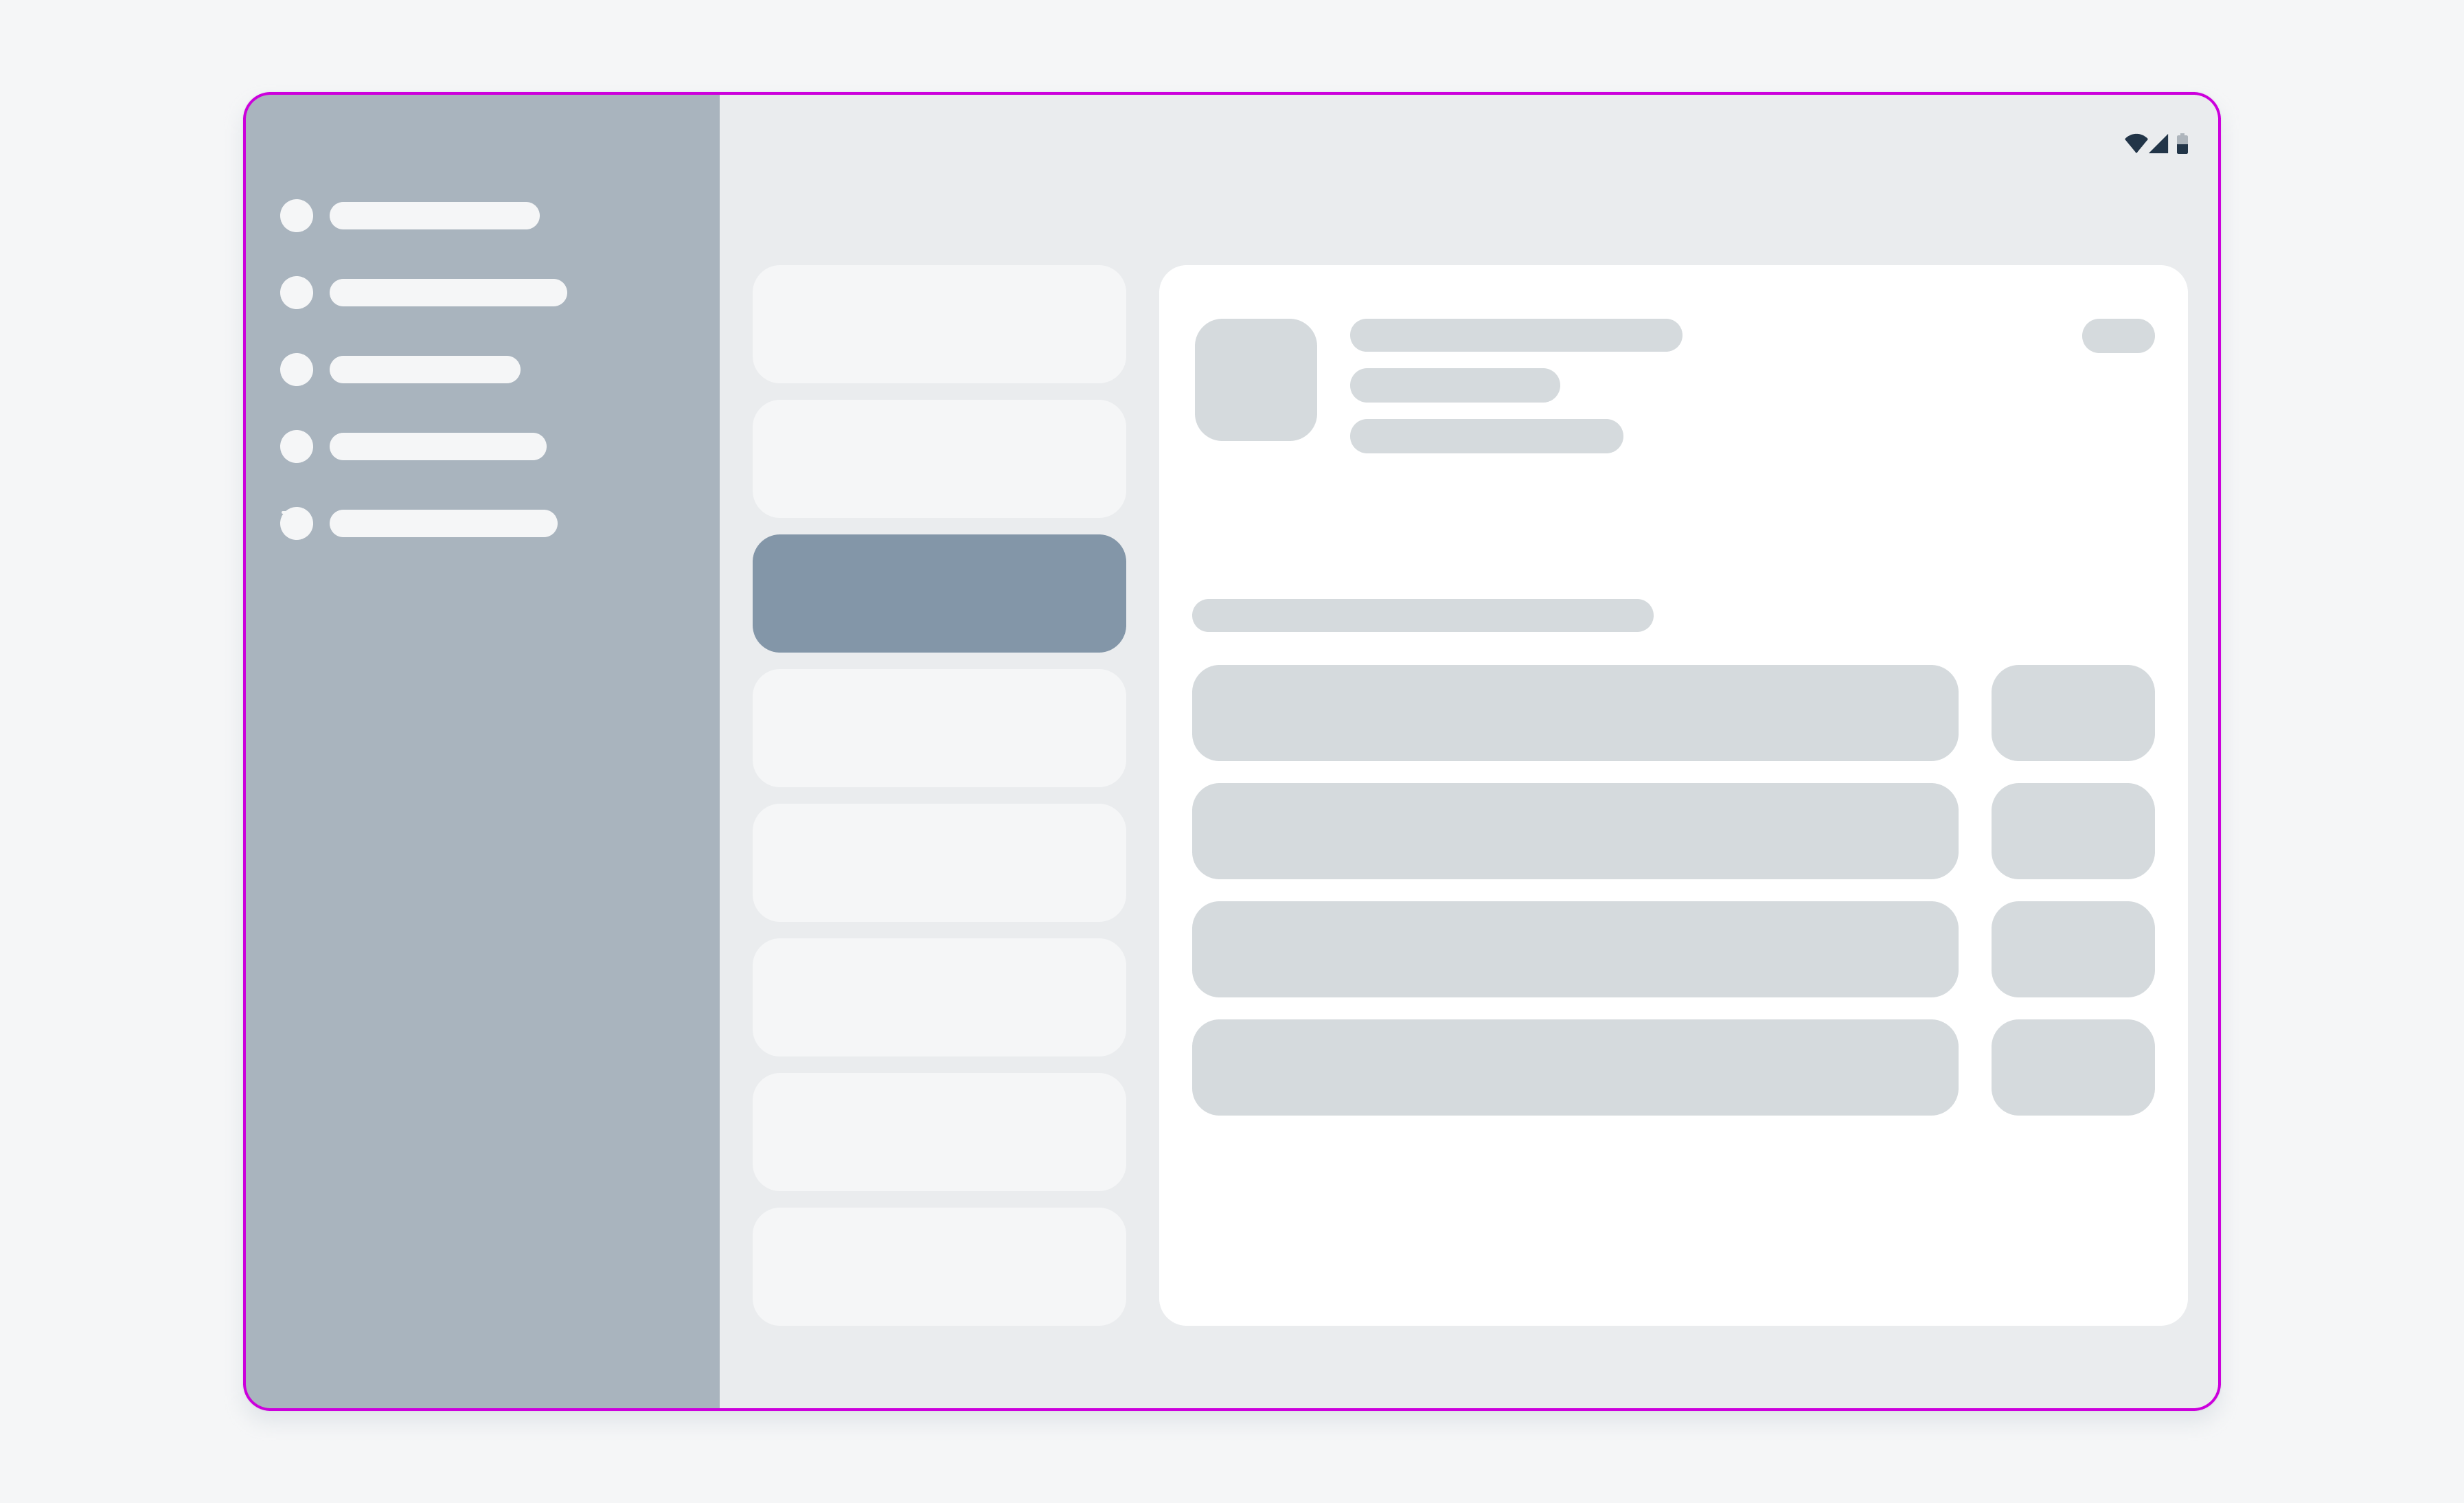
The list-detail layout is ideal for displaying explorable lists of items alongside each item’s supplementary information – the item detail.

The supporting pane layout organizes app content into primary and secondary display areas, with the primary area occupying most of the app window and the secondary area presenting supporting content.

The feed layout is unique for using a grid composition that allows for browsing content easily, such as news, photos, and social media.

The M3 navigation components such as navigation bar, rail, and drawer enhance canonical layouts by keeping primary navigation options within easy reach while minimizing screen space.

Schematics illustrating the different canonical layouts: list-detail (A), supporting pane (B), and feed (C)

Panes

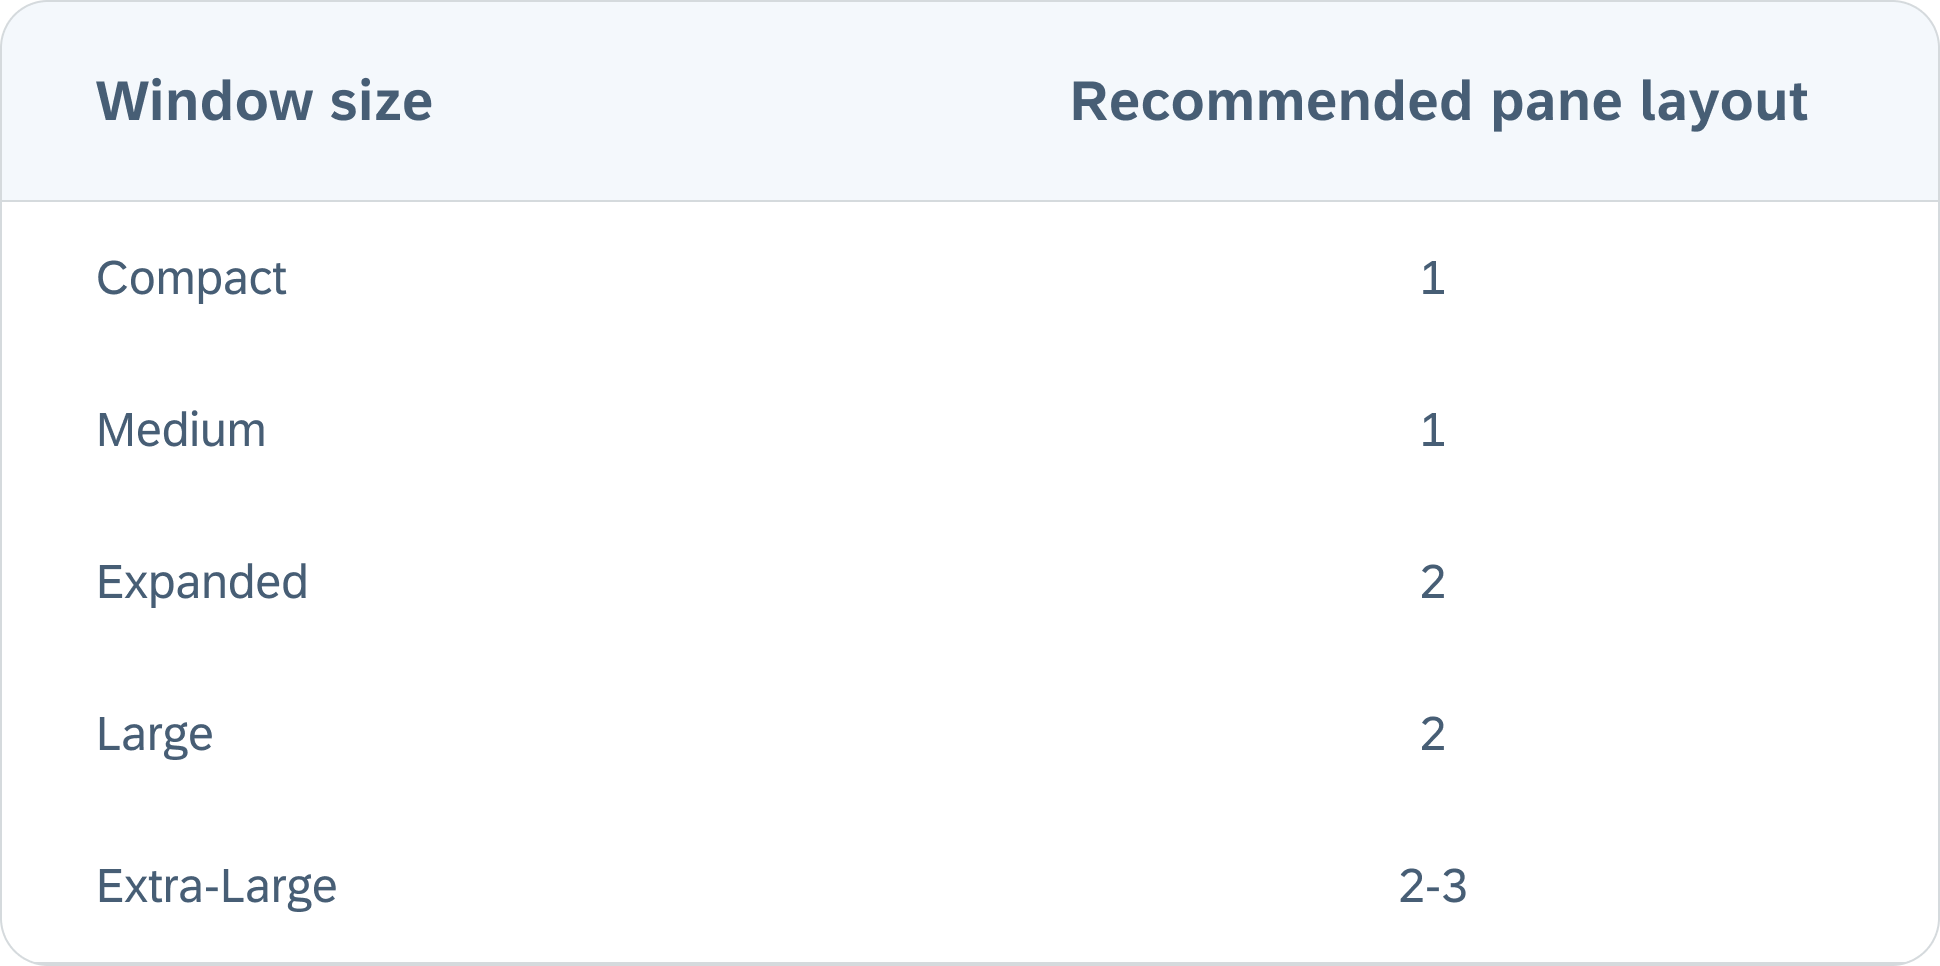
Panes are used to arrange UI elements. A layout may include 1–2 visible panes of different widths, adjusting dynamically to the window size class. Depending on the window size class, an alternative layout option is to stack the panes vertically, for example, with the supporting pane positioned below the focus pane instead of beside it. Additionally, for extra-large windows, a standard side sheet can serve as a third pane.

When there are multiple panes, it’s important to consider the size of each pane. For example, in a list-detail layout, the list should have a fixed width, while the detail pane should be flexible, adjusting to the available space by growing or shrinking. This ensures that the layout remains visually appealing and adapts smoothly across different window size classes.

Pane Types

In all layouts, there should be at least one flexible pane that can adjust to the window size, ensuring responsiveness across various screen sizes. The available pane types are:

Window Size Classes

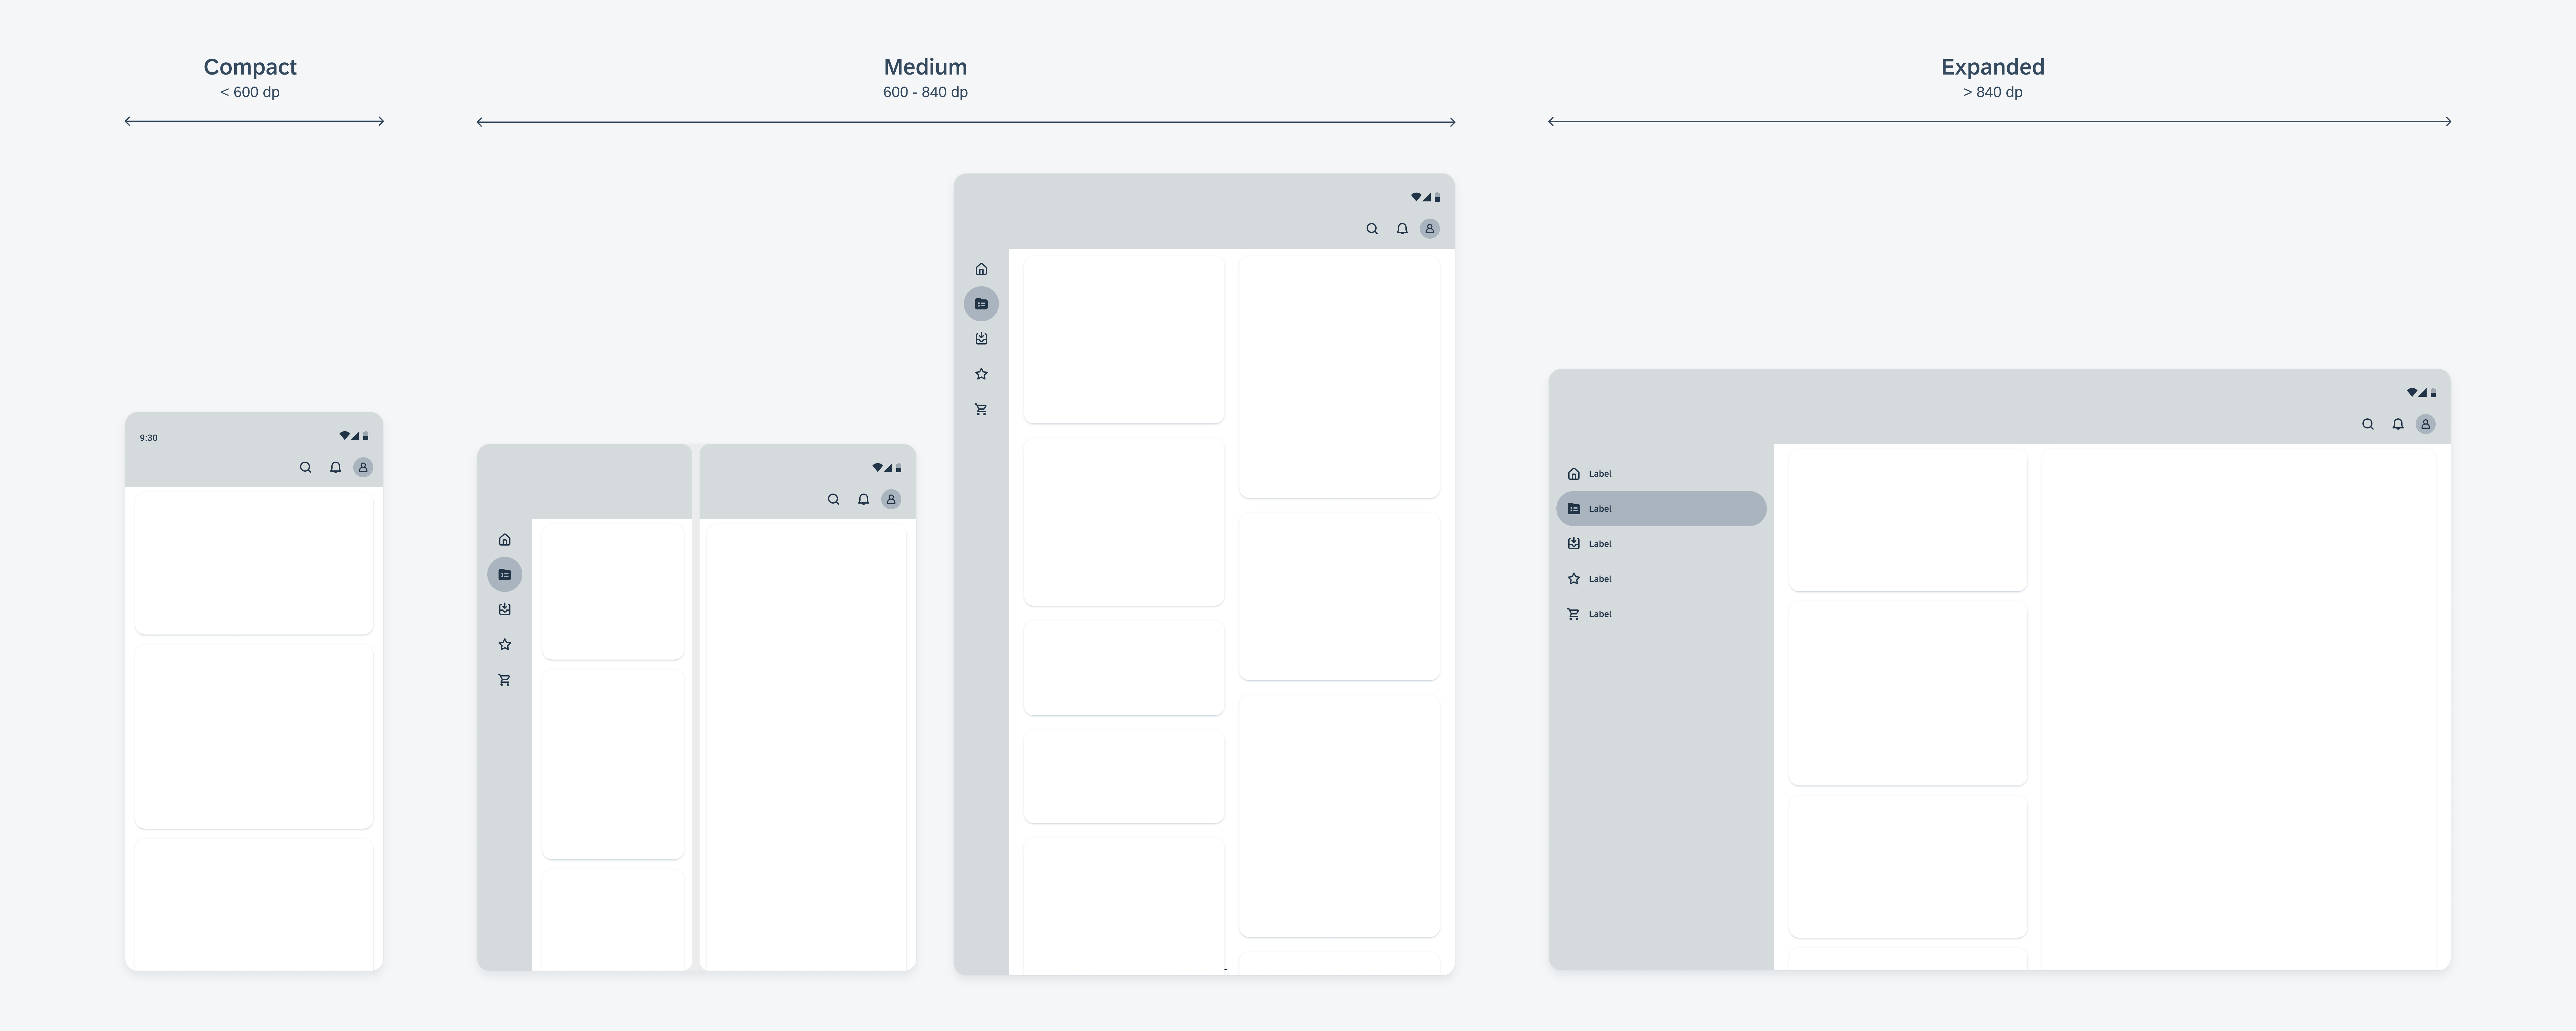
Each window size class corresponds to a specific breakpoint where the layout needs to adjust to fit the available space, device conventions, and ergonomics. The three primary window size classes are compact, medium, and expanded. These size classes provide the basis for designing adaptable layouts that work across various devices and orientations. Material 3 also supports large and extra-large window size classes, which are best suited for creating content designed for extra-large tablets or external displays. These window size classes offer multiple pane layouts and start at a screen width of 1200dp.

The Importance of Designing with Window Size Classes

When designing applications, it’s important to use window size classes rather than focusing on specific devices because the available window space is dynamic and can vary based on user behavior, such as using multi-window modes or unfolding a foldable device. Additionally, devices can be categorized into various window size classes depending on their orientation.

Width and Height Window Size Classes

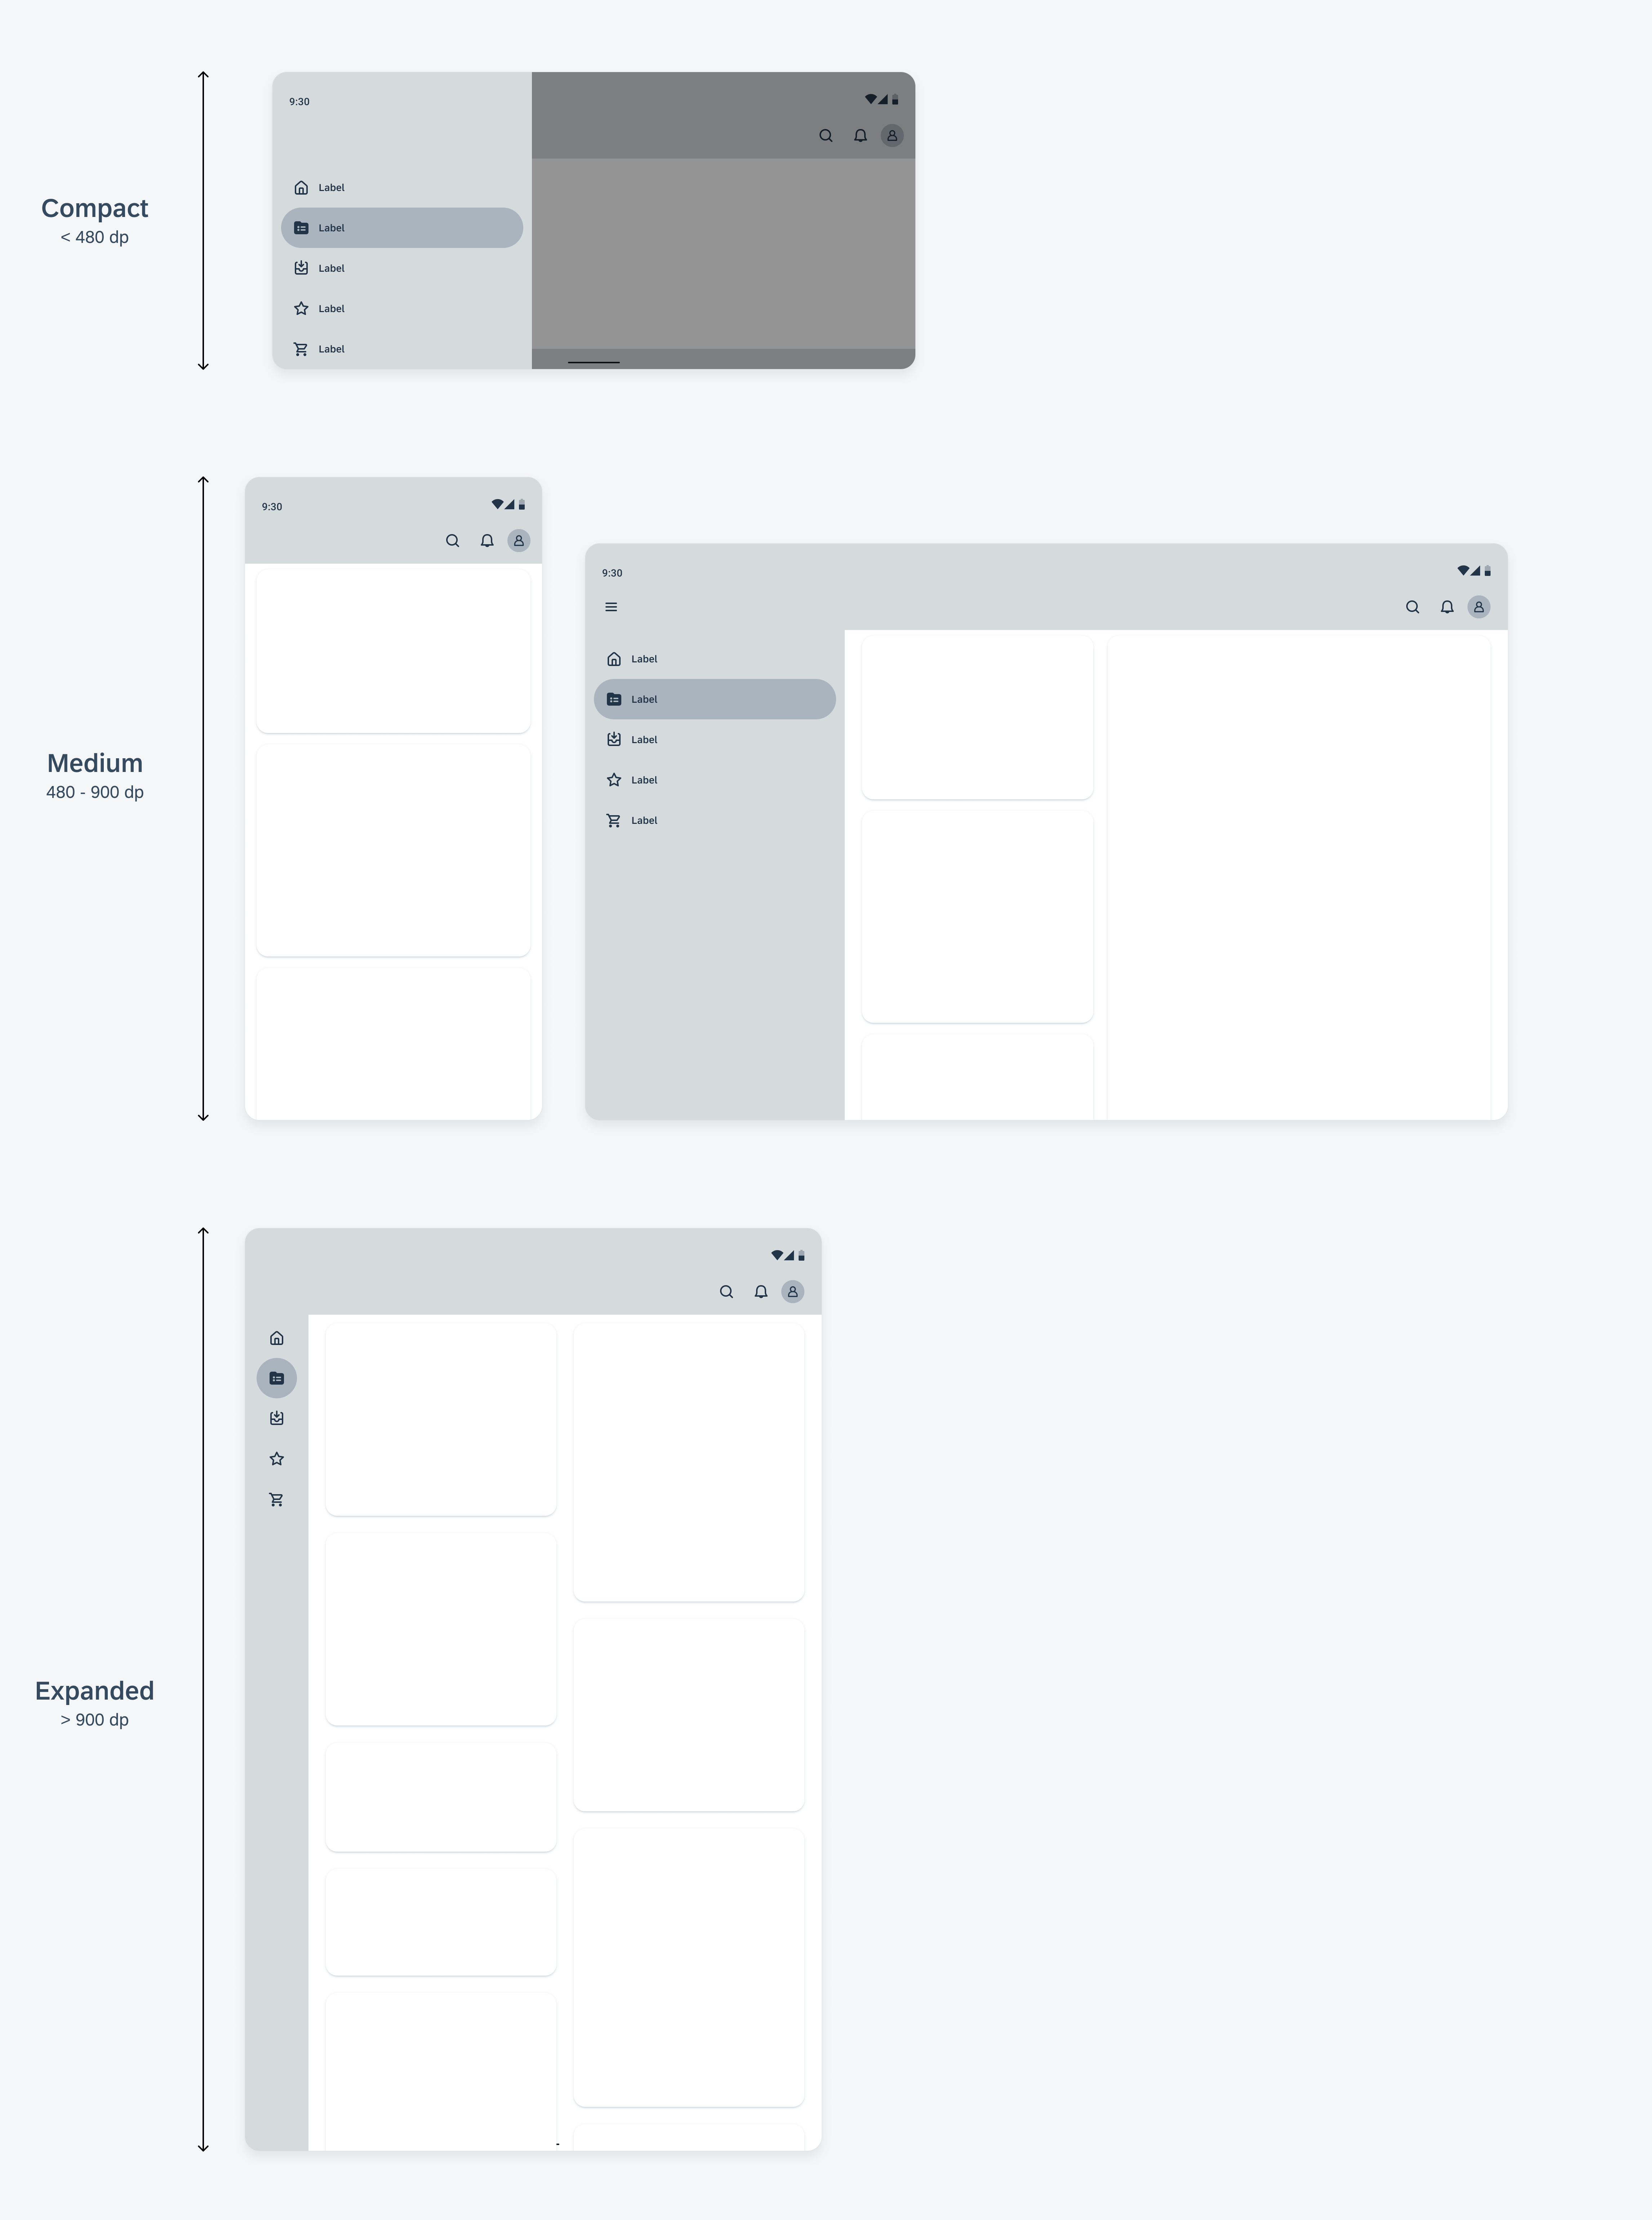
Available width and height are classified separately, so your app always has two window size classes – one for width and one for height. Typically, available width holds more significance than available height because vertical scrolling is more common. Therefore, the window size class related to the available width is likely more relevant to your app’s UI.

Schematics illustrating width-based window size classes
Schematics illustrating height-based window size classes

Layout Basics

Density-Independent Pixels (dp)

SAP Fiori for Android uses a system of pixel units (dp) that allows for a design to scale to screens with different pixel densities. The UI therefore adapts to various device displays regardless of pixel density.

Increment System

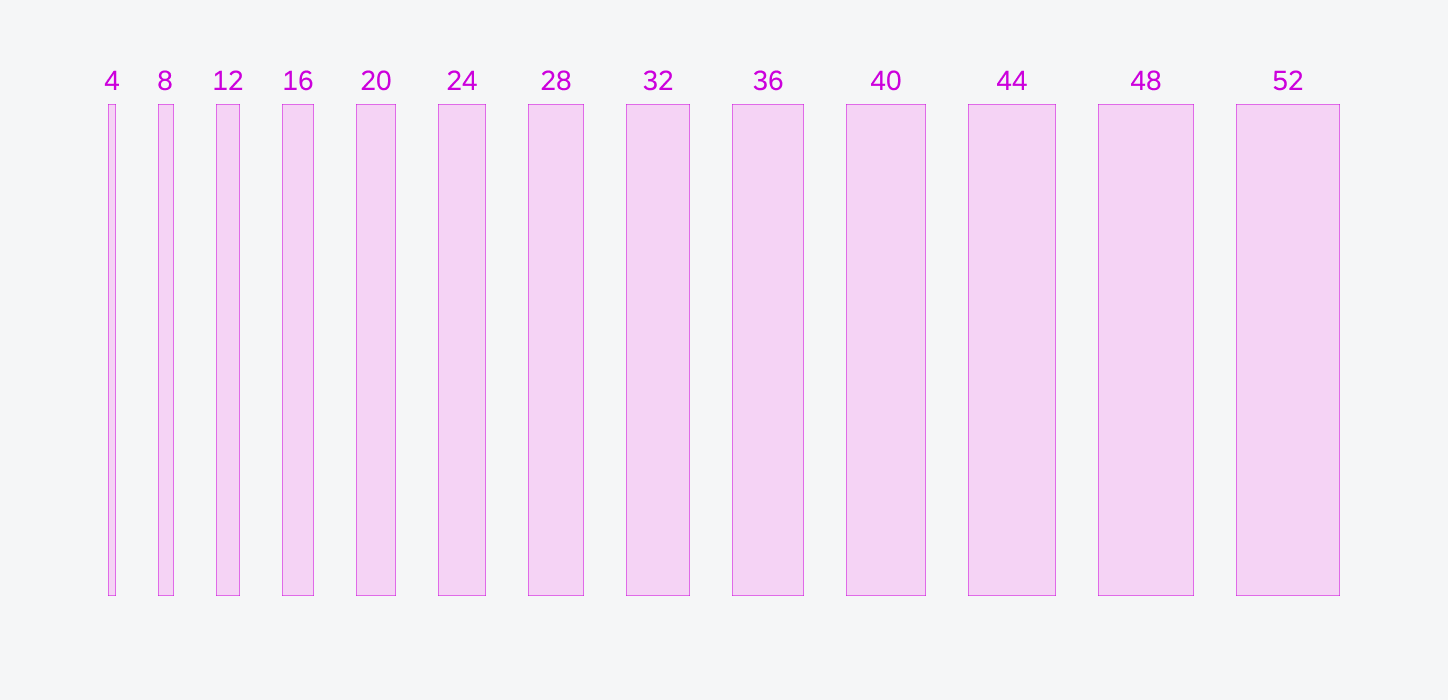
SAP Fiori for Android layouts are designed in increments of 4dp and 8dp for smaller elements for scalability purposes. Using an incremental system allows for all measurements in a design to be predictable and easier to scale when designing on multiple devices.

The 4dp/8dp incremental system enables a variety of spacing options from 4dp to 52dp

Spacing

Margins and Padding

Margins are the spaces between the left/right window edge and the component. Typically, these margins are set to 16dp or 24dp, depending on the window size. For larger window size classes, margins can be adjusted more flexibly to improve legibility, similar to the design element of letterboxing.

Padding is the horizontal or vertical space between elements within a component. Padding ensures consistency and allows for easy scalability.
The padding between elements within a component should add up to an increment of 4dp. This height affects the overall vertical layout.

Compact screen size with 16dp margins (left) and medium/expanded screen size with 24dp margins (right)

Spacers

In a layout, a spacer is the space between two panes. Spacers are 24dp wide and can have a drag handle to adjust the size and position of the panes. The touch target of the handle slightly extends over the panes.

Medium/expanded size with a spacer of 24dp to separate the panes

Parts of Layout

For a seamless transition between different window size classes and to provide the user with better orientation, three regions play an important part:

  • App Bar
  • Body
  • Navigation
Schematics illustrating the three main UI regions: app bar (A), body (B), and navigation (C)

Touch Target

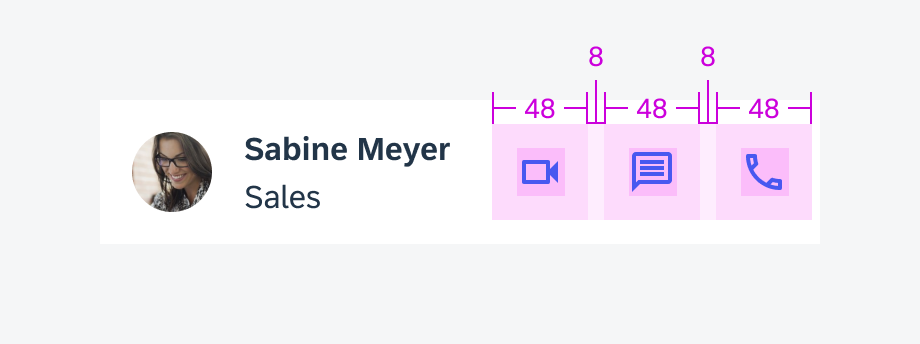
Accessibility is key when designing the spacing of interactive elements. It’s essential to provide sufficient space to place elements, aiming for a minimum touch target size of 48dp x 48dp with 8dp padding between multiple touch targets.

48dp x 48dp touch targets

Resources

Material Design 3: Understanding Layout, Applying Layout