AR Annotations
Intro
AR Annotations components are designed for exploring objects in a facility. They can be used to explore a warehouse, machinery, or a business object to enhance the user experience by leveraging augmented reality.
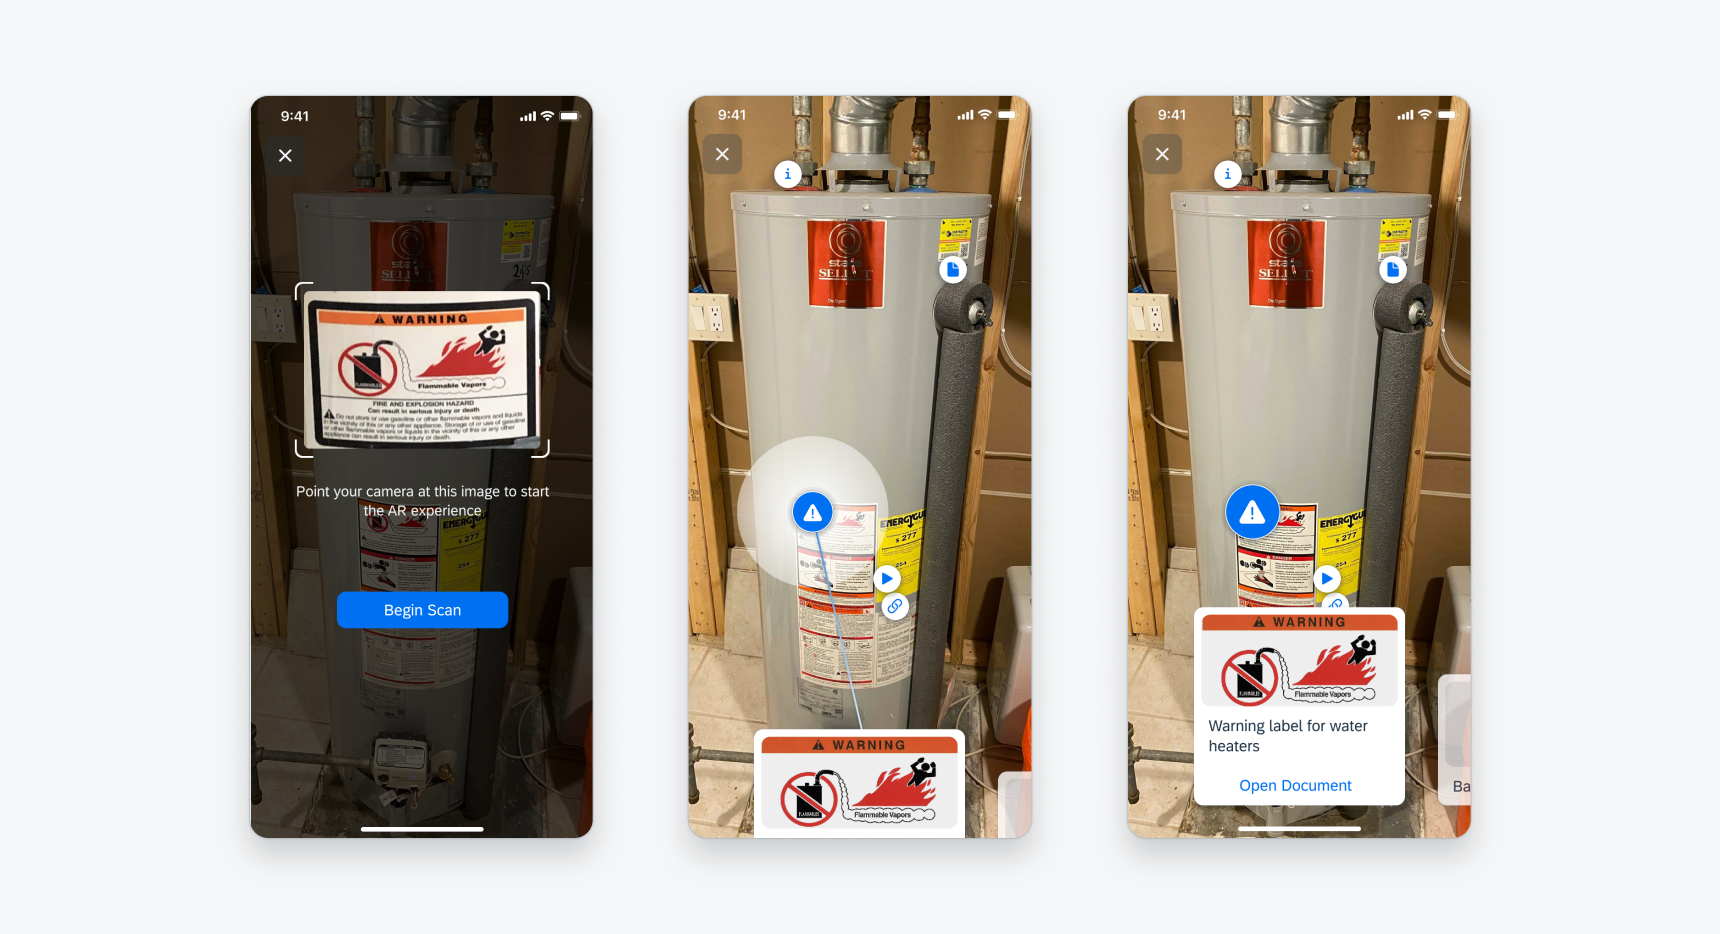
Examples of a scan screen (left), pulsing marker (middle) and selected marker (right)
AR Scanner
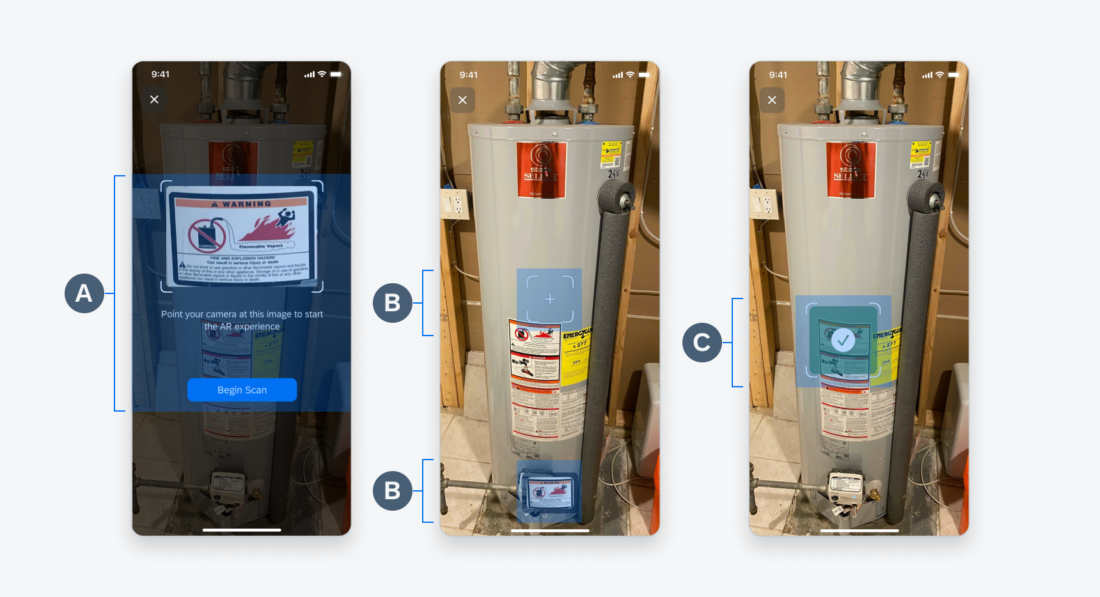
To view annotations in the world view, the user can begin by scanning an image in a facility or an object using their phone. See AR Scanner for more details.
A. Coaching View
B. Scanning View
C. Matched Scan View
AR Marker
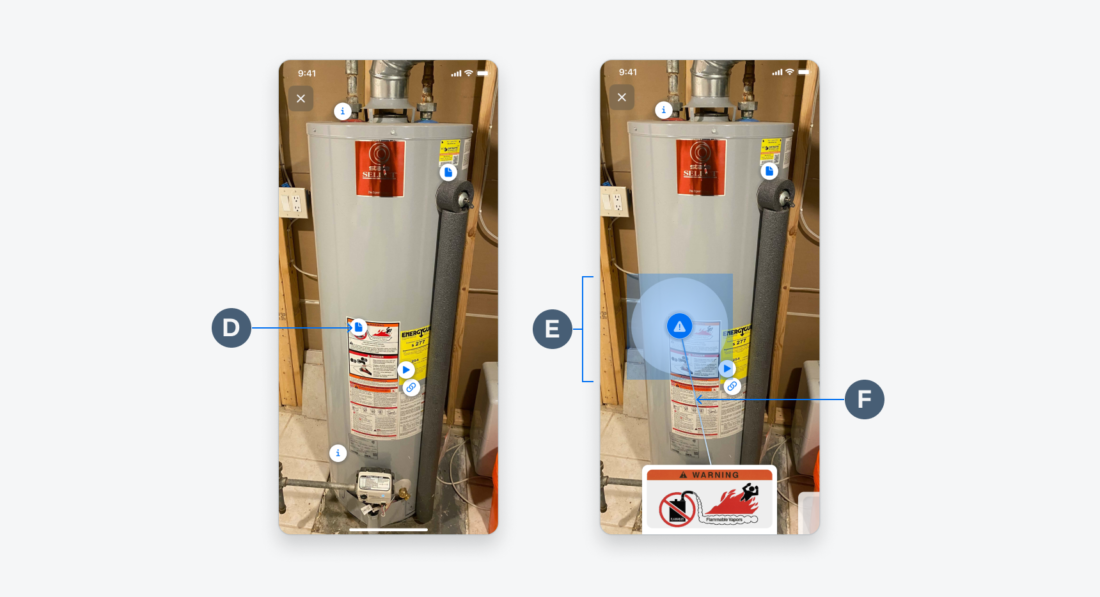
AR markers typically represent a business object in a facility. Each marker type has a default and selected state. A connector line to the AR card appears when the user taps on a marker with a pulse animation of the marker.
D. Default Marker
E. Marker Pulse
F. Marker Connector
AR Cards
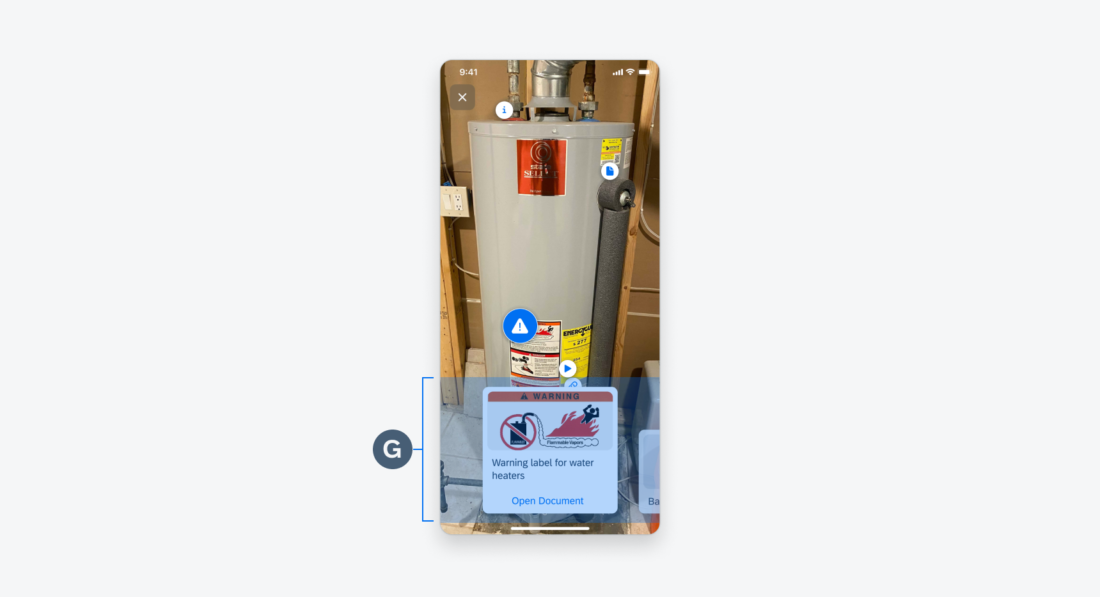
When a user selects a marker, a card slides in from the left to reveal additional information. This card displays information about the selected business object. The AR card appears in the screen view.
G. AR Card
The AR annotation flow consists of three main interactions. To understand each interaction in detail, see AR Scanner, AR Makers, and AR Cards.
Scanning
After an image is successfully scanned, AR makers appear in default state on the screen in the world view.
Markers
When a user taps on a marker, swipes cards, or taps on a card, the marker displays pulse animation with a connector connecting to the card.
Card Detail
Once the user selects a marker, the respective card slides in from the left to the focused state showing relevant information about the object. The user can tap on the card to view more detail about the content. The detail panel slides in from the bottom.
SAP Fiori for Android: AR Annotations
Related Components/Patterns: AR Cards, AR Markers, AR Scanners

 Your feedback has been sent to the SAP Fiori design team.